How to Import MBOX to Office 365 Account?
Struggling to import MBOX files to Office 365 without hassle? The manual method is available, but it requires account setup and configuration and also have some limitations. In this blog, we’ll explain both professional and manual method that help users to choose best solution as per their needs.
As work expands with the passage of time, people require more reliable and secure platforms, and cloud email applications are a solution to this problem. Over time, most companies have moved from desktop-based clients to cloud platforms.
Cloud application, like Office 365, allows users to access their data from anywhere with an active Internet connection. As a result, many users started looking for a way to upload MBOX files to Office 365 for better data security with the support of business applications.
If you are looking for the same, then this blog will be beneficial for you. Here’s what we are going to discuss in this post.
Manual Method to Import MBOX to Office 365
To use this manual method, you must install Thunderbird Desktop Client. Once you have done that, follow the steps mentioned below to open MBOX in Office 365.
Step 1: Set Up Office 365 in Thunderbird
- Download and install Thunderbird.
- Go to Tools >> Account Settings.
- Click Account Actions >>Add New Account.
- Enter your Office 365 credentials and click Continue.
- Select IMAP option and click Done.
- Add password in pop-up window and click Sign In.
Now, your Office 365 account is configured in Thunderbird.
Step 2: Import MBOX Emails to Thunderbird
- Restart Thunderbird, go to Local Folders, then right-click.
- Choose ImportExportTools NG >> Import MBOX Files >> Individual MBOX File.
- Select your MBOX file and open it.
- Right-click the imported folder>> Copy To and select your Office 365 Account.
- Select destination folder in Office 365.
- After that, thunderbird start syncing the emails to Office 365.
Drawbacks of Manual to Import MBOX to Office 365?
- Multiple email clients must be installed and configured.
- Use of O365 or other applications requires technical expertise.
- The integrity of the data cannot be guaranteed.
- Several MBOX files will result in a lot of complexity and time-consuming steps.
Expert Suggestions to Import MBOX File to Office 365
The above-mentioned solution is not the best fit for you in terms of data security and accuracy. For safer & secure results, users can go with the Corbett MBOX Converter Tool. A professional solution to import MBOX to Office 365 accounts without any worry. Additionally, the software works independently and doesn’t require any supporting applications.
You can upload multiple MBOX files to Microsoft 365 account without any file size restrictions. A demo edition of the software is available that users can download for free to evaluate toolkit performance. Click on the download button, and follow the steps mentioned below:
Steps to Import MBOX to Office 365 Account
- Download MBOX to Office 365 Migrator on Windows.
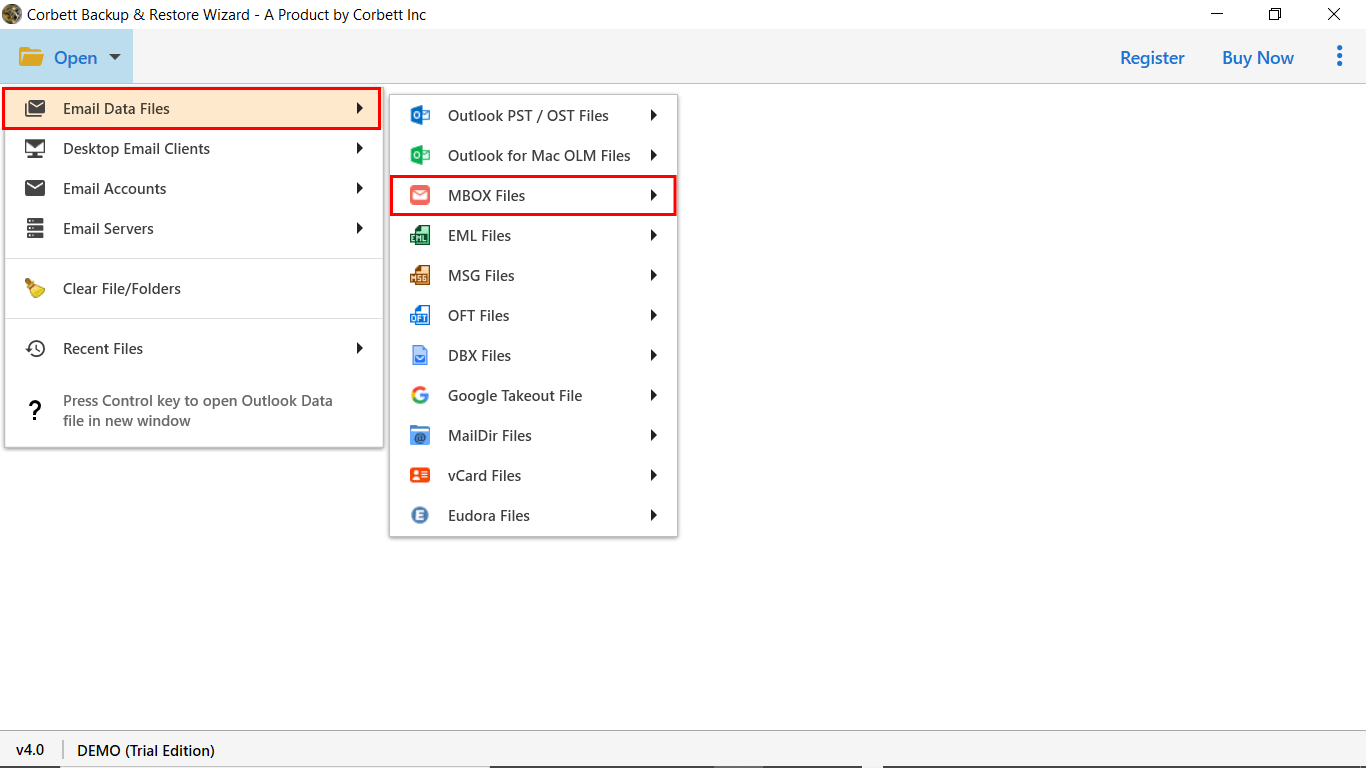
- Now, click on Open >> Email Data Files >> MBOX File.

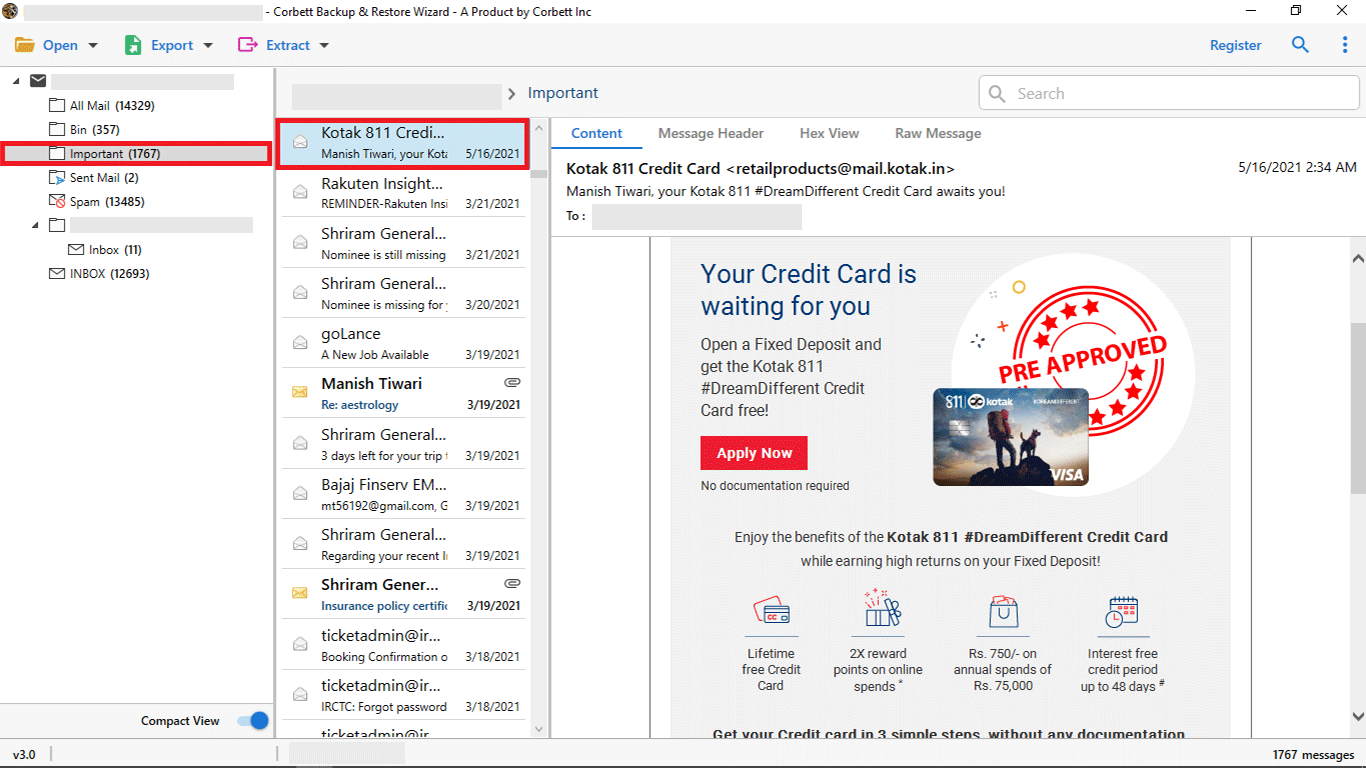
- Next, browse & upload the MBOX file to the software panel.
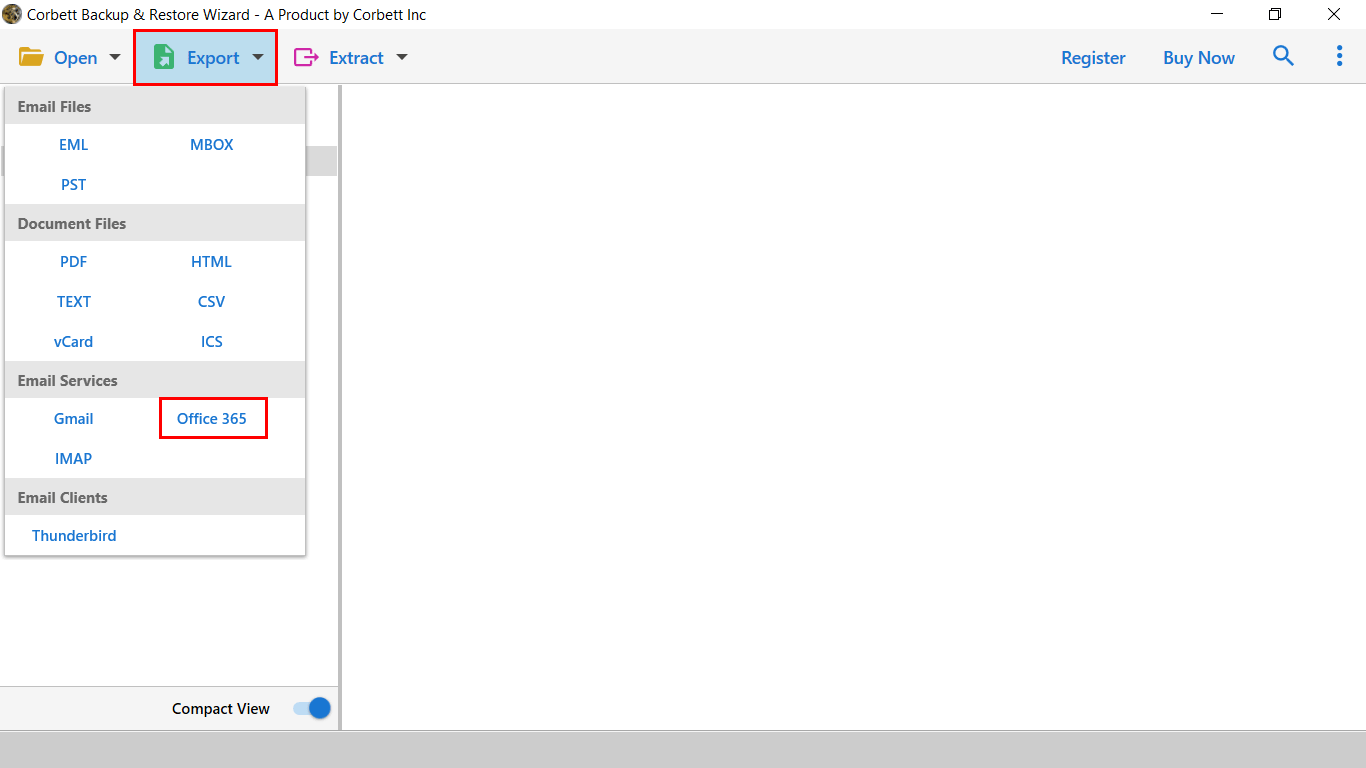
- Afterwards, click on Export & select Office 365 from the list.
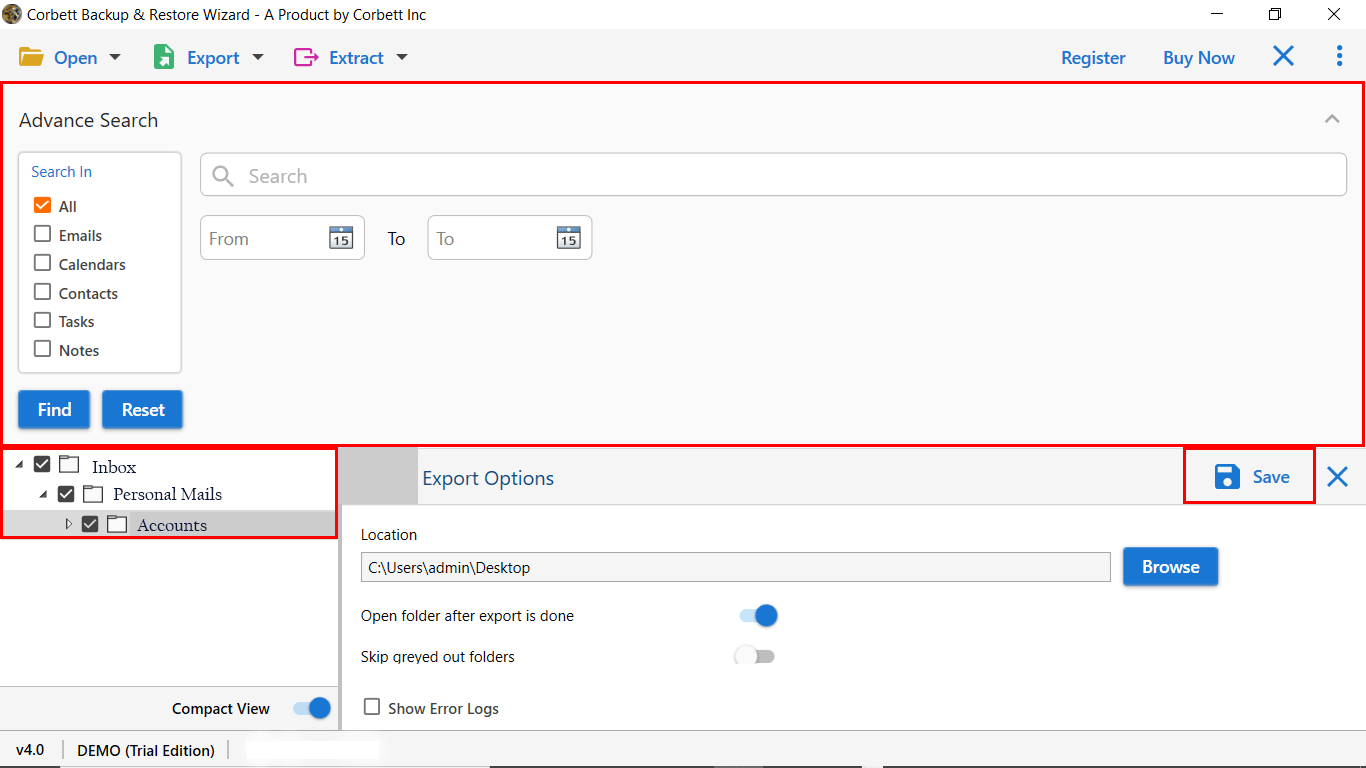
- Apply Filters and click Save to Import MBOX file to Office 365.
Prime Features of Automated Software
- Allows users to import MBOX to Office 365 account in batch.
- Easily manage multiple Office 365 accounts in a single tool.
- Supports all IMAP-supported email client MBOX files.
- The date-range filter is also provided to export only selective MBOX files to M365.
- It maintains file structure and folder hierarchy during the MBOX import procedure.
- Migrate MBOX File to Office 365 with complete attachments.
Author’s Suggestion
In this guide, we provide you with two best free manual solutions to import MBOX to Office 365 account. However, the manual solution is quite tricky & requires technical configurations. We have also listed a reliable automated solution that allows you to upload MBOX file to Office 365 account in a precise & secure manner.