Top 2 Methods to Add Titan Email to Outlook
How can you transfer Titan email to Outlook? In this article, we will explore the methods to add Titan email to Outlook in simple Steps. We will also discuss the benefits of migrating your emails. So without wasting your time let’s start the article.
What is Titan Mail?
Titan Mail is an email hosting service that helps businesses to build strong relationships with their customers. This email service allows users to grow their brands. In addition, it also offers built-in productivity tools such as email scheduling, email templates, etc. Users can use the Titan Mail to manage and sync their calendars and contacts with their emails.
Titan Mail is a good email client, but it is not as good as Microsoft Outlook. Since it does not have advanced features like two-factor authentication, password-protected files, auto-archive, etc. to make the user’s work easier. This makes Outlook a number one choice among users. This is why many users want to import their Titan email to Outlook.
Good thing for you, in the upcoming section of the article, we will share all the methods that are helpful to you. But, before that, we will discuss the benefits you will get when you add your Titan Mail to Outlook or Office 365.
What are the Benefits to Set up Titan Email on Outlook?
Many factors cause the transfer of your emails. This can be the personal needs of the users or the need to save their data. However, connecting Titan email to Outlook will have many benefits.
- Outlook is a great place to manage multiple accounts. By configuring the account you can easily access your Titan emails.
- There are many advanced features in Outlook such as an integrated calendar, task management, etc. By adding a Titan email account you can benefit from all these features.
- Outlook has great security measures that will protect your emails from stolen or unauthorized emails.
- By setting up your Titan email you can get benefits from other Microsoft products such as Word, Excel, PowerPoint, etc.
- Also, Outlook is free and it is available in all the versions of Windows systems.
Thus, you have get various benefits to connect Titan email to Outlook. Now, back to the methods to transfer Titan email to Outlook. After searching all over the internet, there are only two techniques which migrate your emails. We will explain these options with clear instructions so pay attention.
Manually Add Titan Email to Outlook
To manually connect your Titan account, we have to first enable the IMAP server which is used to connect your account in Outlook. For this, you have to know Titan’s email settings. If you don’t know then below we provided the details.
- Incoming Server: imap.titan.email
- Incoming Port: 993
- Encryption Method: SSL/TLS
- Outgoing Server: smtp.titan.email
- Outgoing Port: 465
- Encryption Method: SSL/TLS
Once, you know the email settings of your Titan Mail, follow the steps below to transfer Titan Mail to Outlook.
- First, sign in to Outlook and go to the “File” menu option.
- Select the “Account Information”, and click on “Add Account”.
- Type your Titan email address, then hit the “Next” button.
- In the account type options, select “IMAP”.
- Enter the email settings mentioned above, then the password.
- Click on the “Connect” button, and the “Require logon using Secure Password Authentication (SPA)”.
By following these steps your Titan email account will be connected to Outlook. Now, you can access your emails in the Outlook program. This method is free, but not an effective solution, as it has many limitations.
Drawbacks of the Manual Solution
- First, the method is time consuming. As it requires an internet connection and if the connection is slow. The configuration process will take time.
- For an unknown error, there can be an issue in connecting your Titan email account.
- There are chances that you may lose your data during the process.
This is why the above method is not a reliable way to configure Titan email But, there is another technique that you can use, which is professional software.
Securely Transfer Email from Titan to Outlook
In this method, we use professional software that is verified by experts. As it will smoothly transfer your email from any IMAP accounts to another. Corbett IMAP Migration Software will help you set up your account easily. This is a Windows-based tool that you can download in all the versions of the Windows system.
Steps to Add Titan Email to Outlook
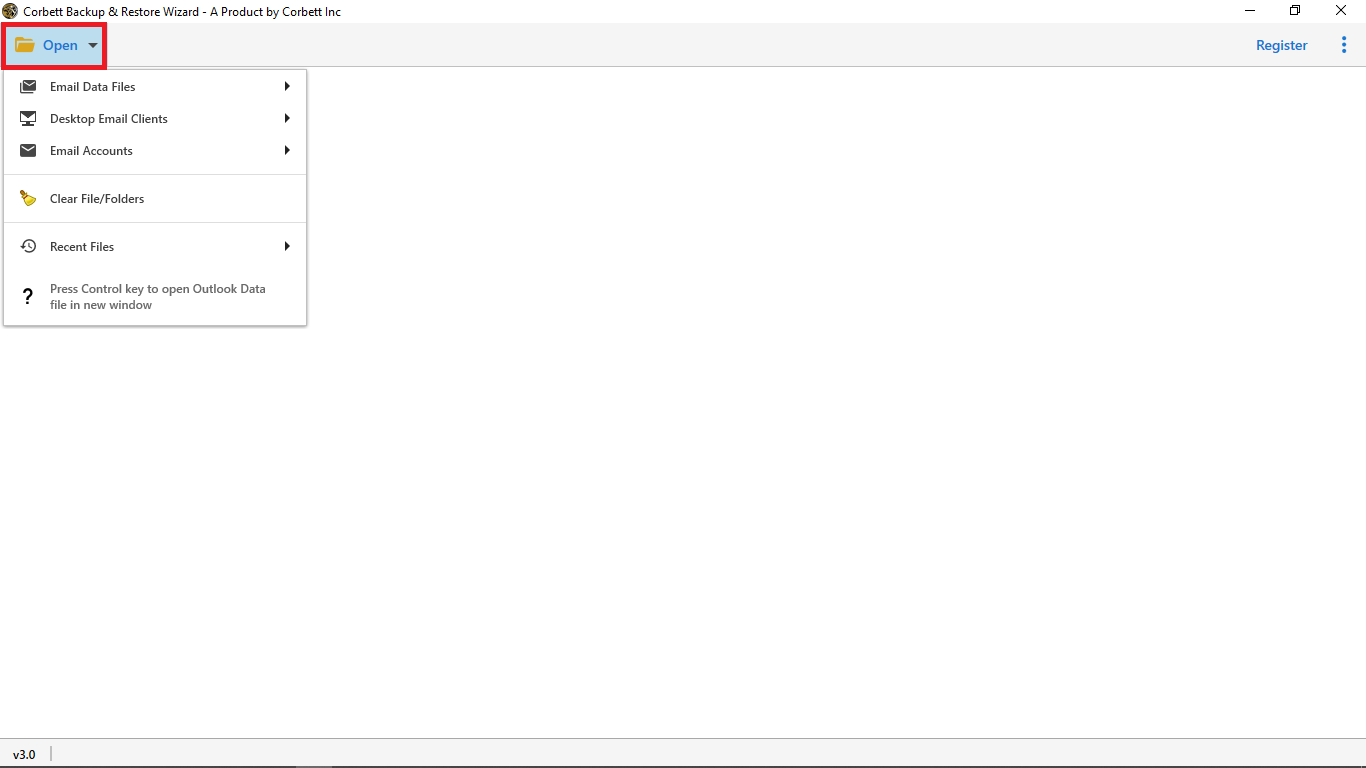
- Download the tool and go to the “Open” button.

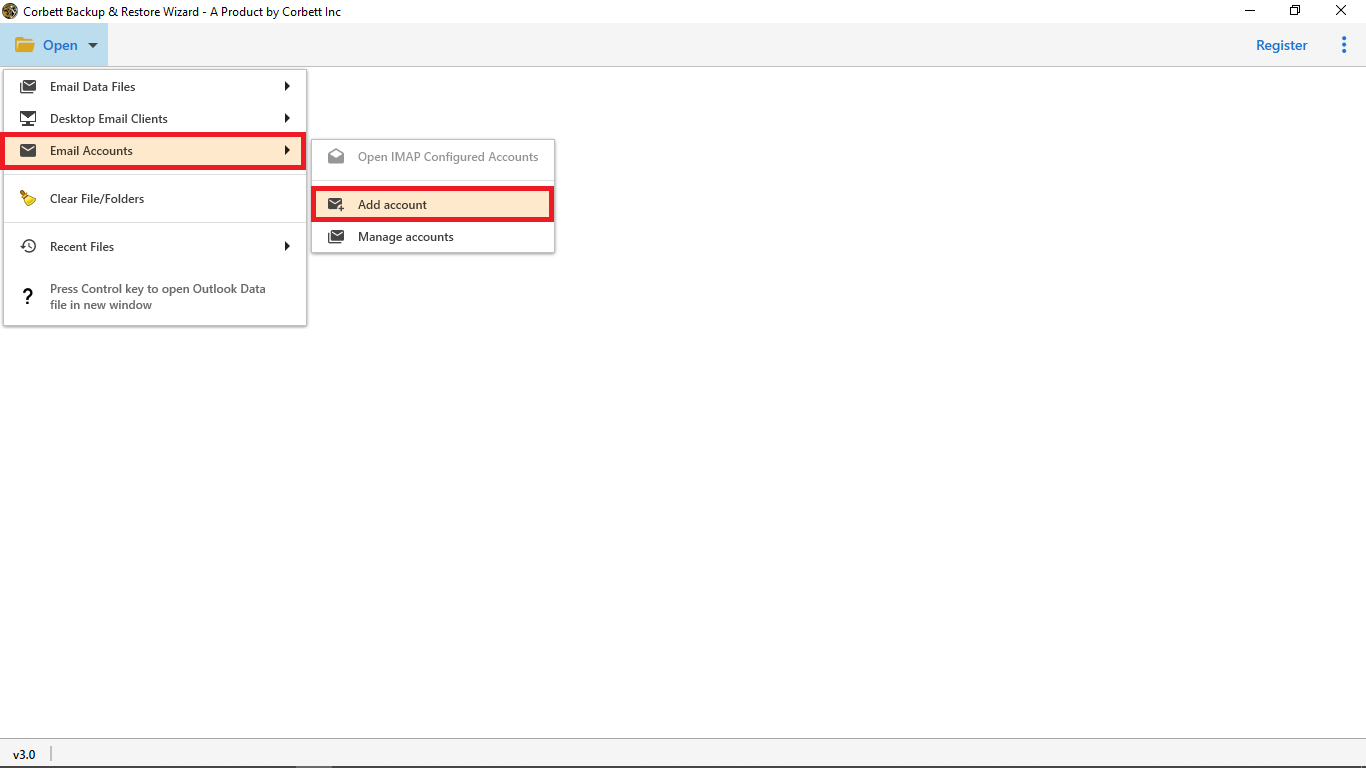
- Click on the “Email Accounts”, then the “Add Account” option.
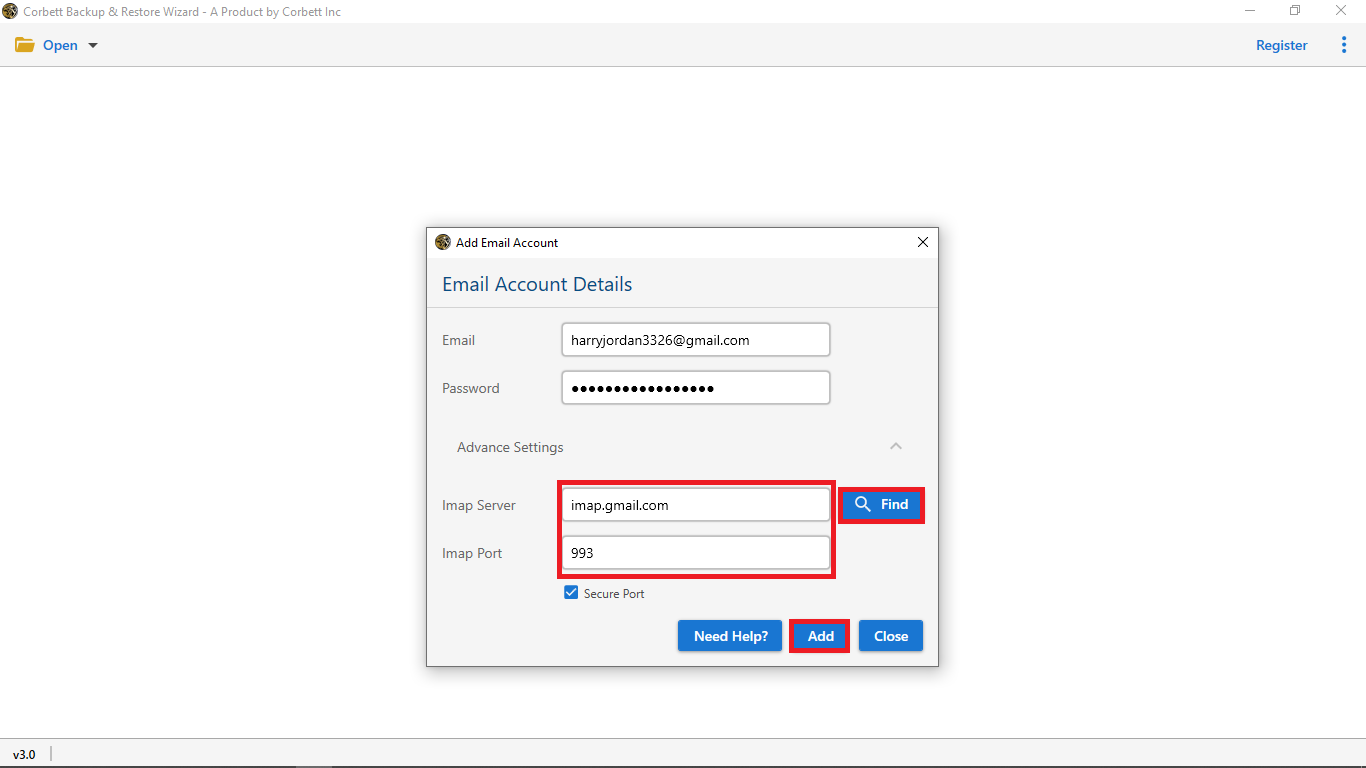
- Enter your Titan email details and click on the “Add” button.
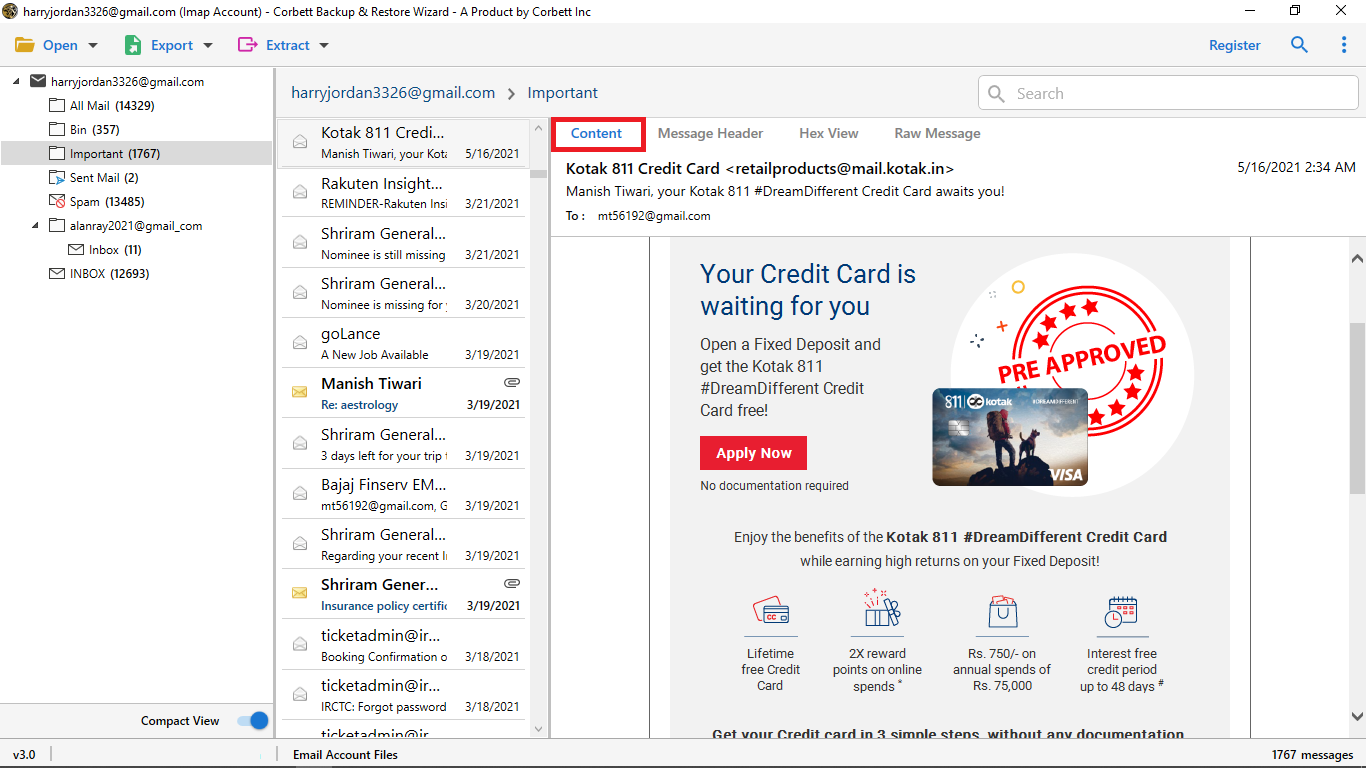
- After that, all your emails will be displayed in front of you. Preview your emails.
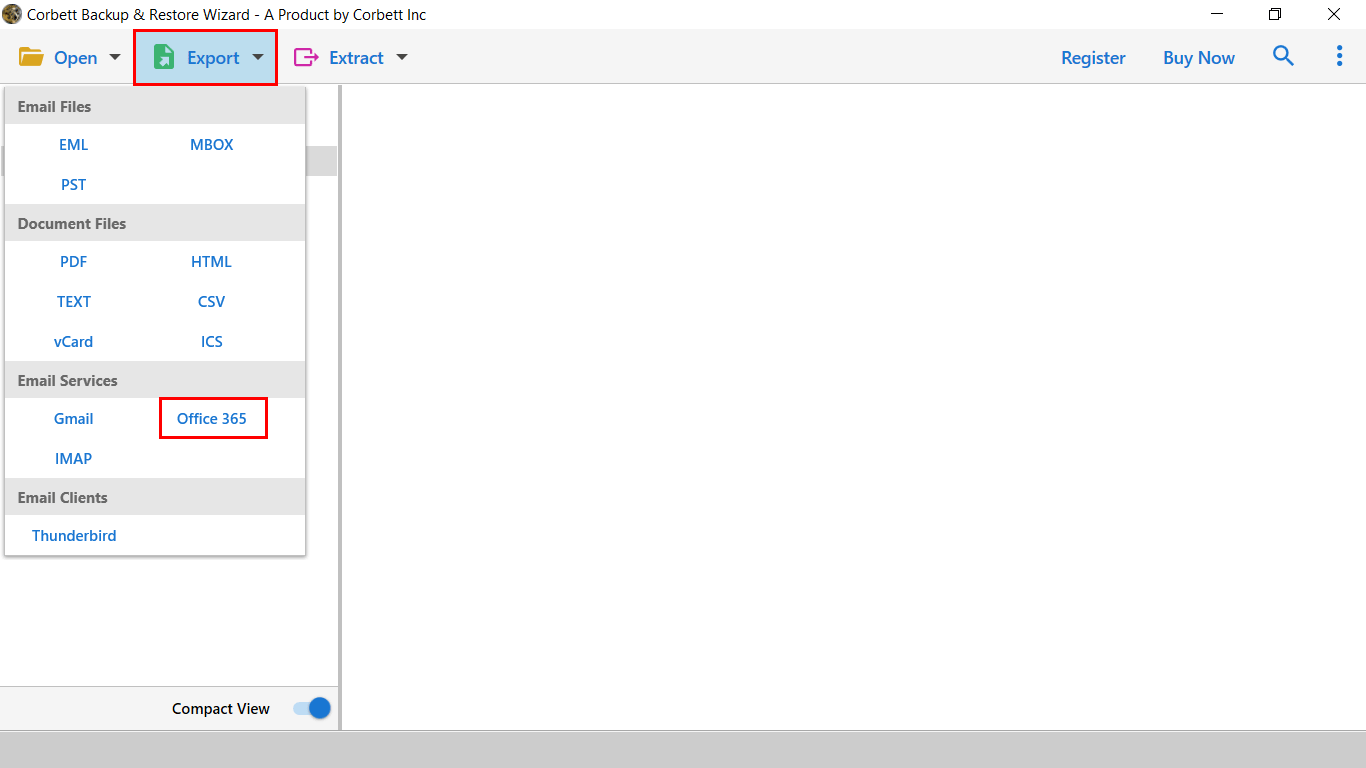
- Click on the “Export” option and then, select the “Office 365” button.
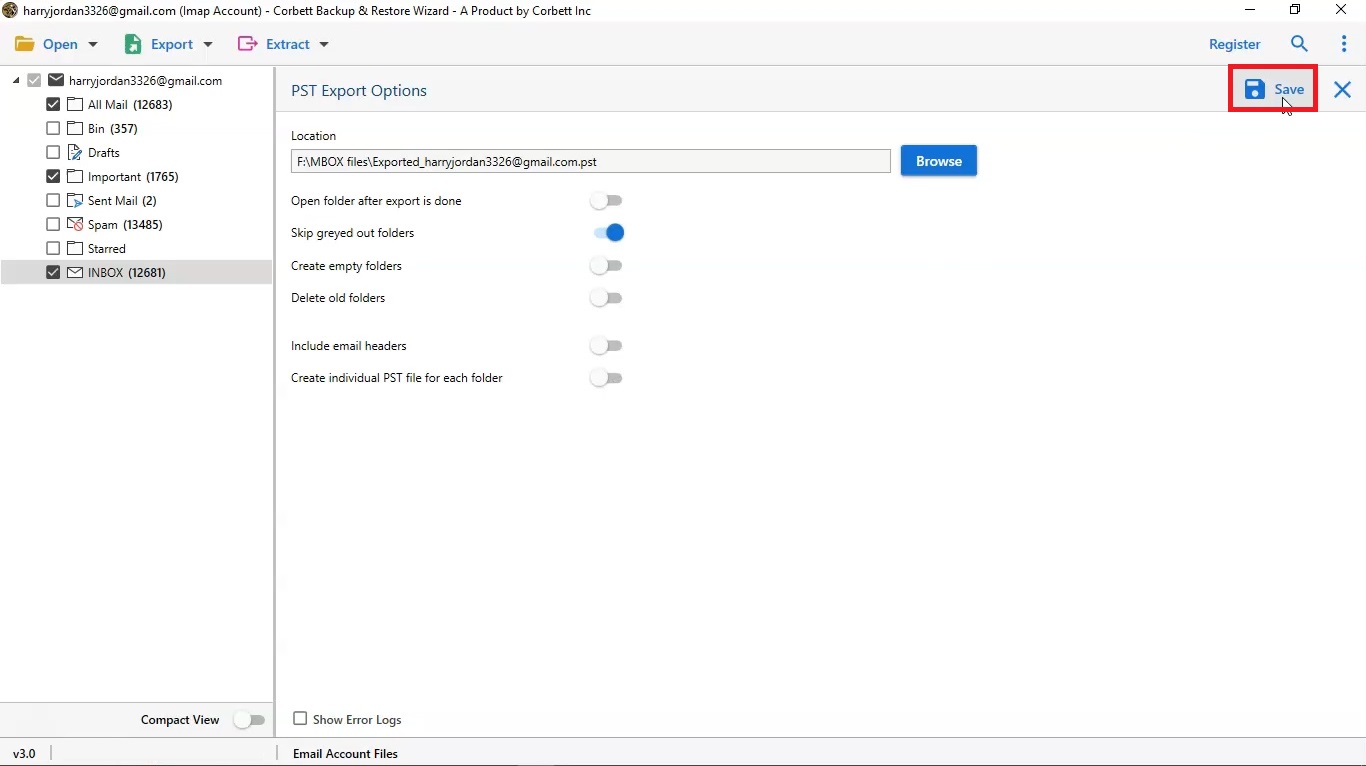
- Browse a location in which your data will be transferred. Hit the “Save” button.

From these steps your emails will be imported in Outlook 365 mailbox to directly saved in Outlook. However, you can also migrate the Titan mail to PST file format and then import the PST file into Outlook. The tool also has great features.
Features of the Tool
- Users can transfer their Titan emails in multiple document file formats.
- There is a search bar that you can use to sort out your emails.
- During the process, it maintains email headers, file structure, and folder hierarchy.
- It automatically detects your IMAP settings when entering the email address.
- You can include or exclude empty directories when transferring the data.
Conclusion
Many users want to add Titan email to Outlook, that’s why this article helped you by providing two methods: manual and professional. The manual one is time-consuming and has a lot of limitations. The professional method on the other hand is a great way to transfer your data, as it is created with advanced technology and a user-friendly interface.