Expert Guide to Add Network Solutions Email to Outlook

Are you still searching & worried about how to add network solutions email to Outlook? Read this article, and make it so. We have discussed the best methods to setup network solutions email in Outlook with complete settings using the POP 3 & IMAP configuration. So, let’s begin the post…
Network Solutions Email is one of the oldest and most trusted applications with a diverse range of customer base. Not only it provides professional email solutions but all services related to website development: marketing, design, web hosting, website builders, domain registration, etc.
However, despite their comprehensive features and other offerings, numerous users have an opinion that email services require high prices without up-to-date functionality or security updates, which often could also be the reason why users want to import Network Solutions emails to Outlook.
Outlook is a desktop-based application with multiple features and security trusted by millions of people across the world. The tool comes with a virtual environment with updated features and safety protocols where users can efficiently perform functions without any hassle. Given these merits, many users go for to import Network solutions emails to Outlook for a better experience. Let’s explore the reasons & Network Solutions email settings for Outlook configuration. Here is the table of contents we will discuss throughout the post.
Why Do Users Migrate from Network Solutions to Outlook?
- Microsoft Outlook provides security, the most important aspect for users to secure their data.
- It is well known for its robust and quick searches like dates, calendars, contacts, etc.
- Compatible and allows the configuration of POP 3 & IMAP accounts into it.
- Outlook features get auto-update options for ease in usability.
- Unlike Outlook Network solutions has a slow adaptation to updated security standards.
- High maintenance cost of the Network Solutions email account compared to the features provided.
- Outlook offers a single account with plenty of robust features for communication, collaboration needs, and document creation, rather than managing everything separately.
- Cloud-based allows users to access their important documents such as files, emails, applications, etc. on any device without needing an internet connection which is not very similar to Network Solutions.
- Outlook involves the attributes of data retention, compliance and e-discovery with numerous various industrial regulations essential for businesses.
As we have already checked out the advantages of Outlook over Network Mail, it becomes an excellent choice for users to import Network Solutions email to Outlook for better productivity & collaboration. This conversion process can be done in two steps. In the upcoming section, we will look at both Network Solutions email settings for Outlook, along with an automated solution to complete the process.
How to Manually Setup Network Solutions Email in Outlook?
While users can easily migrate with the convenience of a cloud-based email solution like Outlook, there still come scenarios where one might need to configure an email account on Network Solutions within Outlook due to not being completely ready for a full cloud transition. Setting up Network Solutions email in Outlook manually gives users the freedom to access and manage their messages directly from their desired desktop client.
Here are some of the manual methods users can utilize to setup your Network Solutions account Outlook:
- Open Microsoft Outlook on your computer.
- Click on the “File tab >> Add Account” option.
- Select the “Manual Setup” option and click the “Next” button.
- Select the server type “POP 3 or IMAP” & provide the required details.
- Afterward, click the “More Settings” button & move to the “Outgoing Server” tab.
- Provide the configuration details & click “OK” to close the Internet Email Settings window.
- Click “Next” and Outlook will check all the settings.
- Lastly, click “Finish” to set up Network Solutions email in Outlook.
These are the Network Solutions email settings for Outlook. Now, let’s checkout the Network Solutions IMAP settings along with POP 3.
Network Solutions POP3 Settings Outlook
Network Solutions email settings for POP3 are as follows:
| Settings | Value |
|---|---|
| Incoming Mail Server (POP 3) | pop.yourdomainname.com |
| Port | 110 |
| Encryption | None |
| Outgoing Mail Server (SMTP) | smtp.yourdomainname.com |
| Port | 587 |
| Requires sign-in | Yes |
Network Solutions IMAP Settings for Outlook
| Settings | Value |
|---|---|
| Incoming Mail Server (IMAP) | imap.yourdomainname.com |
| Port | 143 |
| Encryption | STARTTLS or SSL/TLS |
| Outgoing server | SMTP.[domain].com |
| Requires sign-in | Yes |
Securely Add Network Solutions Email to MS Outlook?
It is highly recommended to go with the Corbett IMAP Migration Tool if you want to import network solution emails to Outlook in bulk securely. There are many reasons why users prefer an efficient tool to complete the migration process. For one, the software allows you to export your data from Network Solutions to PST format, which can easily be accessed in all editions of Outlook.
The software is tested & admired by IT experts for its excellent performance. Moreover, the software comes with an easy-to-use GUI. Both technical and non-technical users can use this utility easily. A free demo version of the software lets users import a limited number of Network Solutions emails to Outlook. So, download the software & follow the steps mentioned below to complete the process.
Objectives of Merging Network Solutions Email Account to Outlook
- Allow users to transfer emails from numerous network solutions accounts to Outlook in Bulk saving a large amount of time and effort as compared to moving it individually.
- It preserves the integrity of the data by sustaining all attachments, metadata, and email formatting during the process, ensuring no data is altered or lost.
- This professional IMAP migrator is specifically designed to lower the risk of data corruption or loss, offering a more secure migration process than the traditional techniques.
- Provides a free trial version to have a preview of the emails before starting the migration process, permitting users to test the tool and reach the satisfaction level before buying it.
- No need to install any additional software other than the migration tool as the migration process can be done independently.
Steps to Add Network Solutions Email to Outlook
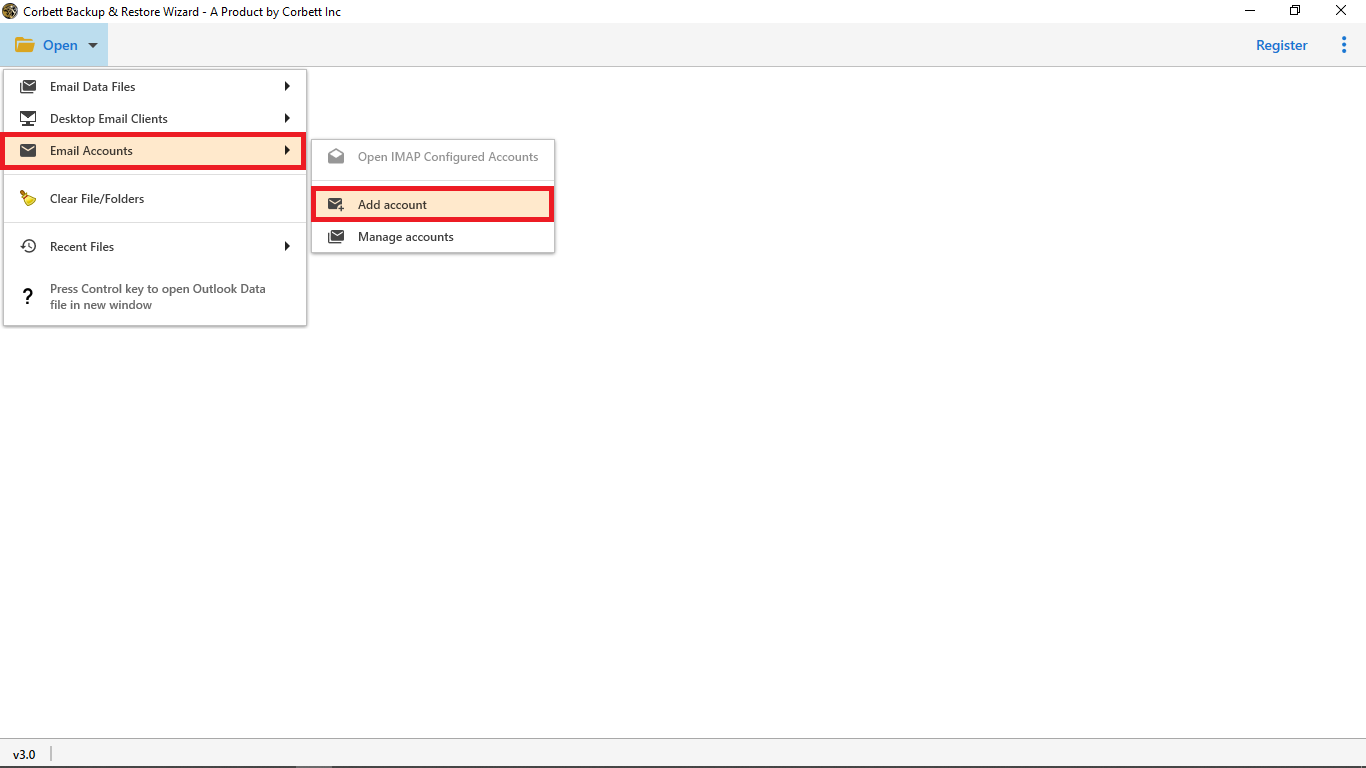
- Launch the utility on your computer and click the “Open” button. Then, select “Email Accounts” and “Add Account”.

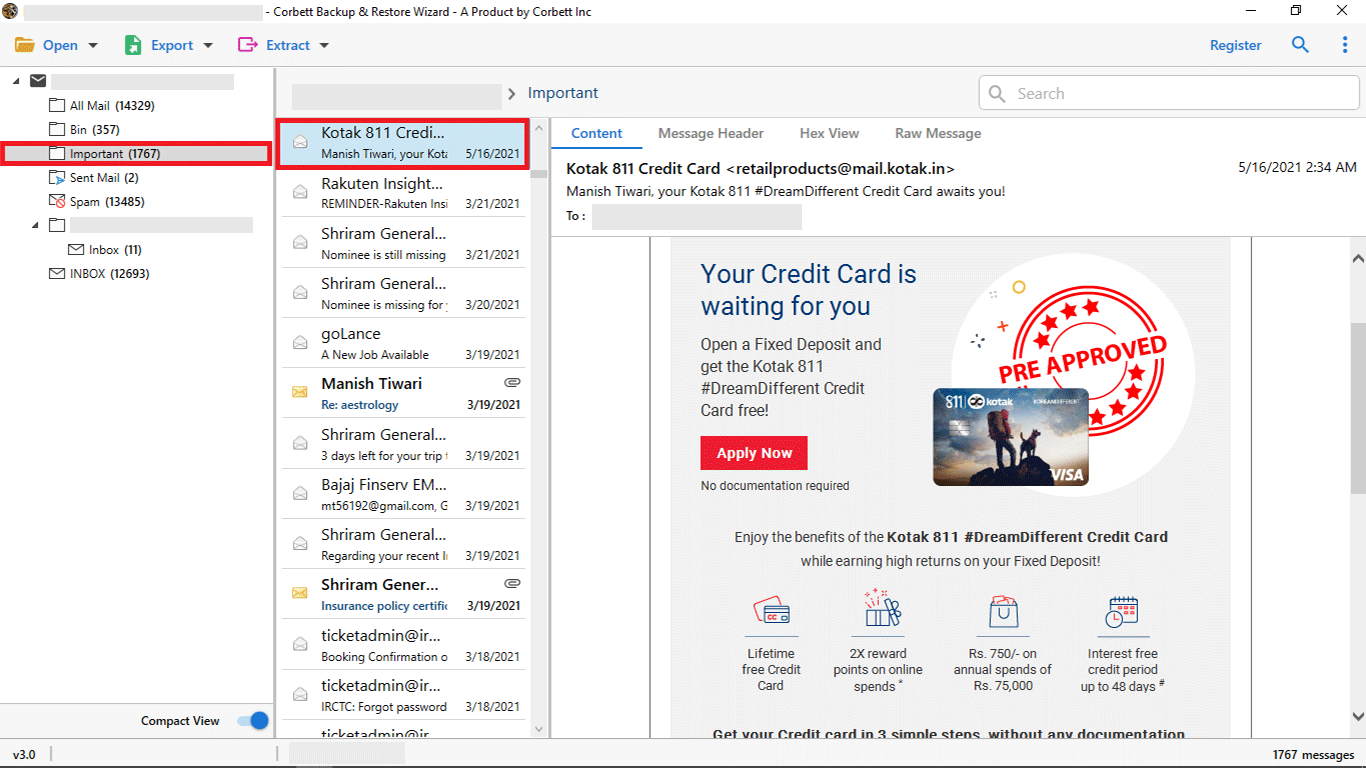
- Additionally, the software will fetch your data stored in Network Solutions and get a data preview in the software panel.
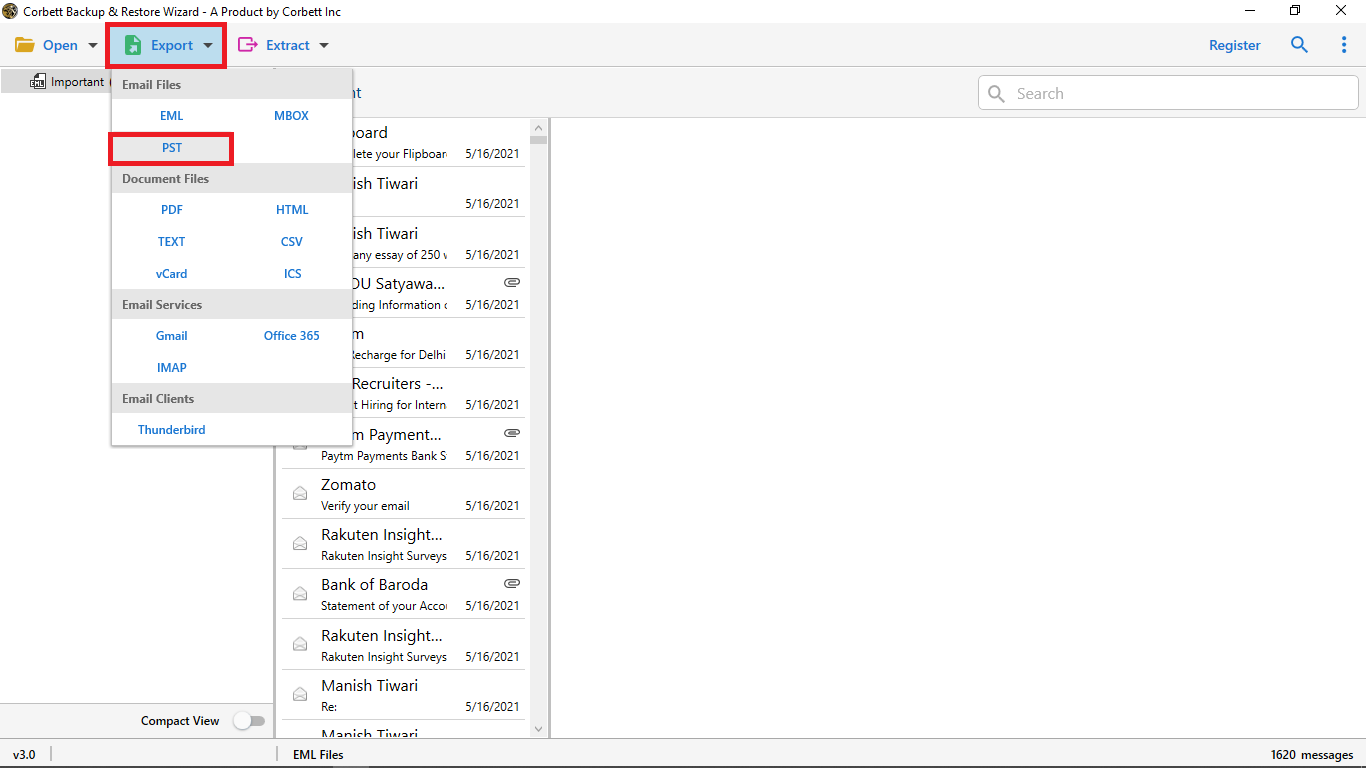
- Go to the “Export” tab and select the “PST” Option to add Network Solutions Email to Outlook.
- Lastly, apply the Data Filters and click on “Save” Button.
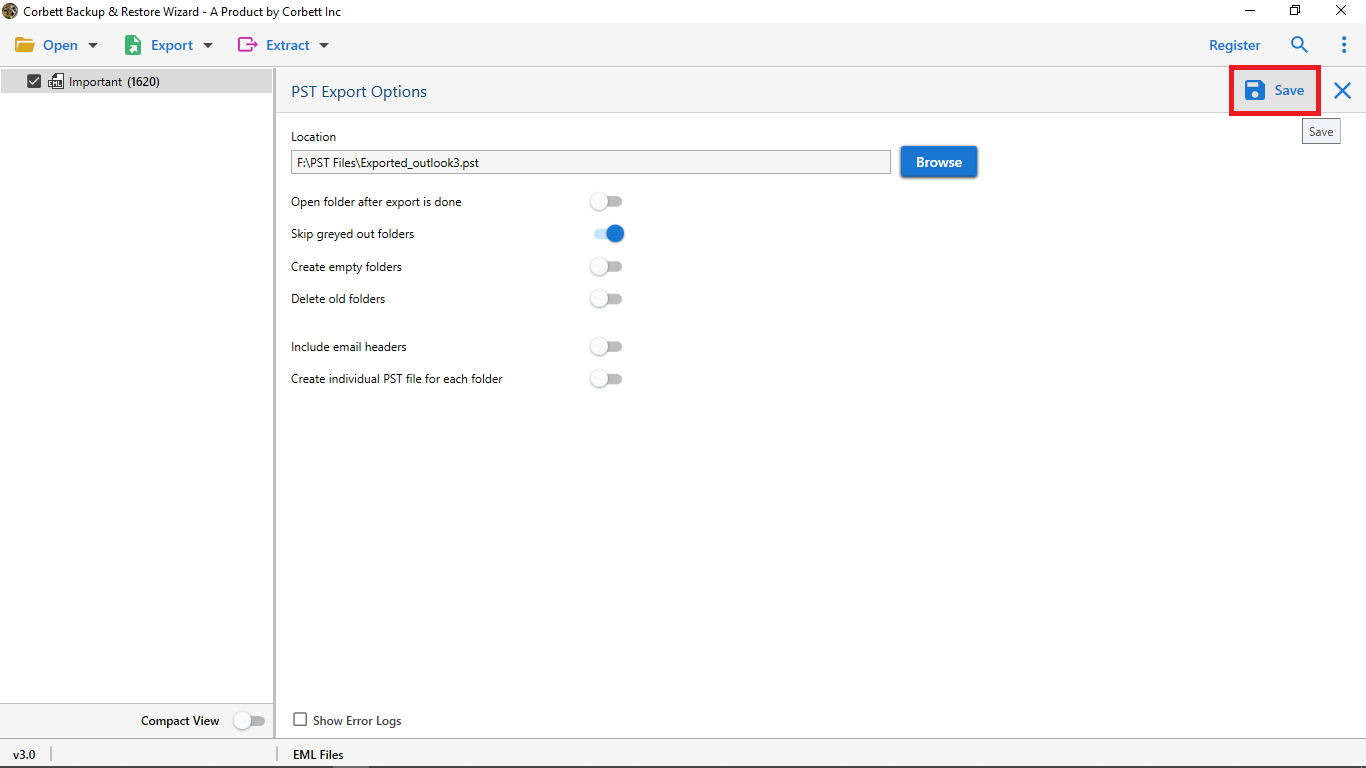
Now, the user will get the PST file that they can easily import to all editions of Outlook. Visit the link to import PST files into Outlook
To Wrap it Up
In the above blog, we have described the procedure to add Network Solutions email to Outlook. There is no manual method available to complete this process. However, certain Network Solutions email settings for Microsoft Outlook are unreliable. Our recommendation for users is to go with Corbett’s automated approach, which delivers fast & precise results without any chance of data loss.