How to Add Windstream Email to Outlook With IMAP


Written by Jared Young, an engineering graduate in Computer Science who specializes in data recovery and email backup at Corbett Software.
Want your Windstream email in Outlook? You do not need any special software for this. Outlook can add a Windstream account directly once you give it the right server settings, and getting those settings exactly right is the whole game. Here they are, followed by the step by step setup.
Summary: To set up Windstream email in Outlook, add a new account using IMAP server imap.windstream.net on port 993 with SSL, and SMTP server smtp.windstream.net on port 465 with SSL and authentication on. This is free and built into Outlook. To move years of existing Windstream mail into Office 365 or a PST file in bulk, a migration tool does it in one run.
Windstream Email Settings for Outlook
Windstream is an internet and phone provider in the United States, and Windstream.net is its webmail service, now under the Kinetic brand. The account works in Outlook over IMAP, which keeps the mail in sync across every device. Enter these settings exactly, because a single wrong port or a missing SSL box is the usual reason the connection fails.
- Incoming, IMAP: imap.windstream.net, port 993 with SSL.
- Incoming, POP3 if you prefer: pop.windstream.net, port 995 with SSL.
- Outgoing, SMTP: smtp.windstream.net, port 465 with SSL.
- Username: your full email address, such as name@windstream.net.
- Outgoing server: requires authentication, using the same username and password as incoming.
IMAP is the better choice for most people, since it keeps your mail on the server and mirrors it across Outlook, your phone and webmail. POP3 pulls mail down to one device and can make messages look like they have vanished from the others.
Set Up Windstream Email in Outlook Step by Step
With the settings above to hand, adding the account takes a couple of minutes.
- In Outlook, go to File, then Add Account.
- Type your full Windstream email address. In classic Outlook, tick Let me set up my account manually, then choose IMAP.
- Enter the incoming and outgoing servers and ports from the settings above, with SSL on for both.
- Make sure the outgoing server is set to require authentication with the same login.
- Enter your Windstream password, finish, and let Outlook test the connection.
Once the test passes, your Windstream mail loads into Outlook and stays in sync from then on. That is the entire job, at no cost.
If the Connection Fails, Check These
Most Windstream setup errors come down to a short list of causes, so run through these before anything else.
- Confirm SSL is enabled on both incoming and outgoing, with ports 993 and 465.
- Check that outgoing authentication is switched on, as Windstream rejects unauthenticated sending.
- Sign in to Windstream webmail first and confirm IMAP access is enabled on the account.
- Use your full email address as the username, not just the part before the at sign.
- If sign in still fails, check whether your account needs an application specific password rather than your normal one.
Moving Old Windstream Mail in Bulk
Setting up the account brings your mail into Outlook live, which is all most people need. There is one job it does not cover. If you are leaving Windstream and want to move years of existing mail into an Office 365 account, or save it as a PST file before the address is deactivated, doing that account to account by hand is slow. That is the only place a tool earns its keep here.
Steps to Migrate Windstream Mail
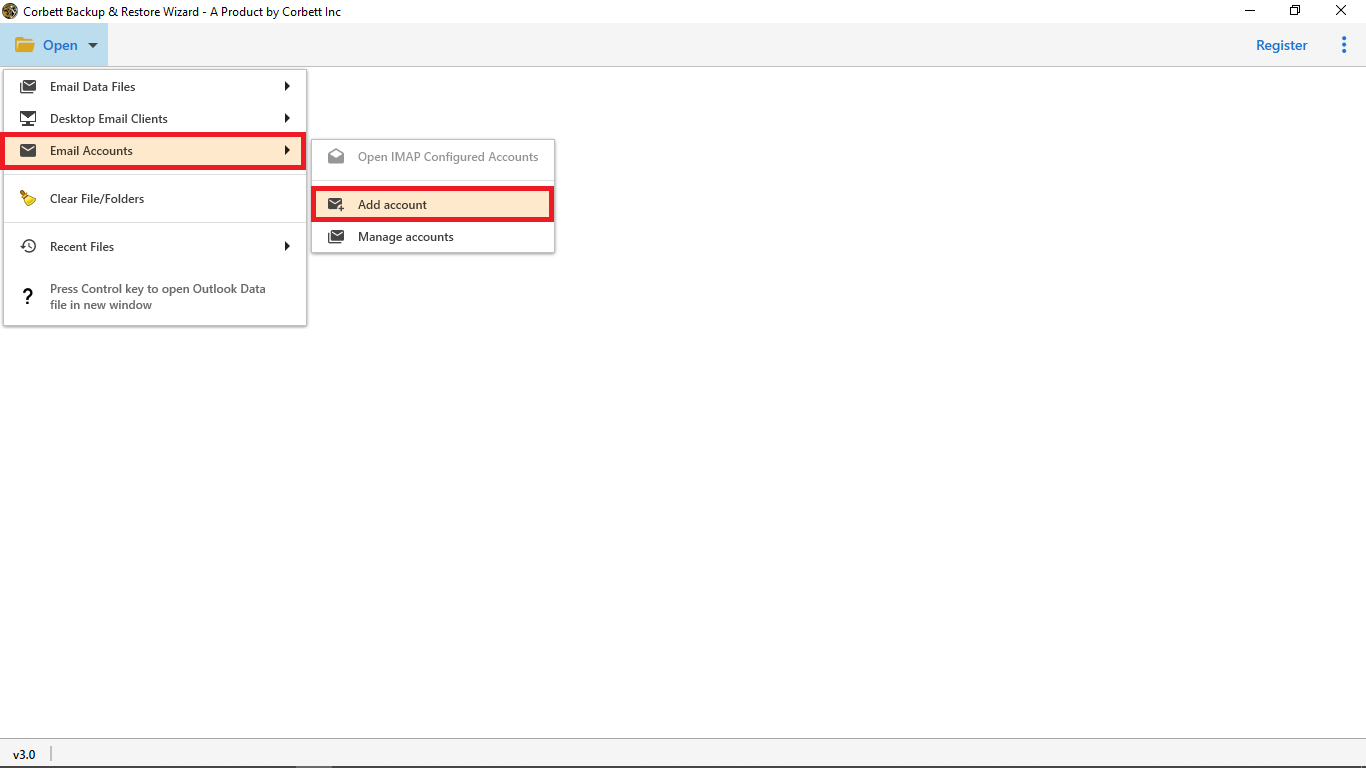
- Launch the tool, then click Open, choose Email Accounts and select Add Account.

Step 1: Adding an account in the tool.
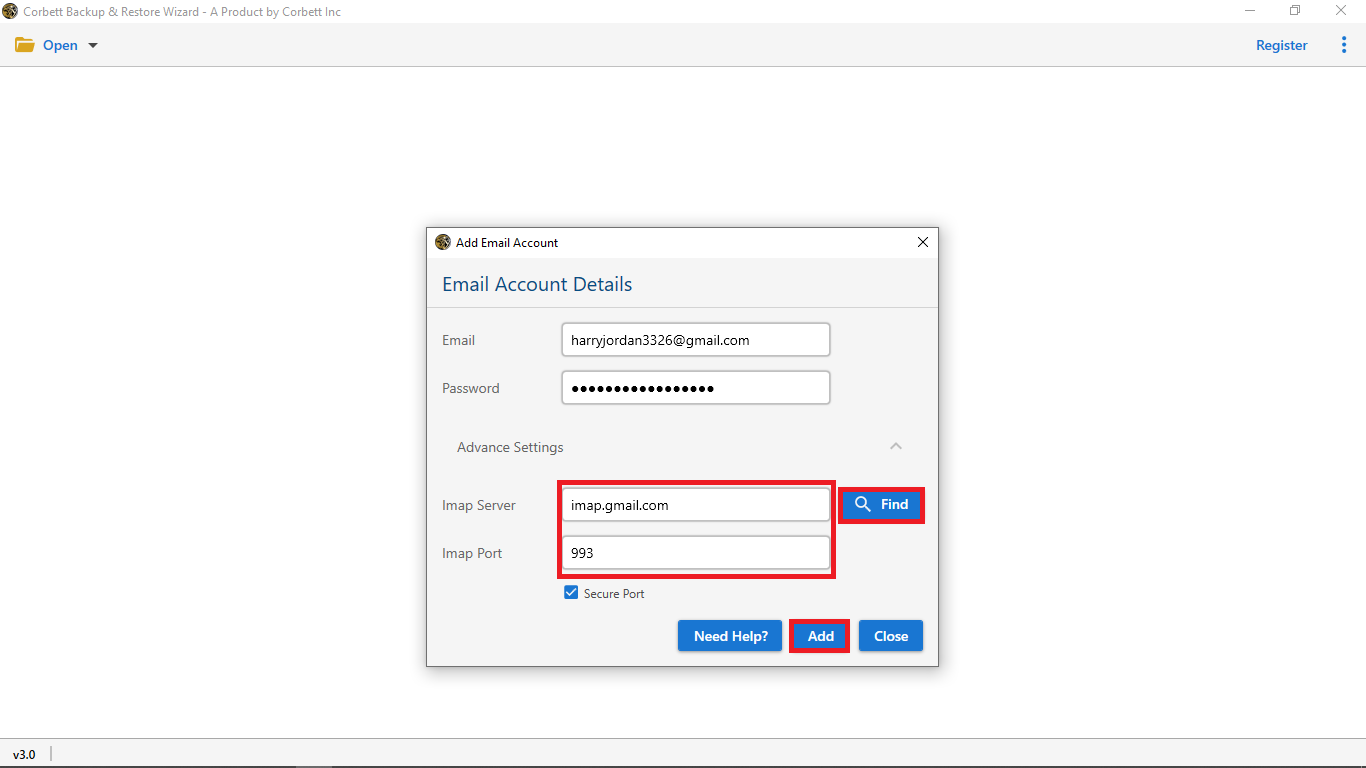
- Enter your Windstream email details with imap.windstream.net as the server, then click Add.
Step 2: Windstream credentials entered.
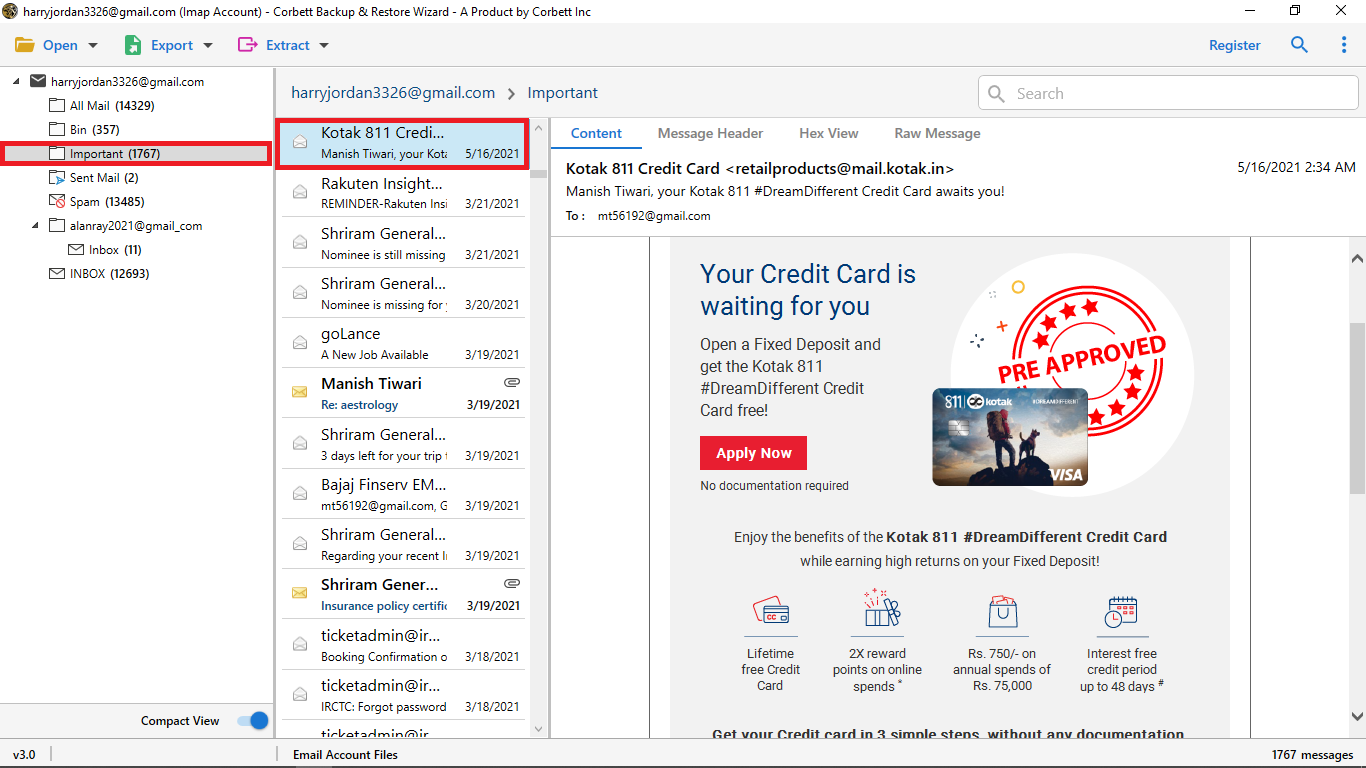
- Let the mailbox load and preview your emails to confirm the right account.
Step 3: The Windstream mailbox in the preview panel.
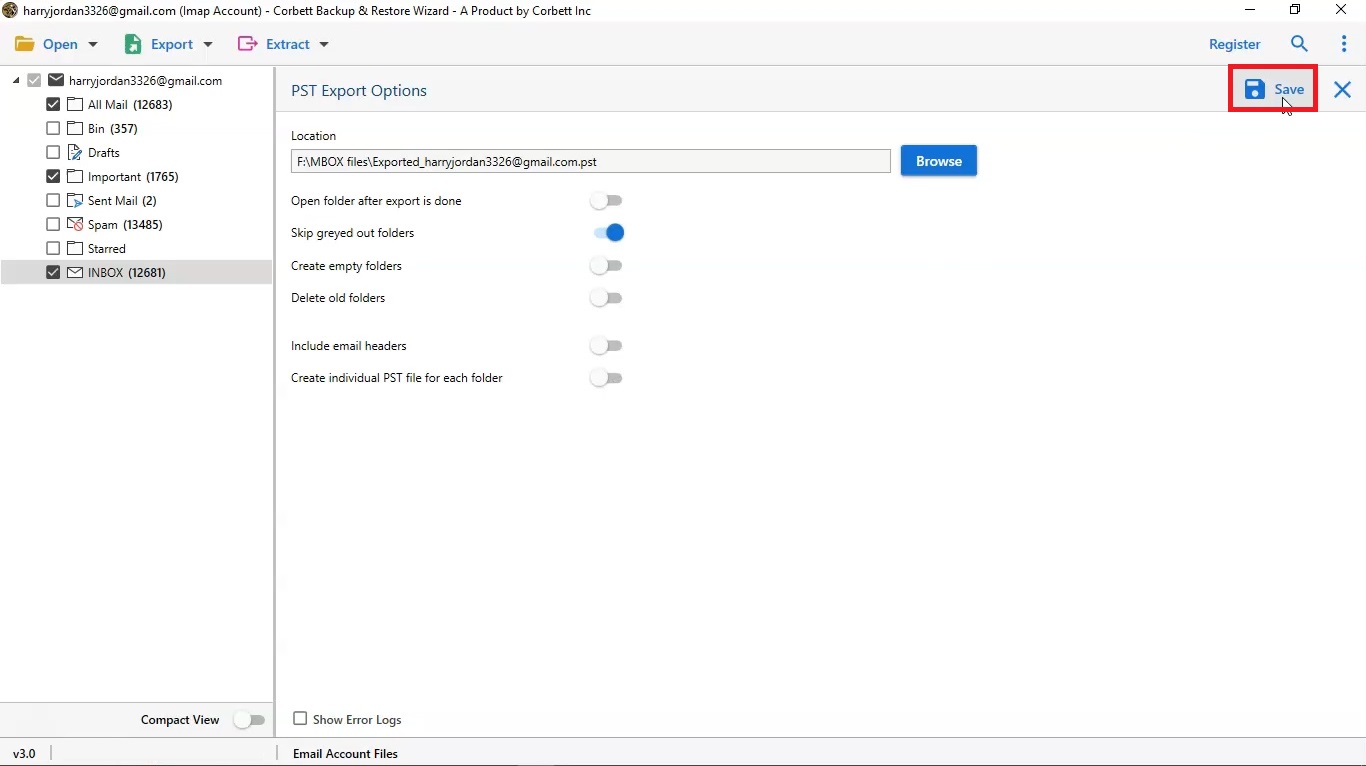
- Click Export, choose Office 365 or PST, apply any filters, then click Save to run the migration.

Step 4: Choosing the destination and running the migration.
If you export to PST, you can then import the PST file into Outlook on any machine.
People Also Ask
Q2: Do I need software to add Windstream email to Outlook?
A2: No. Outlook adds a Windstream account directly with the IMAP and SMTP settings above, free of charge. A tool is only useful if you want to move existing mail in bulk to Office 365 or a PST file.
Q3: Why does Outlook say it cannot connect to the Windstream IMAP server?
A3: Usually a wrong port or a missing SSL setting. Confirm port 993 with SSL for incoming and 465 with SSL for outgoing, check outgoing authentication is on, and make sure IMAP is enabled in your Windstream webmail.
Q4: Should I use IMAP or POP for Windstream in Outlook?
A4: IMAP in almost all cases. It keeps mail on the server and in sync across every device. POP downloads mail to one device and can make it look like messages are missing elsewhere.
Q5: Can I keep my Windstream mail after closing the account?
A5: Not the address itself, which is deactivated when the account closes. Export the mail to a PST file or move it to another account beforehand so you keep a copy.
Conclusion
Getting Windstream email into Outlook is a free, built in job once you have the server settings right, IMAP on 993 and SMTP on 465, both with SSL, and outgoing authentication on. That covers reading and sending your Windstream mail in Outlook. The only time you need more is when you are moving years of old mail into Office 365 or a PST file in bulk, where a migration tool saves the manual slog. Are you setting up the live account, or moving your old mail out of Windstream?