Transfer Windows Live Mail to New Computer using 4 Advanced Methods
Windows Live Mail is an email client application by Microsoft. It comes as an integrated email application in Windows Essential Suite which can be downloaded free from its official website.
However, there can be many possible reasons due to which users want to transfer Windows Live Mail to new computer. One of the reasons could be that the user wants to update the operating system or replace hardware components. Another could be that they are facing issues to send or receive emails due to issue in computer.
In this blog, you will learn about the different methods to transfer Windows Live Mail to new computer by using professional and manual method.
Free Way to Export Windows Live Mail to Another Computer
- Open Windows Live Mail or Windows Mail on your New Computer.
- Now, click on File >> Add Account >> Enter Email ID & other details.
- Set up the configuration settings to POP3 or IMAP.
- At last, click “OK” all your Windows Live Mail emails sync to new computer.
Manually Move Windows Live Mail to New Computer
- Create a new folder on your desktop of an old computer.
- Go to the default storage location of Windows Live Mail on the old computer.
- Copy all the folders and files from this location and save them in the folder created on desktop.
- Now copy and save these files into external hard drive like pen drive.
- Move all your data to new computer and save them in the storage location.
- Configure the Windows Live Mail account and get the files from the storage into this email application.
Export Windows Live Mail to Another Computer
- First thing first, Create a folder in the desktop of the old computer.
- Open the Windows Live Mail in the old computer and follow the steps.
- Go to ‘File’ tab, select ‘Export email’ and then choose ‘Email messages’.
- In the Windows Live Mail Export, select the program as ‘Microsoft Windows Live Mail’ and then click on ‘Next’ button.
- Select the folder as created on the desktop and follow the further steps.
- Click on ‘Start’ button and hence the process will initiate to export all the emails from Windows Live Mail to the folder.
- Connect your pen drive to the old computer and copy the folder containing EML files of Windows Live Mail.
- Using the pen drive, move the EML files to the new computer and install the Windows Live Mail application.
Import EML Files to Windows Live Mail in New Computer
- In Windows Live Mail, click on the ‘File’ tab, select ‘Import messages’ and choose ‘Import Emails’.
- In the Windows Live Mail Import, select the program as ‘Windows Live Mail’, choose the desktop folder containing the EML files and then, click on the ‘Next’ button.
- Now, follow the steps and complete the process. The EML files would get imported in just few hours.
Drawbacks of the Manual Method
- It is a tedious, lengthy and time-consuming process.
- It requires technical expertise to execute the functions.
- There are chances of losing data due to export and import of the EML files.
- It does not ensure 100% data integrity.
- The file structure and folder hierarchy may get affected.
Expert Way to Export Windows Live Mail
Corbett Software provides you with the best EML Converter Software that helps to transfer Windows Live Mail to new computer and convert the WLM data to various file formats. In addition, to that the software is capable of auto-detecting the configured profile location. The user can choose the file format, and then proceed with the conversion. The converted files can be accessed in the respective application of new computer.
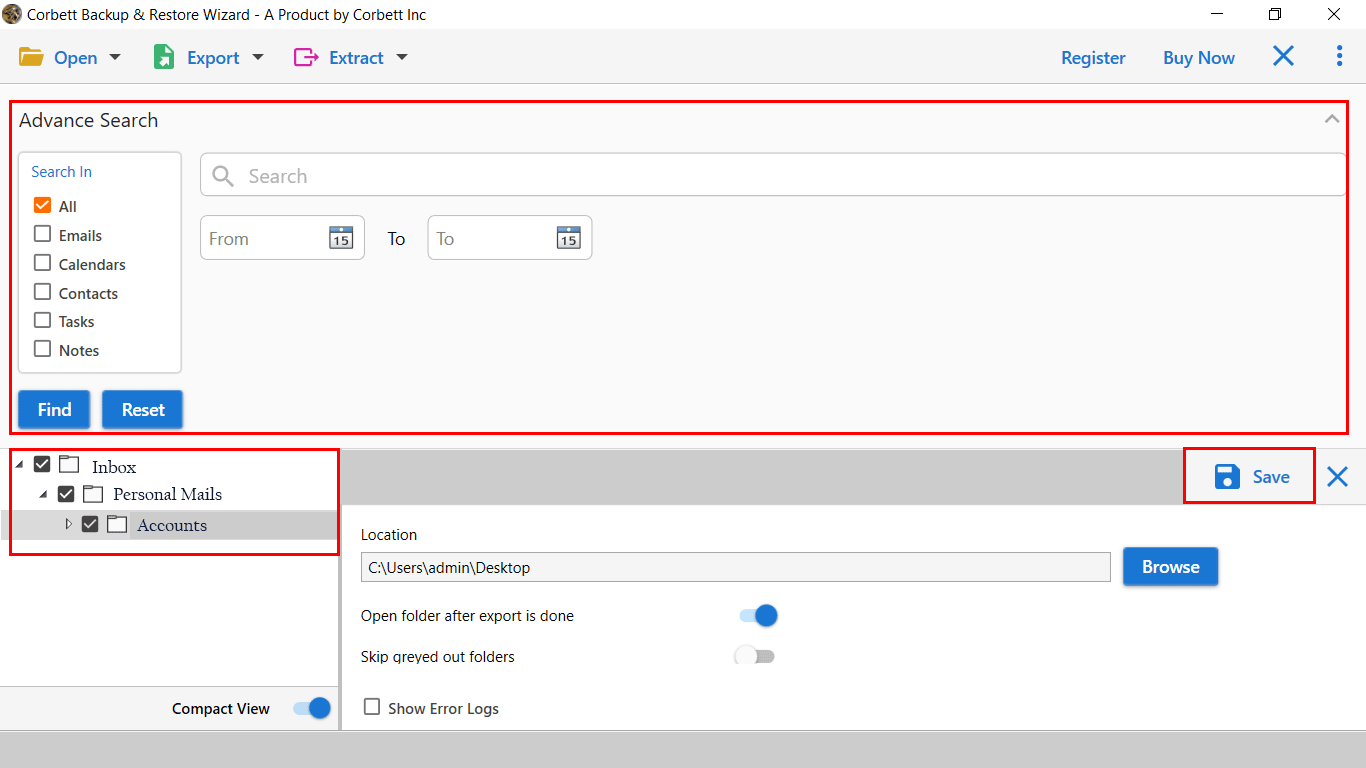
Steps to Transfer Windows Live Mail to New Computer
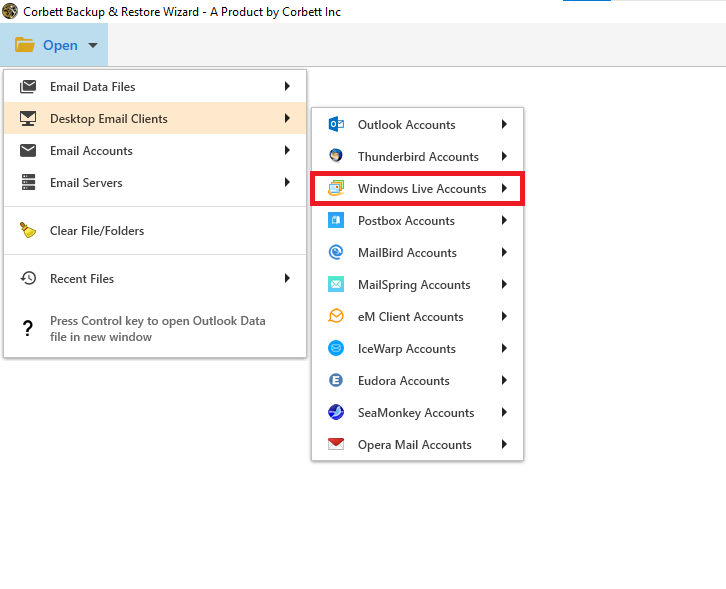
- Download & Install Software on Windows OS.
- Go to Open >> Desktop Email Client >> Windows Live Mail.

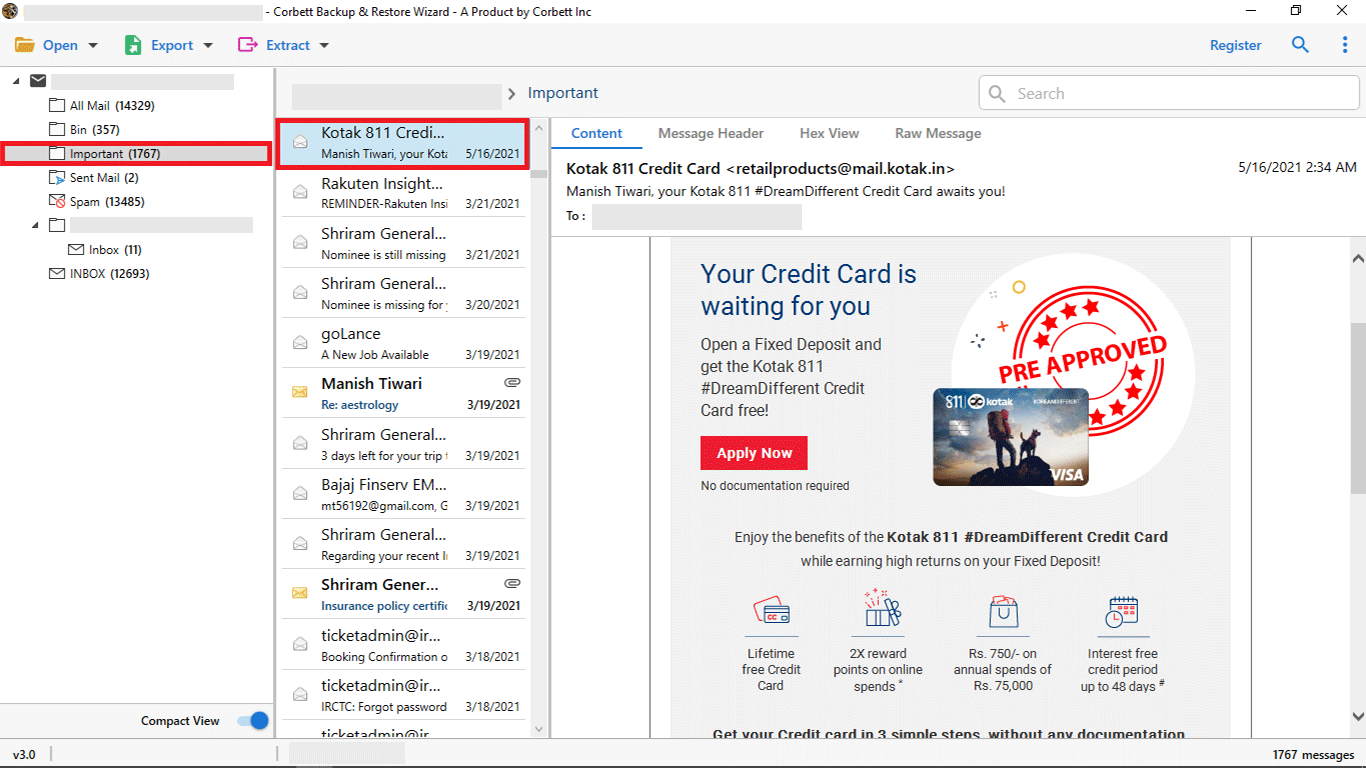
- Select the Required profile & preview the data.

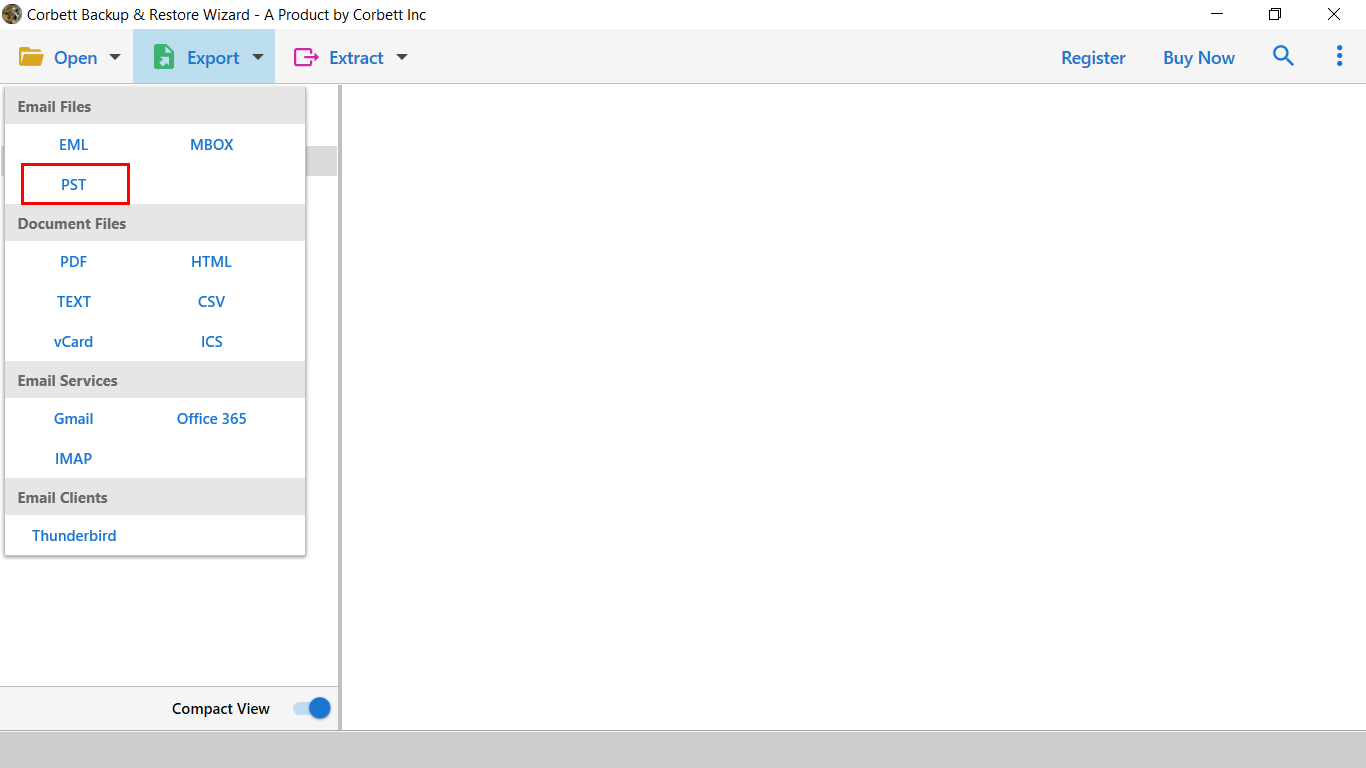
- Next, click the Export button and select the required format.
- Last, apply data filters & click save to move WLM to New PC.
So There Your Have It
In the above blog, the light has been thrown on the need to transfer Windows Live Mail to new computer. There are possibly two ways to resolve this query. One is the manual method and the other is automated method. Out of which the automated method is the most trusted and reliable tool which secures data and guarantees the data integrity.
Whereas manual method is quite lengthy and time consuming which does not promises to 100% data integrity. Henceforth, the users can try the free demo version which encompasses the full-fledged features of the original version. Then, take the decision wisely.