Add CenturyLink Email to Gmail Account [Complete Guide]
![Add CenturyLink Email to Gmail Account [Complete Guide]](https://corbettsoftware.com/blog/wp-content/uploads/2023/05/transfer-centurylink-email-to-gmail-thumbnail-corettsoftware.png)
CenturyLink is a global innovation organization that offers a myriad of services to users. It provides business network solutions, cloud solutions, phone, email, security, managed services, and so on. Along with that, it provides webmail email services to private individuals, private ventures, public spaces, enterprises, etc.
Whereas, Gmail is also a webmail where you will get multiple features. It is free of cost and offers 15 GB worth of storage space. That’s why many users want to transfer their CenturyLink email to Gmail. But why is that? Below are the reasons to connect CenturyLink Mail to Gmail.
What are the Causes of Migrating CenturyLink to Gmail?
- The Gmail interface is better than CenturyLink as it is simple to navigate. That’s why users prefer Gmail to work with.
- Your CenturyLink storage space is full. So, by moving your data to Gmail you can reduce the storage of CenturyLink and store new emails.
- It is also needed for the backup purpose, saving your CenturyLink to Gmail helps you to prevent data loss.
- You can take the benefits of G Suite features, to improve your productivity, communication, and collaboration.
These are the common reasons why you are required to transfer CenturyLink email to Gmail. Now, we are going to see the methods that can migrate your data.
How to Transfer Emails from CenturyLink to Gmail Manually?
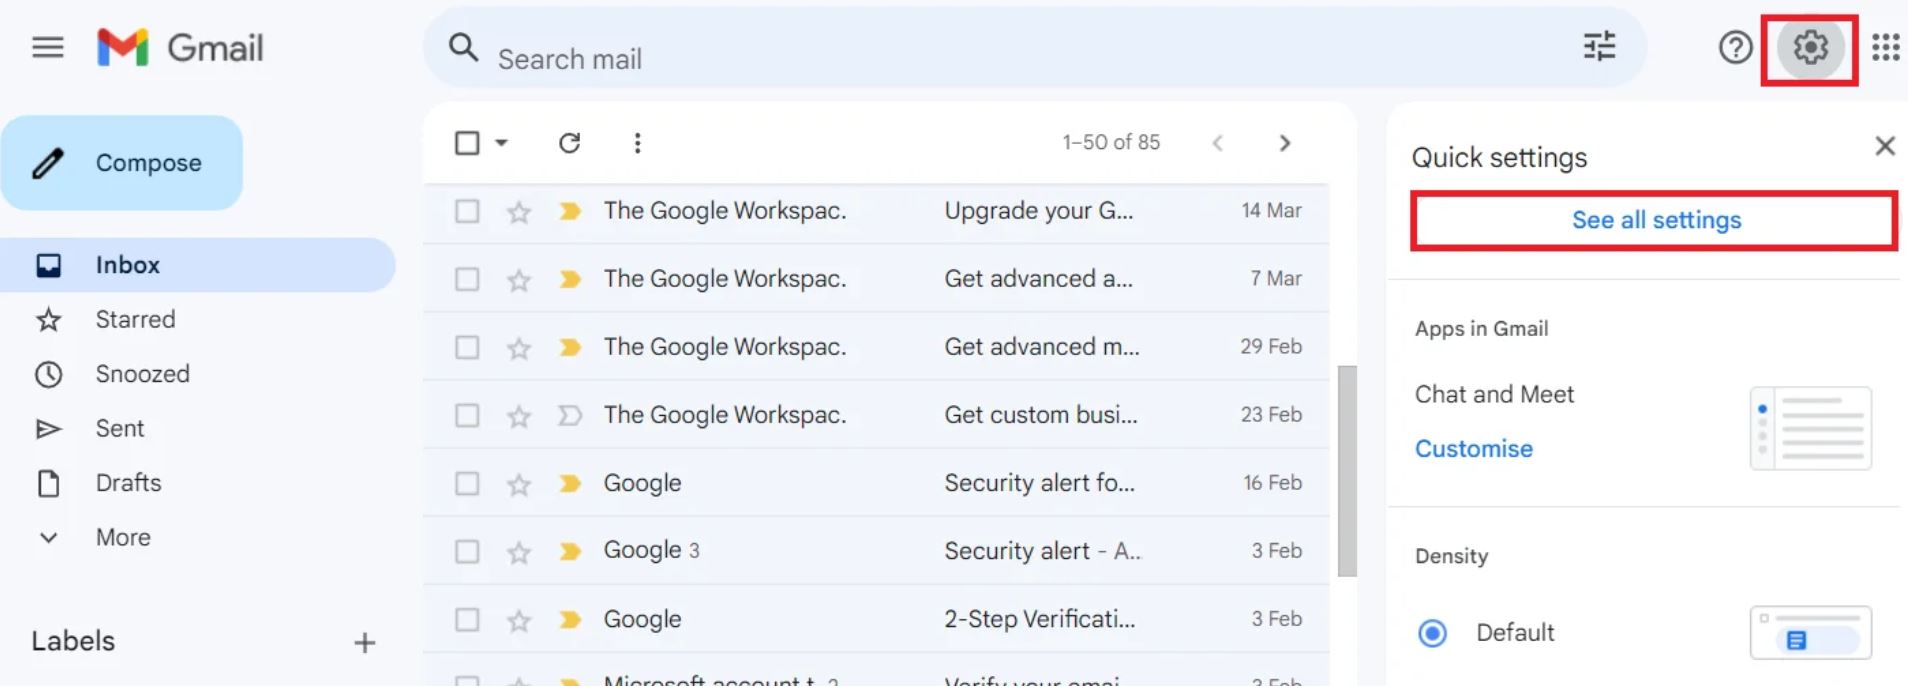
- Login to your Gmail account with valid login credentials.
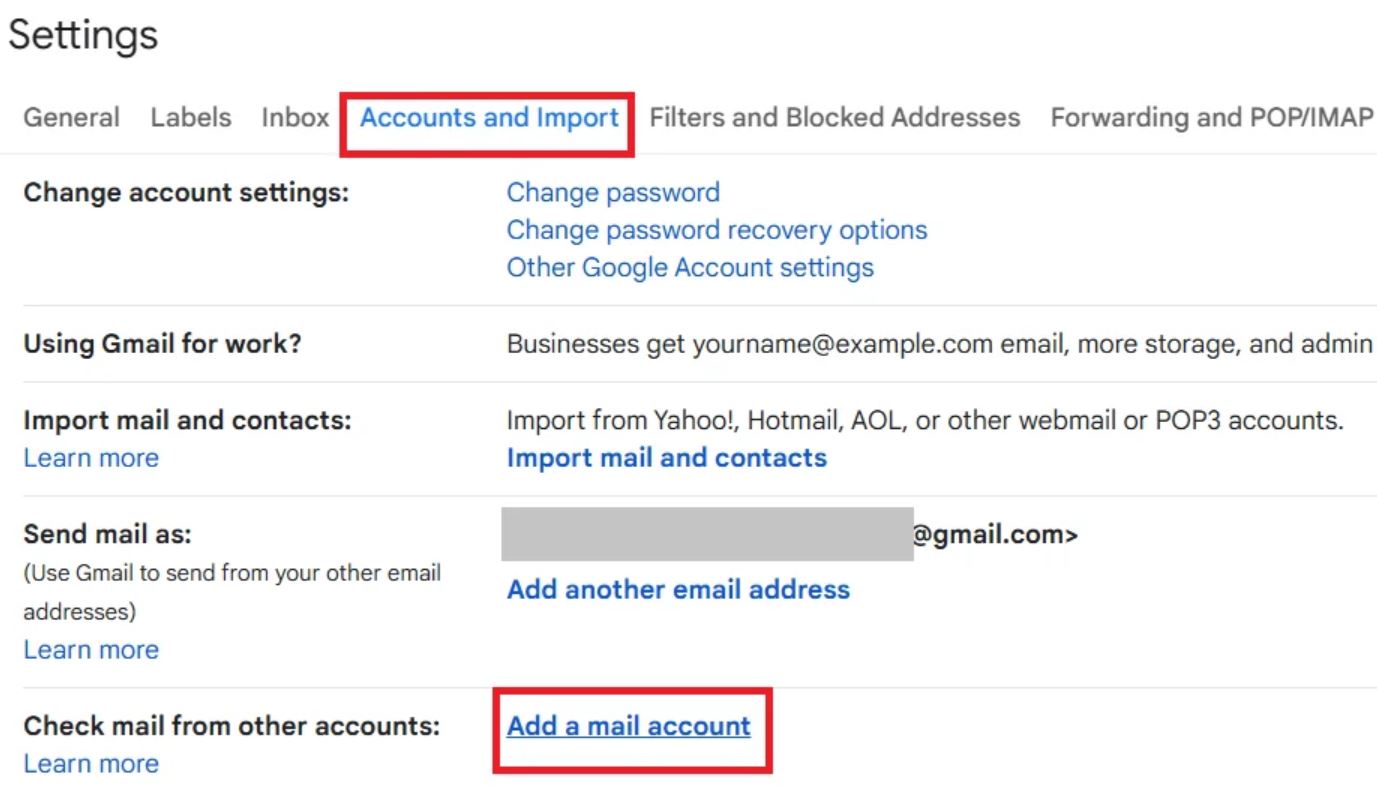
- Click the “Gear” icon at the top-right corner. Then, select the “Settings” option from the dropdown list.

- Now head to “Accounts & Import” and select “Add a Mail Account”.

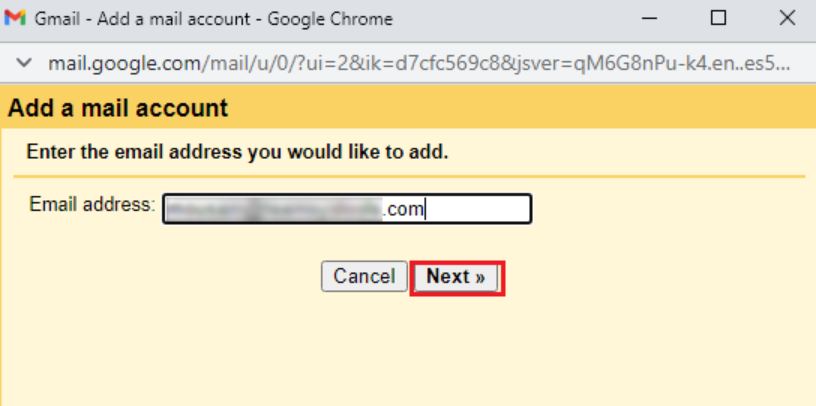
- Then, in the appeared window enter your CenturyLink email address and click “Next”.

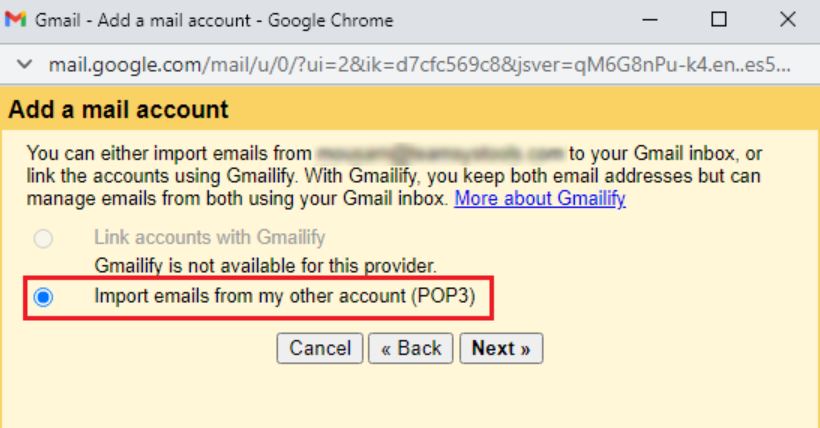
- Afterward, select the “Import Emails from my Other Account (POP3)” option and click “Next”.

- Then, proceed to enter your CenturyLink username and password in the required fields. Also, make sure to check the option “Leave a Copy of Retrieved Message on the Server”.
- Now, type and enter “pop.centurylink.net” in the “POP Server” field. Then, proceed to click the “Add Account” button.
- Afterward, select the “No” option and at last, click the “Finish” button.
By connecting the CenturyLink account to Gmail, your mailbox will be in Gmail automatically. Your emails directly move to Gmail. However, some users may have problems synchronizing your account. As we explained below.
Limitations with Manual Method
- Due to backend or network issues, the procedure could dissipate in between and users will have to start it all over.
- This is a time-consuming and tedious method that makes users look for quick and efficient alternatives.
- This method requires users to have technical insights. For a novice user, this process might get overly complicated to execute.
As you can see, this method is simple and free to use. However, it is not an ideal way to get emails from CenturyLink to Gmail. So, if you are having a problem with this. There is a professional method that can help you.
How to Forward CenturyLink Email to Gmail? Expert Solution
For a smooth transition, the Corbett IMAP Migration Tool will help you. This specialized tool allows you to migrate your emails from any webmail using the IMAP server. It moves the complete mailbox including email attachments and attributes easily. That’s why it is a great way to migrate your CenturyLink emails to Gmail or G Suite. The process of transferring the data is much easier and quicker where you can export multiple emails at once and does not require any additional software. Thus, below are the working steps of the CenturyLink to Gmail migration tool. Properly follow the steps and securely move your data.
Steps to Transfer CenturyLink Email to Gmail
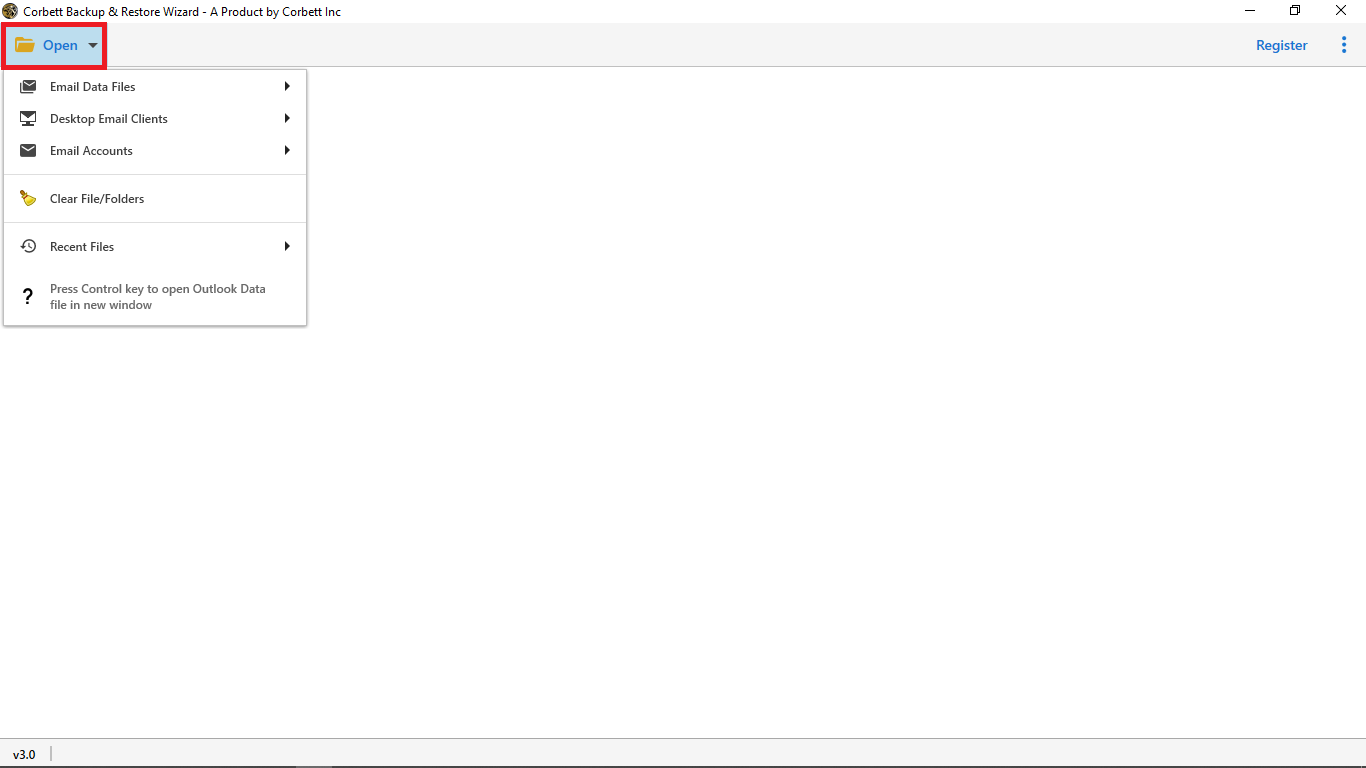
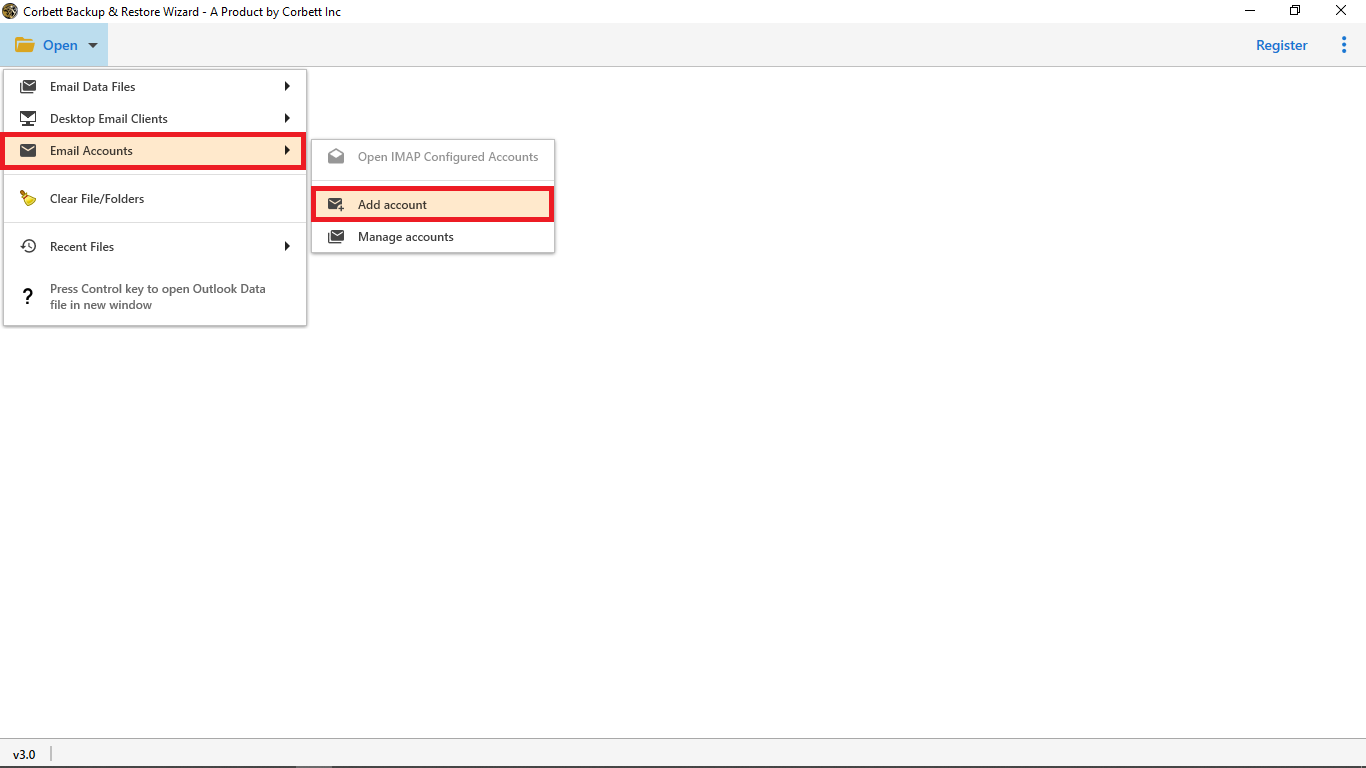
- Download and install this software on your Windows OS. Then, click the Open button to run the tool.

- Click on the Email Accounts, then Add Accounts options.
- Enter your CenturyLink email address and Password. Then, click the Add button.
- Once you configure the account, the software auto-fetches your emails and displays them in front of you. Preview the emails.
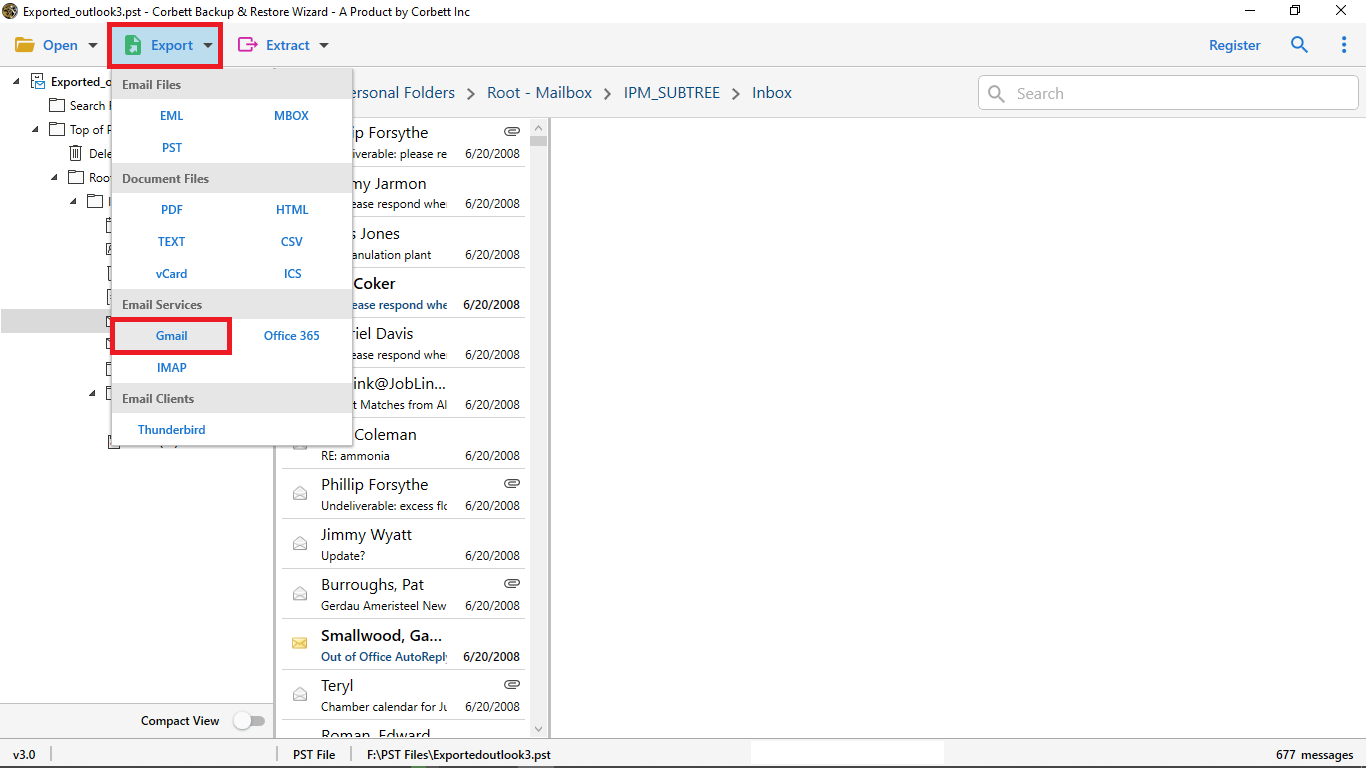
- Afterward, click on the Export option and select the Gmail option from the drop-down list.
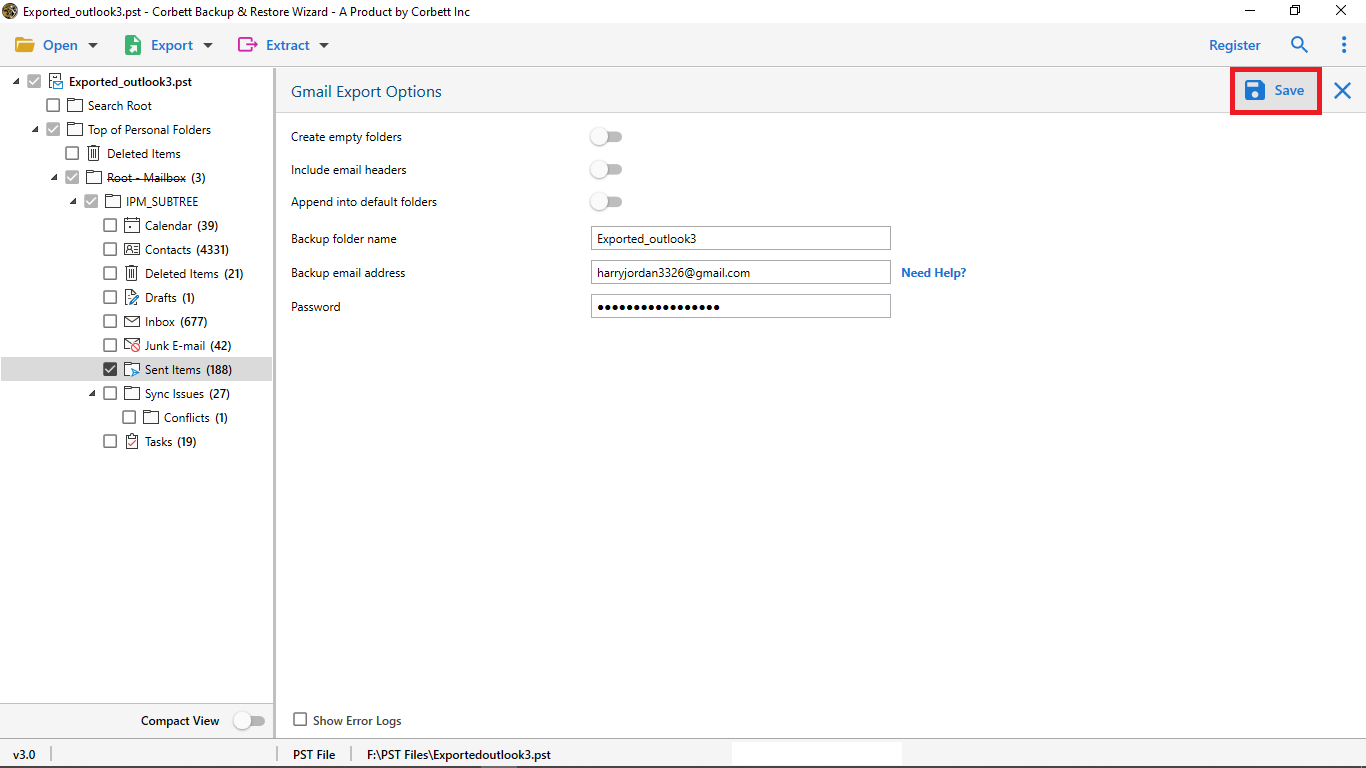
- Provide your Gmail account details, then click on the Save button.


Here are the steps to get your emails from CenturyLink to Gmail. This process is simple and offers great results. It also provides several features that help you in your work.
Advanced Features of Professional Tool
- The software offers search filter options, which you can use to sort out your data and export selective data.
- It supports 100+ email accounts. That’s why, it is a perfect solution to move your data from one account to another.
- You can preview your emails in multiple view modes like Hex View, Content, Message Header, and Raw Message.
- It maintains data integrity, email structure, and folder hierarchy during the process.
- This software is a Windows-based program, which you can download in any version and edition.
Wrapping It Up
To access your CenturyLink email in Gmail. This article provided two simple methods. The first one is the manual one where we connect our account to Gmail using the IMAP server. It is free, but it can cause you many problems. So, the professional method is the best. It directly transfers your data in less than a minute and most experts recommend this tool as well.
Frequently Asked Questions
Q. Is it possible to keep my email address if I close my CenturyLink account?
Ans. No, once you close your CenturyLink account, your email address will no longer be active. So, before closing the account, backing up your CenturyLink account is very important.
Q. How can I export my CenturyLink emails?
Ans. CenturyLink does not provide an option to save your email. However, if you sync your account with another email client you can easily save your CenturyLink data.
Q. Can I still use my CenturyLink emails?
Ans. Yes, if you have the correct credentials of your CenturyLink email account, then you can access your emails. However, inactive for a long time, deactivated your account. Therefore, log in at least twice a year to make your account active and working.
Read Similar Articles: