How to Add Gmail to Thunderbird Effortlessly?

Adding Gmail to Thunderbird allows you to manage emails offline, improve organization, and maintain backups. In this guide, we explain both the manual IMAP method and a professional solution to help you migrate Gmail emails to Thunderbird safely and efficiently.
Gmail, a widely used email client, offers reliable email services to its users. It is a webmail program that allows you to access your account from any platform or device. Gmail is a free program providing many features, including spam filters, 15 GB of free storage space, email filtering ability to organize your emails, and many more. However, despite these benefits, some users want to migrate Gmail to Thunderbird.
Mozilla Thunderbird, another email application for the desktop, is available for Windows, Mac, and Linux OS. It is also a free open source software that offers functions such as multiple account support, message filters, free add-ons and extensions, etc. Hence, importing Gmail emails into Thunderbird gives you many benefits, which we will explain below.
Benefits to Add Gmail to Thunderbird
Users who move Gmail to Thunderbird gain several benefits. Some of these are discussed below.
- Offline Access: Thunderbird is a desktop application that allows users to view their Gmail emails without the internet, using the MBOX file.
- Unified Inbox: As Thunderbird has an option to add accounts, users can easily manage multiple email accounts in one place.
- Data Backup: Having to migrate Gmail to Thunderbird will act as a backup to save users’ important emails.
- Export Option: Thunderbird allows you to export data in different file formats, like EML and MBOX.
- Security and Privacy: Users setup export Gmail emails to Thunderbird to obtain an extra layer of encrypted protection against malware practices like phishing, disruptions, ransom, etc.
- Improved Search: Along with Gmail, Thunderbird provides users with efficient tools to go through emails in large volumes locally.
- Customized Junk Mail: Another benefit users add Gmail to Thunderbird is that it enables them to flexibly customize their junk or spam mail effectively through filters.
These are the advantages you will get when you save your Gmail emails in the Thunderbird account. Now, we will explain the methods that we have found on the internet.
Manually Export Gmail Emails to Thunderbird
- Open Thunderbird on your computer.
- Click on the Tools, then click the “Account Settings” option.
- Then, click on the “New Account” option and choose “Mail Account”.
- Enter the full name, email address. Now, click the Manual Configuration.
- Add the details. Incoming IMAP Server Settings:
Hostname: imap.gmail.com
Port: 993
Connection Security: SSL/TLS - Outgoing SMTP Server Settings:
Hostname: smtp.gmail.com
Port: 465 (SSL/TLS enabled)
Connection Security: SSL/TLS
Enter your Gmail email address as the username and keep the Authentication Method as Autodetect. - Click Test and verify server settings.
- Finally, click Continue.
Now, a Google sign-in window will appear; log in and allows Thunderbird to access your access Gmail account. After that, you will see Gmail successfully configured in Thunderbird.
Also read:
Limitations of the Manual Method
Even with the best instructions, things can sometimes go wrong with manual solutions. Here are a few common issues you may face.
- You can add only one Gmail account at a time.
- Migrating large volumes of data can take a long time and slow down the process.
- Requires a stable internet connection.
- If the steps are not followed properly, there is a risk of data loss.
- Doesn’t maintain the original folder structure.
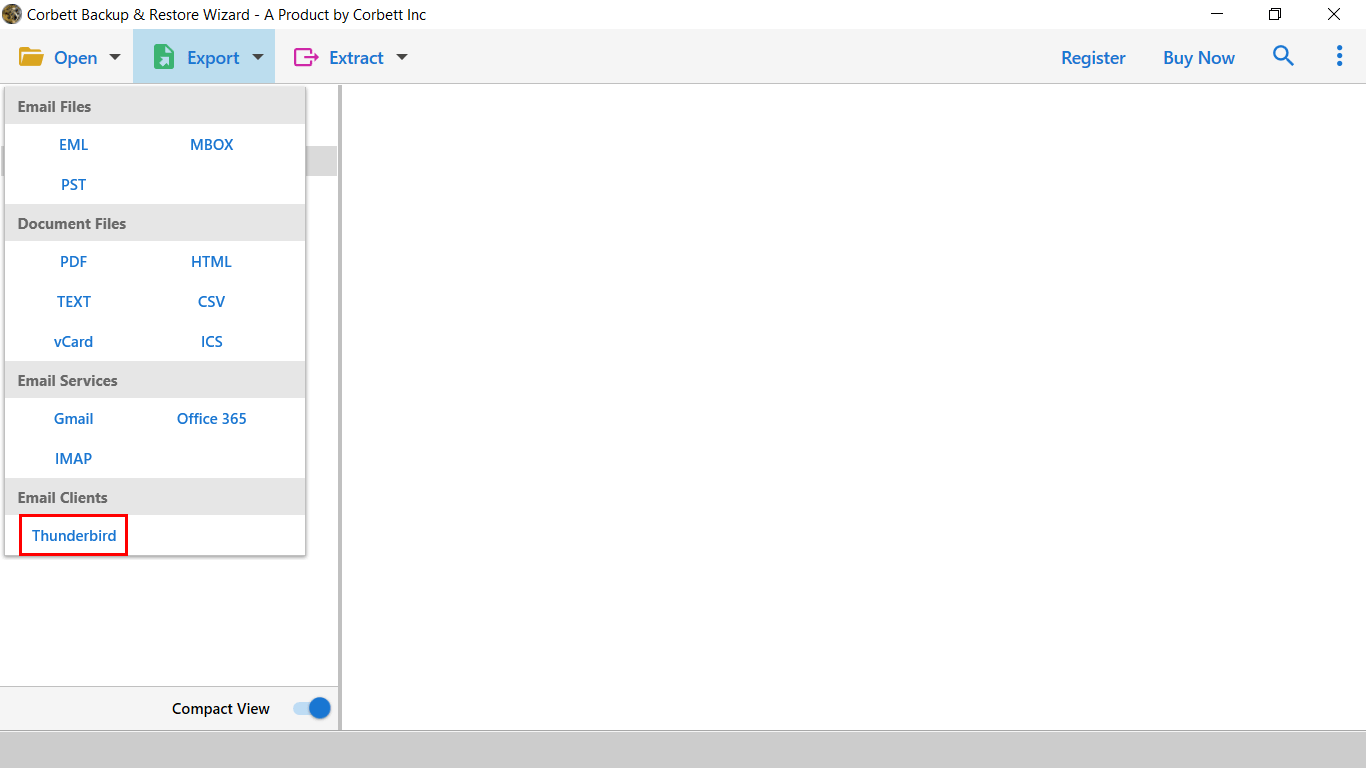
Export Gmail Emails to Thunderbird with a Secure Method
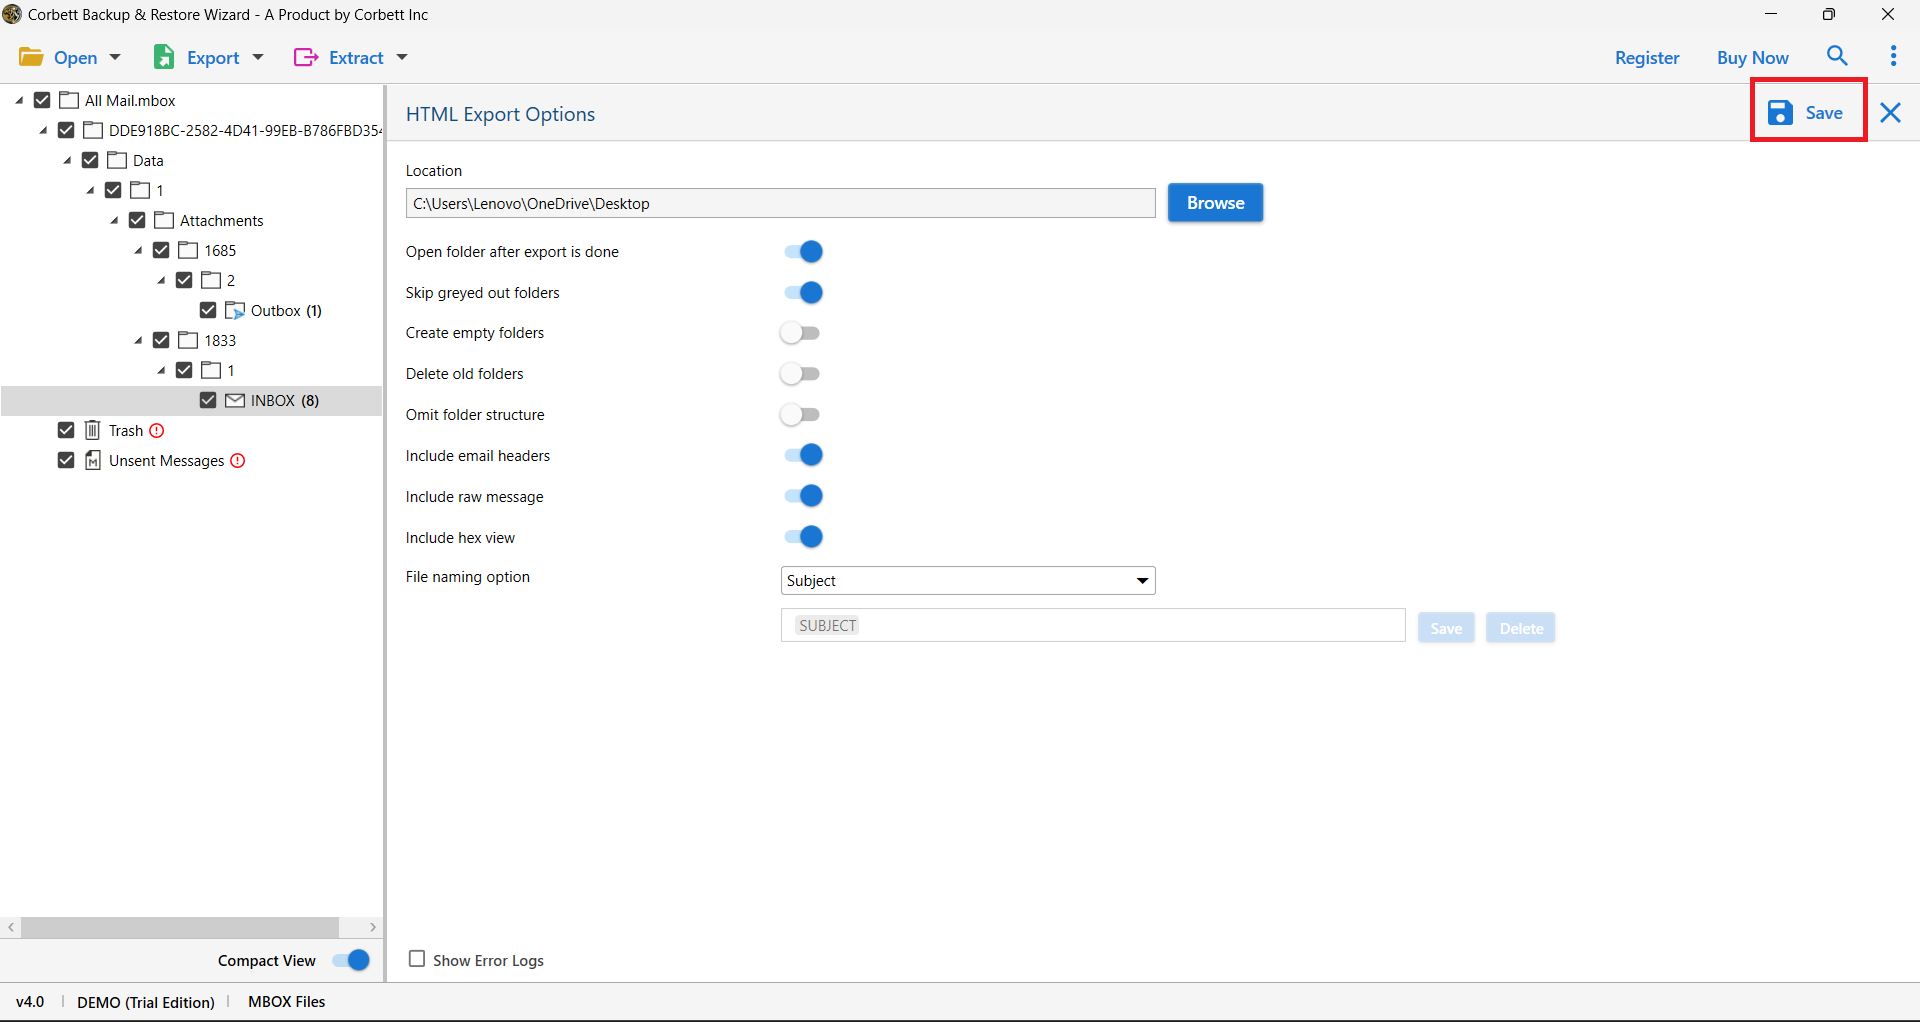
A reliable Gmail Migration Tool can simplify the process and reduce manual effort. This utility offers a reliable solution to the user’s “add Gmail to Thunderbird” problem. Using the software, you can securely save and export your Gmail emails, contacts, calendars, and attachments to any other email client. In addition to that, the software is compatible with all Windows OS versions. The best part of this utility is that you can directly migrate Gmail to Thunderbird without any issues. Below are the steps you can use to download your emails.
Steps to Move Gmail to Thunderbird Effortlessly
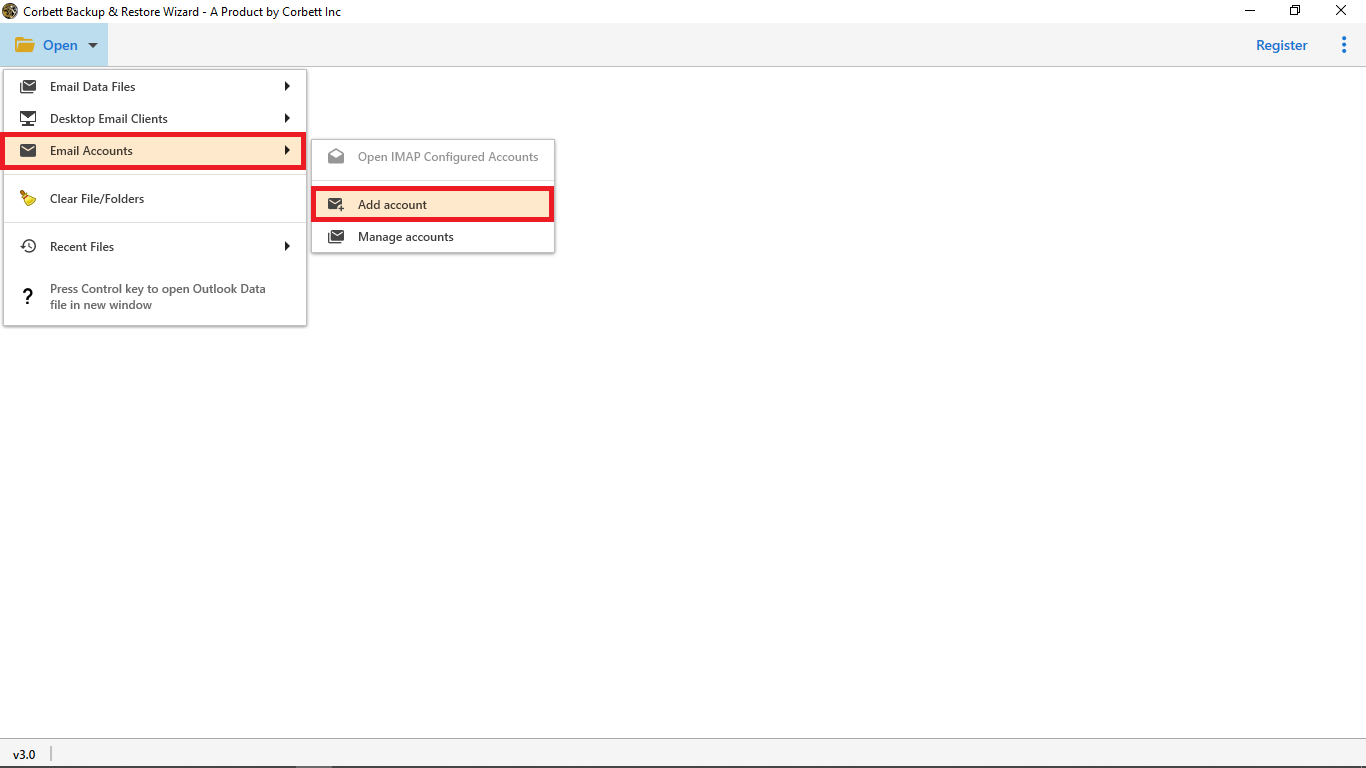
- Download and launch the Gmail Migration Tool on your Windows computer.
- Then, click on “Open” >> “Email Accounts” >> “Add Accounts”.

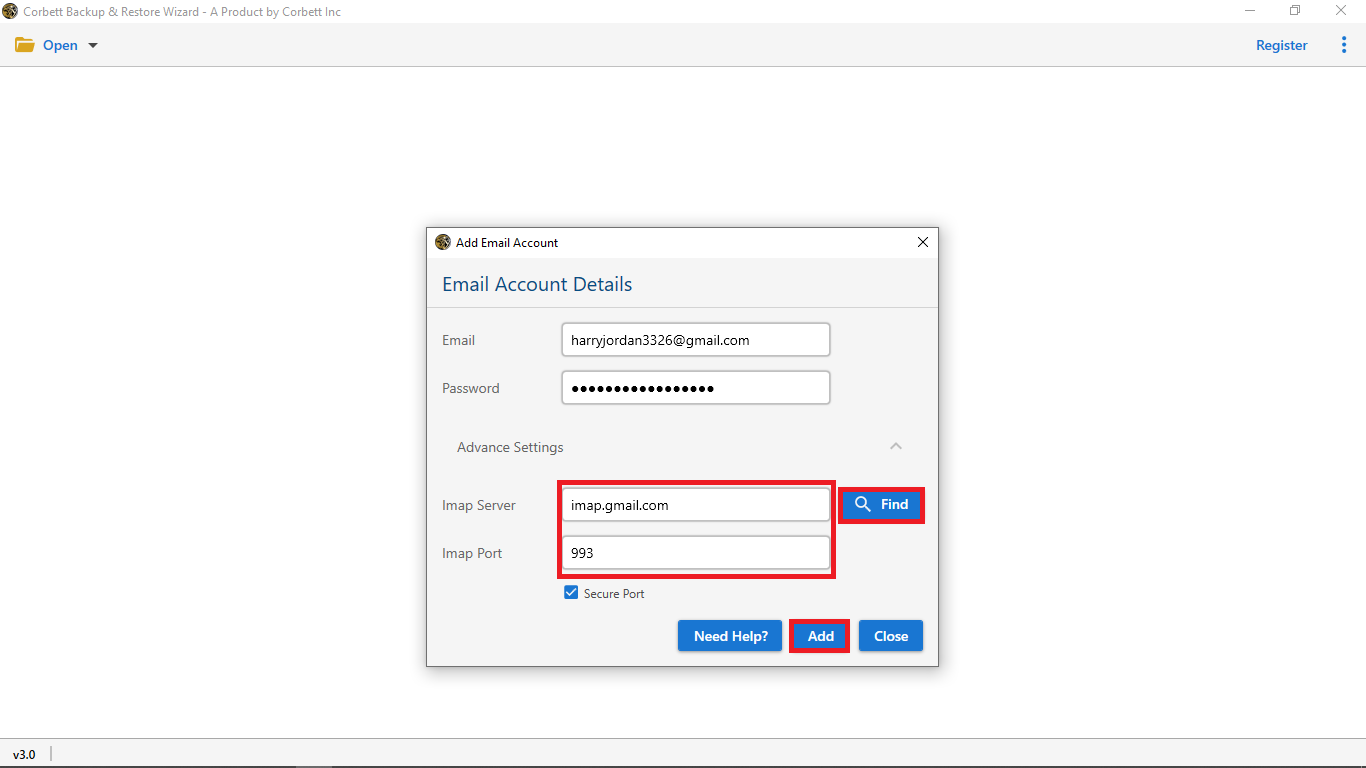
- Next, enter your Gmail account credentials (username & app password) to add your Gmail account to the software.
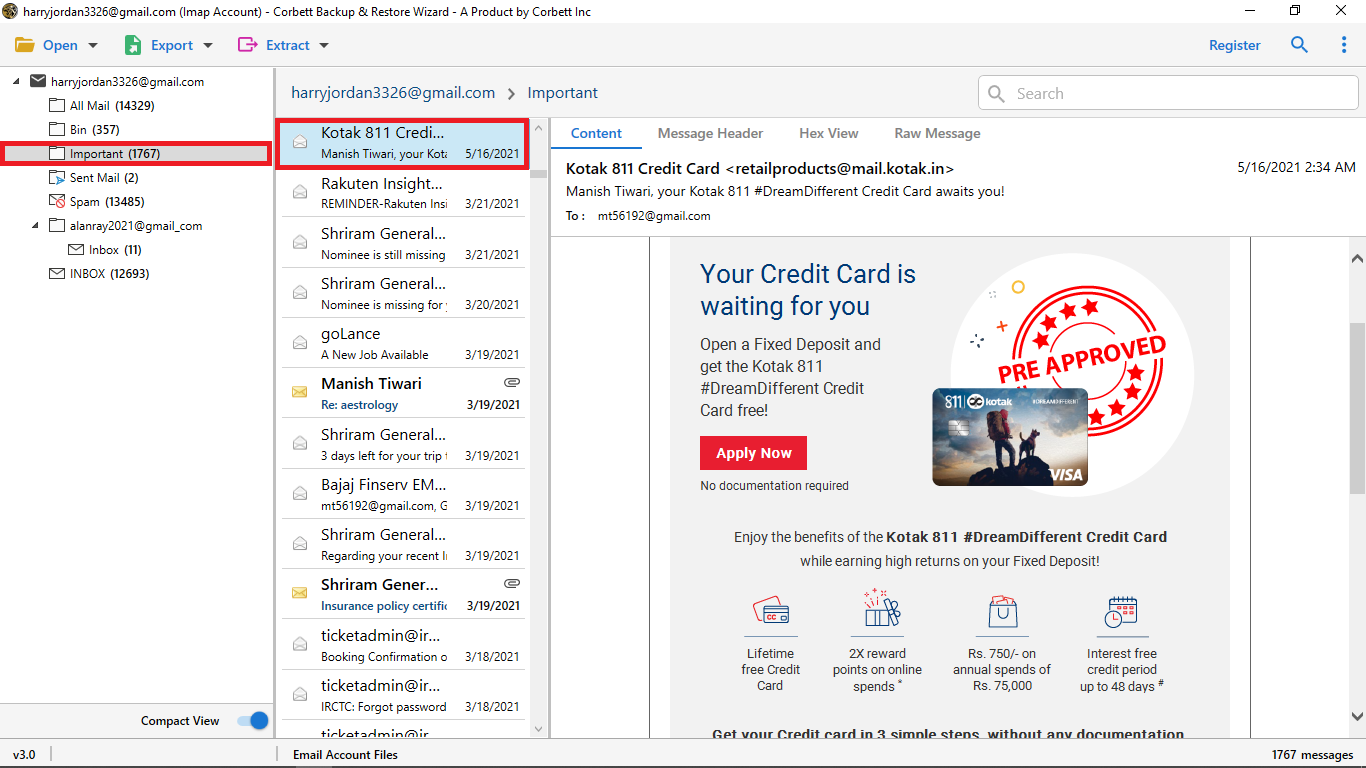
- Upon doing so, the tool will automatically load your Gmail mailbox, after which you can then preview your data before exporting it.
- Now, click the “Export” and select “Thunderbird” from the dropdown list.
- Finally, click on the “Save” button to start the import process.

Conclusion
In this guide, we discussed two easy ways to add Gmail to Thunderbird without losing any emails. This helps you manage your messages better, change settings the way you like, and read emails even when there’s no internet. You can pick any one of the solutions from the given guide according to your requirements.
Frequently Asked Questions
Q1: What server is used for Gmail in Thunderbird?
A1: The IMAP email server is used to connect your Gmail account in Thunderbird.
Q2: Can I add an existing email account to Thunderbird?
A2: Yes, you can add your existing email account, however, it should be IMAP-enabled.
Q3: Does the Professional’s tool protect the integrity of the data?
A3: Reputed software tools like ours make sure to sustain the integrity of the data, like attachments, email formats, structure of the folder, etc. to protect the users from losing their data while the user backup Gmail to Thunderbird.
Q4: How many email accounts can I add to Thunderbird?
A4: You can add as many email accounts to Thunderbird. There are no such restrictions on how many accounts you sync your accounts.
Q5: Why do I need an “App Password” to export Gmail emails to Thunderbird?
A5: Having an app password is needed if the user has the 2-step verification settings on. The password consists of a 16-digit code that allows Thunderbird to have access to Gmail, as it cannot deal with the 2SV prompts
Read More: