Expert Guide to Add COX Emails to Outlook 365
This blog will focus on our client queries, i.e., “how to move Cox emails to Outlook 365?” Here, you will get a step-by-step procedure to effortlessly forward Cox to Outlook. The process to accomplish this task is straightforward and provides accurate results. In this way, here we go.
If you own a Cox email account, you may know that it doesn’t provide any alternate option for moving email data messages to the Outlook profile. At this point, users are pretty frustrated because they didn’t get any reliable solution. So if you are one of those users who need to move from Cox to Outlook , then go through the blog mentioned below.
Why Do you Need to Forward COX to Outlook?
Multiple factors depend on why users decide to move Cox emails to Outlook 365. Some of them are mentioned below:
- Microsoft Office 365 is extending its services and gaining more popularity over time. If you decide to shift from Cox email to Outlook, it must be a good decision.
- The best part is that you can import your contacts similarly to other data to Microsoft Office 365.
- Over time, it offers improved and updated features to its customers.
- Being a desktop email client, it allows for managing multiple email profiles.
Manually Transfer COX Emails to Outlook
The procedure to forward Cox to Outlook is a pretty tricky task. You have to configure the account, which is again a time-consuming process. Follow this configuration setting if you want to continue with the manual solution.
| SETTING | INCOMING SERVER | OUTGOING SERVER |
|---|---|---|
| HOST | imap.cox.net | smtp.cox.net |
| Port | 993 | 465 |
| User Name | [username]@cox.net | [username]@cox.net |
| Connection Security | SSL/TLS | SSL/TLS |
| Authentication | Password | Password |
Use the mentioned data to forward Cox to Outlook for pc. We don’t recommend using the manual solution if you are not a technical geek.
Add Cox Email to Outlook 365 using Expert Solution
If you want effortless migration, you should go with Corbett IMAP Migration Tool. Without a doubt, it is a fantastic solution with easy to use graphical interface. Additionally, it works on all editions of Windows OS 10, 8, 7 & below versions.
Anyone can efficiently perform the migration without any issue. So you don’t have to worry about data loss or folder structure. You need to download the demo edition of the software and continue with the steps mentioned below.
Steps to Transfer COX Emails to MS Outlook
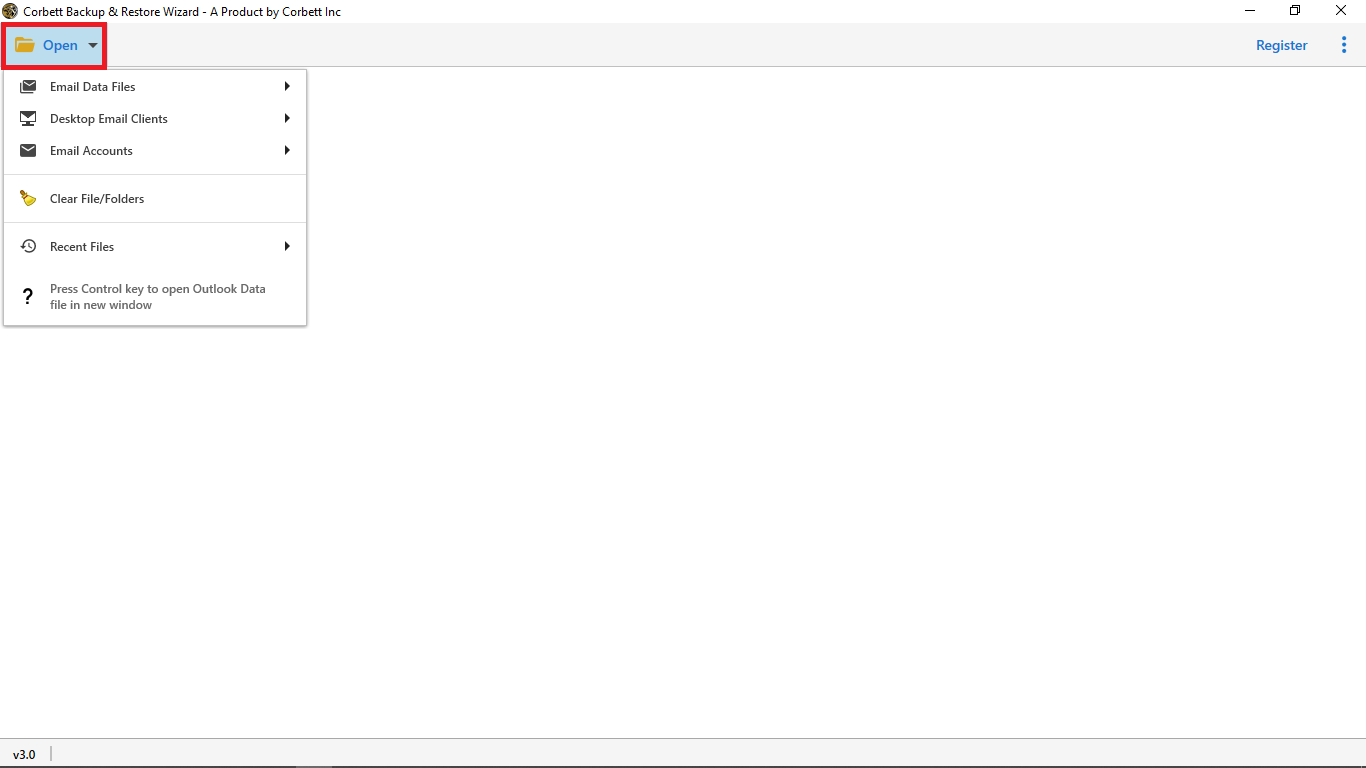
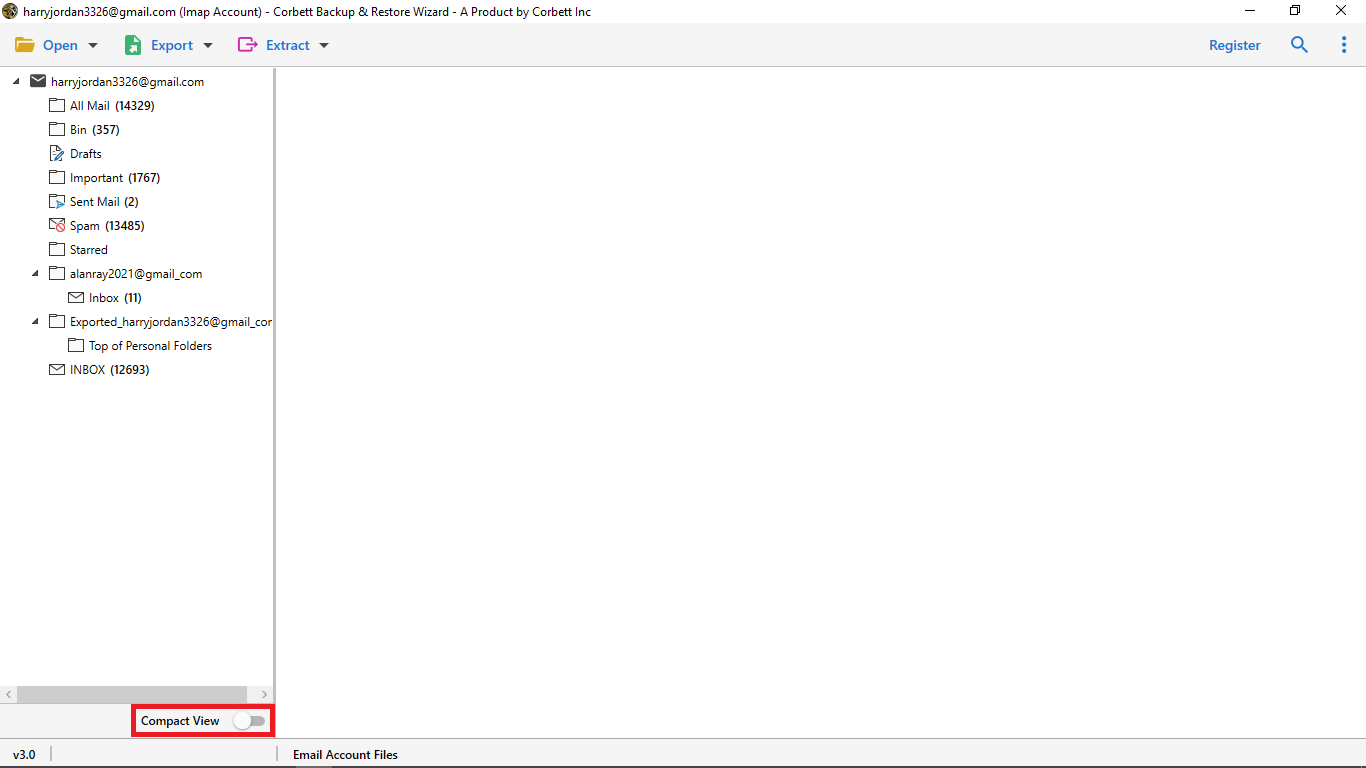
- Step 1.) Once you launch the tool, select the “Open” Button in the top left corner of the screen

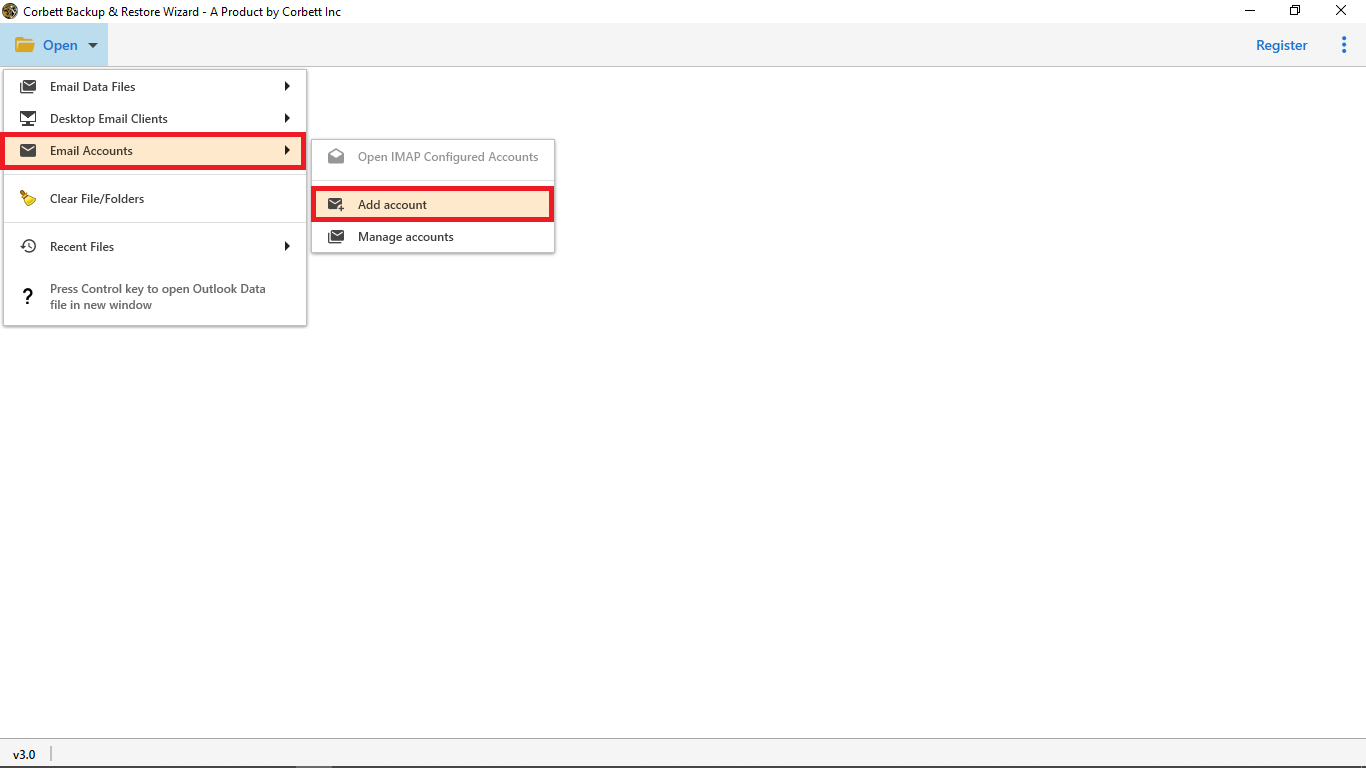
- Step 2.) Next, select the “Email Accounts” and the “Add Account” to go on.
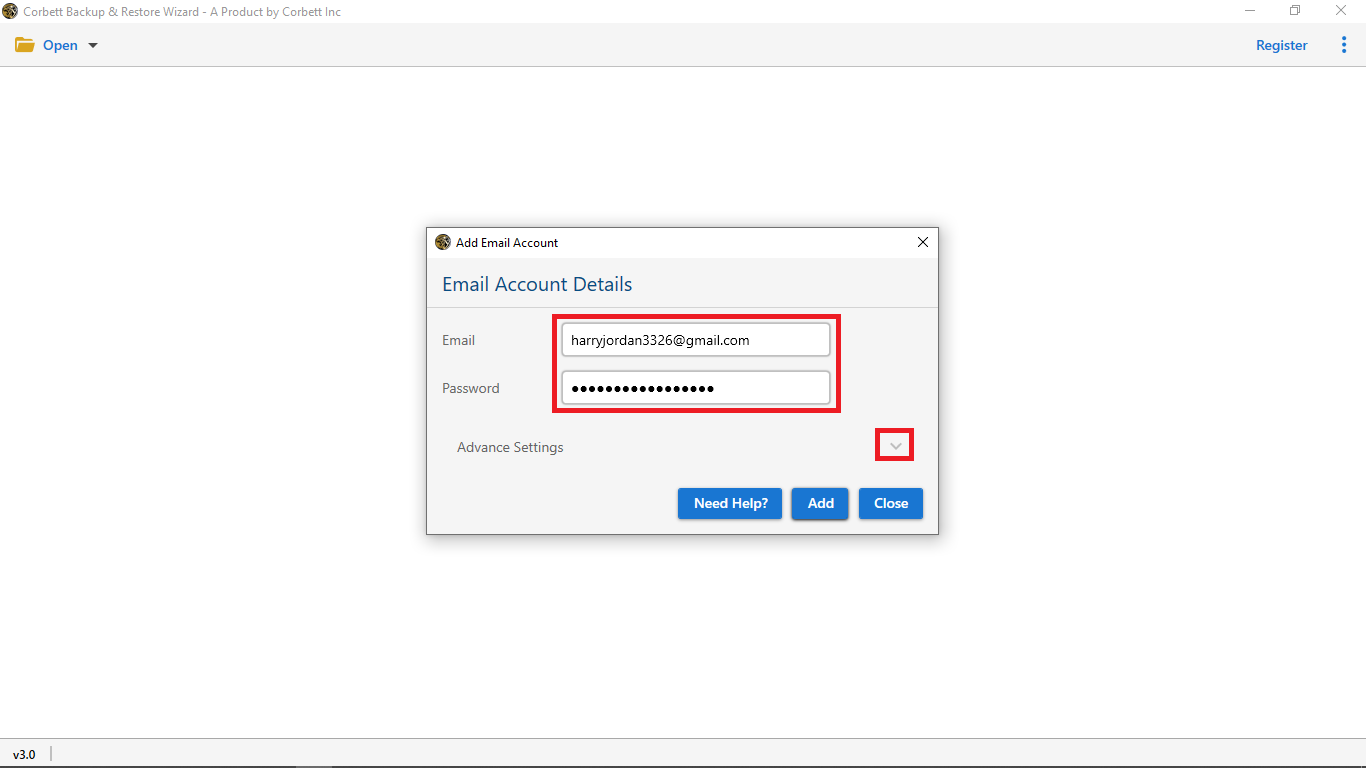
- Step 3.) Once done, Enter your Cox email ID and password. And continue by hitting the ‘Advanced Settings’ tab.
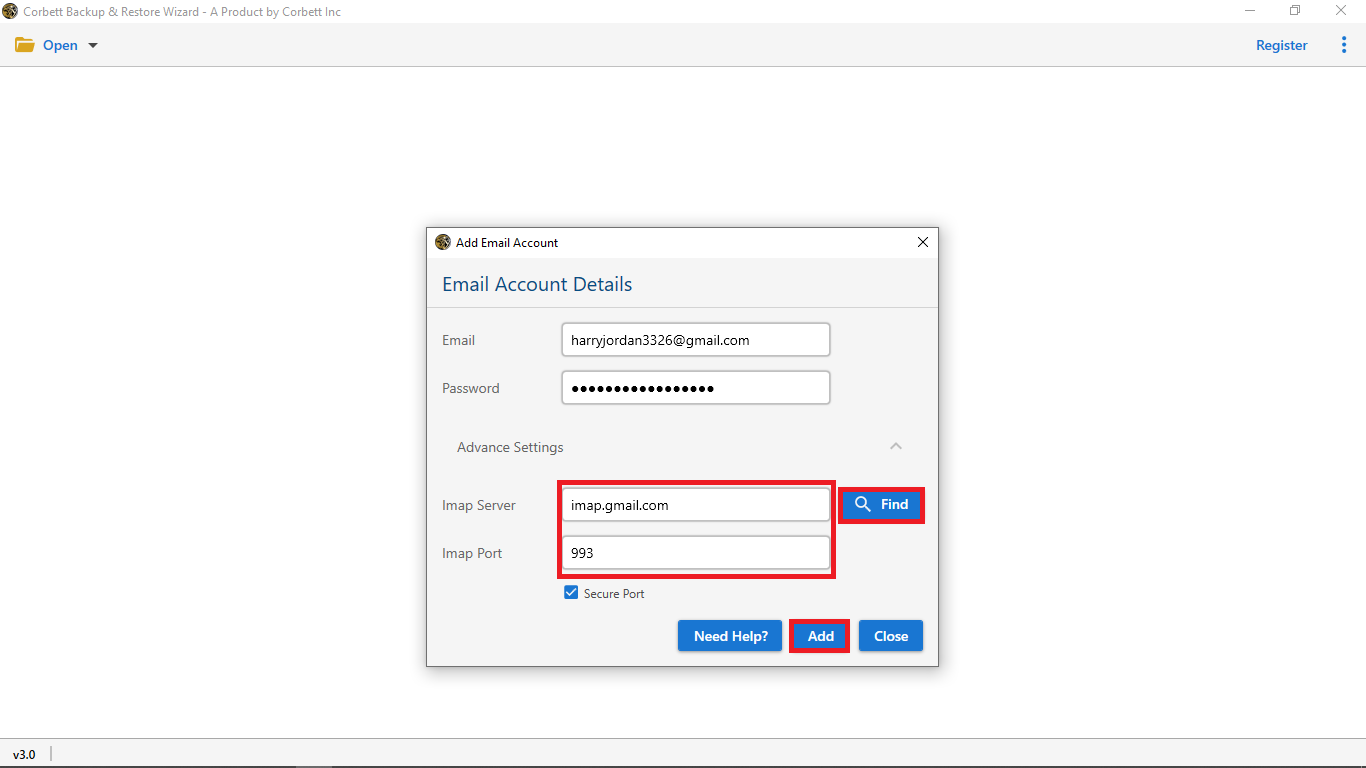
- Step 4.) Then, at that point, you will be required to give the IMAP server and hit the ‘Add’ button
- Step 5.) Then, the tool will start to investigate the entirety of the significant files.
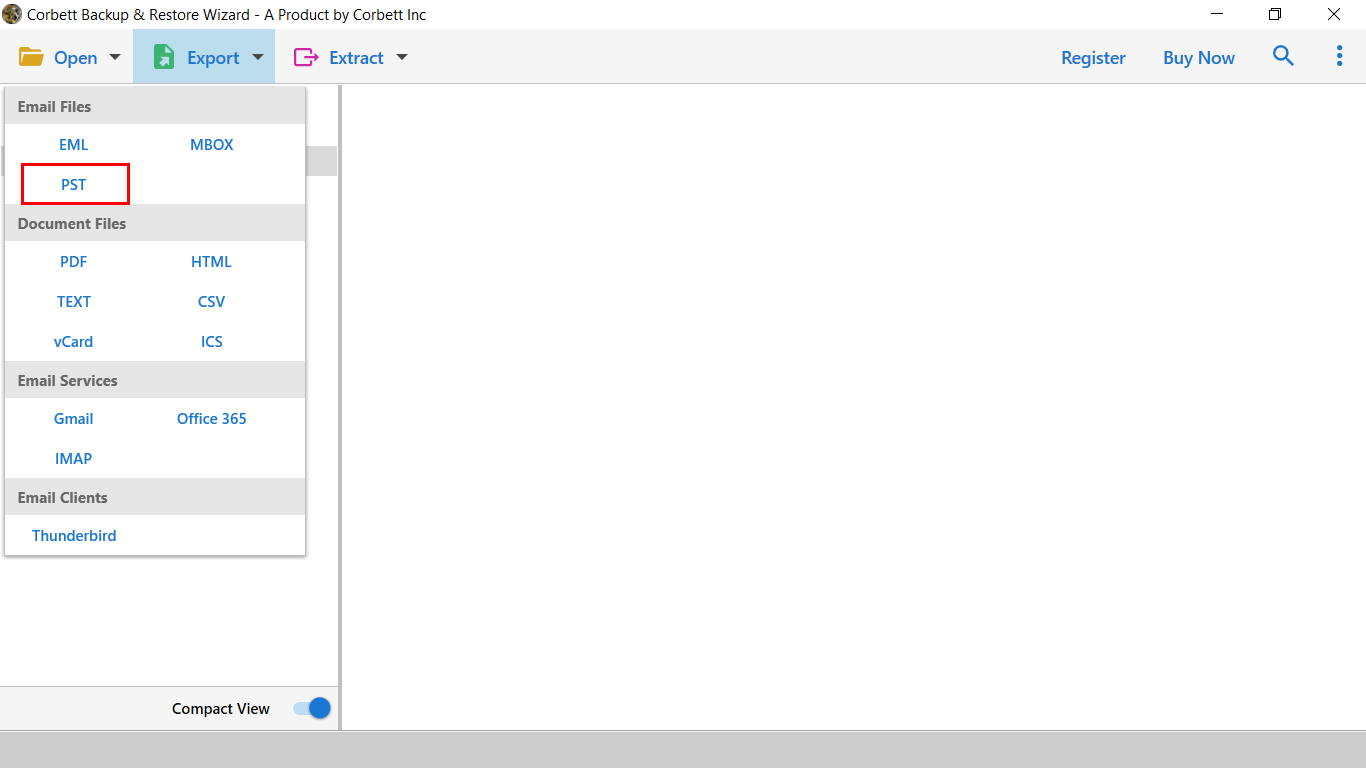
- Step 6.) Lastly, select “Export” and complete the transmission by hitting the “PST” button
The right execution of the methods will guarantee that you will be able to move Cox emails to Outlook 365. Let’s take a look at some of the prime features of toolkit. Once you have the PST file then you can easily import PST file to Outlook account.
Also Read: How to Transfer Cox Email to Gmail?
So There You Have It
In this article, we described two verified expert ways to transfer Cox emails to Outlook. However, there are numerous limitations associated with the manual approach. Therefore, if you’re not highly technically sound, we strongly recommend you go for the above-shared automated approach.