“OST has Reached The Maximum Size” – Query Solved

Facing the “OST has reached the maximum size” issue? You have come to the right post. Here, we have brought you top solutions that include a manual and an automated technique to overcome the problem of the OST file reaching maximum size. You can choose from to solve the issue and reduce your OST file size. So, read this entire blog till the end to see which solution best solves the problem.
The Outlook OST file, as we know, is a synchronized replica of the user’s mailbox. It contains all mailbox items like emails, contacts, calendars, etc. It helps users access their Outlook data in offline mode. However, the OST files have storage limits that can be surpassed with regular usage of the email client. Due to this, users suffer from issues like OST has reached the maximum size.
Therefore, to avoid this, we have brought you several methods from all over the internet. We have brought multiple manual methods as well as an automated utility to resolve the problem in a permanent way. So, without any further ado, let us get started with the solutions and see which one is a better fit for you.
Reasons Behind “Why OST Has Reached The Maximum Size?”
- Format Threshold Limit
The UNICODE format of MS Outlook has a size limit of 50 GB. This threshold can easily be surpassed with regular use of the email client. Once exceeded it causes problems such as OST has reached the maximum size limit for the users. - Limit on File Size
More often than not, file sizes have a limit, and Outlook files do too. The ANSI file format of Outlook has a 2 GB limit which can be easily filled within a span of a few months. Upon filling the limit, it can easily cause problems with the OST file. - Issues with Registry Entry
When two Outlook versions are installed on the same machine at the same time, they are prone to cause errors. Due to this, some registry entries might not be updated and could cause OST errors.
Now that we have cleared up potential reasons that cause this size error in OST files, let us move on and see how you can fix the problem.
How to Fix the “OST File Reached Maximum Size” Issue Manually?
The prominent solution to resolve the error is to increase the mailbox size limit by asking the Exchange admin. Once the mailbox size increases – the error will automatically revert. However, it will appear again once the OST file reaches the newly set threshold limit.
Now, several ways can help you increase the limit of your mailbox size. The prime one is reducing the size of your data and that will automatically free up the storage space.
1. Reduce OST Size by Compacting
First and foremost, delete the items from OST files that you do not want to keep anymore. Then, clear out the deleted items folder.
- Select File >> Account Settings and then select Account Settings again.
- Then, under the Data Files tab, select the OST file that you wish to compact.
- Then, click on Settings >> Advanced >> Outlook Data File settings…
- Next, click on Compact Now >> OK.
And that is how you can manually compact the size of your OST files. Following the steps, you can compress your OST file to an extent and resolve the “OST has reached the maximum size” issue temporarily.
2. Clear Out the Mailbox
- Select File >> Info and select Cleanup Tools.
- Then, from the dropdown menu, select the mailbox cleanup option.
- You can click on the “View Mailbox Size” button and see your current mailbox size stored in the local OST file on the server.
- Enter date range to find the older emails and delete them in order to reduce the size of your OST file as well as the mailbox on the server.
- You can also use “Find items larger than”, “Empty deleted folders”, “View deleted items size”, and “Empty Conflicts” to reduce PST file size.
Furthermore, you can also find large emails, download their attachments, and then delete the attachments from the emails to reduce storage space.
3. Disable the Shared Folder Synchronization
- Click File >> Account Settings and then Account Settings again.
- Select the OST file under the Data Files tab.
- Click on Settings >> Advanced and then select Outlook Data Settings…
- Now, uncheck the box for “Download Shared Folders” and click on OK.
- Lastly, restart your Outlook and wait for the synchronization to complete.
This was the manual solution to resolve the “OST has reached the maximum size” issue by clearing out the shared folders. In this procedure, we disabled the shared folder synchronization to reduce the OST size.
4. Adjust the “Mail to Keep Offline” Settings
- Start the email client and select File > Info > Account Settings > Account Settings.
- Select your email account/profile and click on Change.
- Now, adjust the “Mail to Keep Offline” folder.
Here, you can choose between 3 years, 5 years, or All. Outlook will synchronize depending on how high you set the range. A limitation of this method is that you may not get emails with results that are older than the range you have chosen in the settings.
5. Configure OST File Size Limit with Registry Key
If you do not want to remove attachments from your email messages or delete your emails in order to reduce OST file size, then you can use this alternative solution to resolve the “OST has reached the maximum size” issue. By simply changing the Registry Key’s entries and values, you can reconfigure the OST file size limit. There are four registry entries that you can edit and set a maximum size for an OST to grow.
- MaxFileSize and WarnFileSize
These two Registry entries refer to the ANSI formatted OST file size limit which is a maximum of 2 GB for Outlook 2000.
- MaxLargeFileSize and WarnLargeFileSize
These two Registry entries let you set the UNICODE formatted OST file to a maximum 50 GB size limit for Outlook 2010 and later; 20 GB for Outlook 2007 and 2003.
6. Move OST Mail Items to Archive Folder
Another alternative for when you don’t want to delete your OST emails and attachments is moving them to an archive folder. This helps significantly reduce your OST file size as well as keeps all the emails and other OST items intact. Here’s how to do it:
- Open Outlook 2013. Go to File >> Clean up Tools >> Archive. For Outlook 2016 or 2019, head to File >> Info >> Tools >> Clean Up Old Items.
- Next, click on the “Select the “Archive this folder and all subfolders” option.
- Now, choose a folder from a list for the archive.
- Then, select the “Archive items older than:” date.
- Click “Browse” to set a destination location for resultant files and click OK.
You can also choose to create another folder in your Outlook for moving all the emails with large attachments. And then, proceed to archive the folder using the above-mentioned steps. This helps in greatly reducing your OST file size.
Resolve “OST File Reached its Maximum Size” Issue – The Expert Way
If the manual methods turn out to be not feasible for you, then experts suggest using an automated solution. Thus, to provide you with the best experience, we have brought you none other than the Corbett OST Converter Tool. This utility is backed by countless experts as it provides a secure and smooth-sailing solution to its users.
It is packed with a myriad of features that make it a rare find nowadays. It not only batch converts OST files but also supports converting even orphaned and corrupted OST files into healthy formats. In addition to that, it provides numerous advanced options that make the process even more efficient for users, for instance, you can create individual PST files for each folder, skip greyed-out folders, delete old folders, create empty folders, etc. Moreover, it is compatible with all versions of the Windows OS. Thus, one can use it on any Windows machine without any issues.
Steps to Resolve “OST Has Reached the Maximum Size”
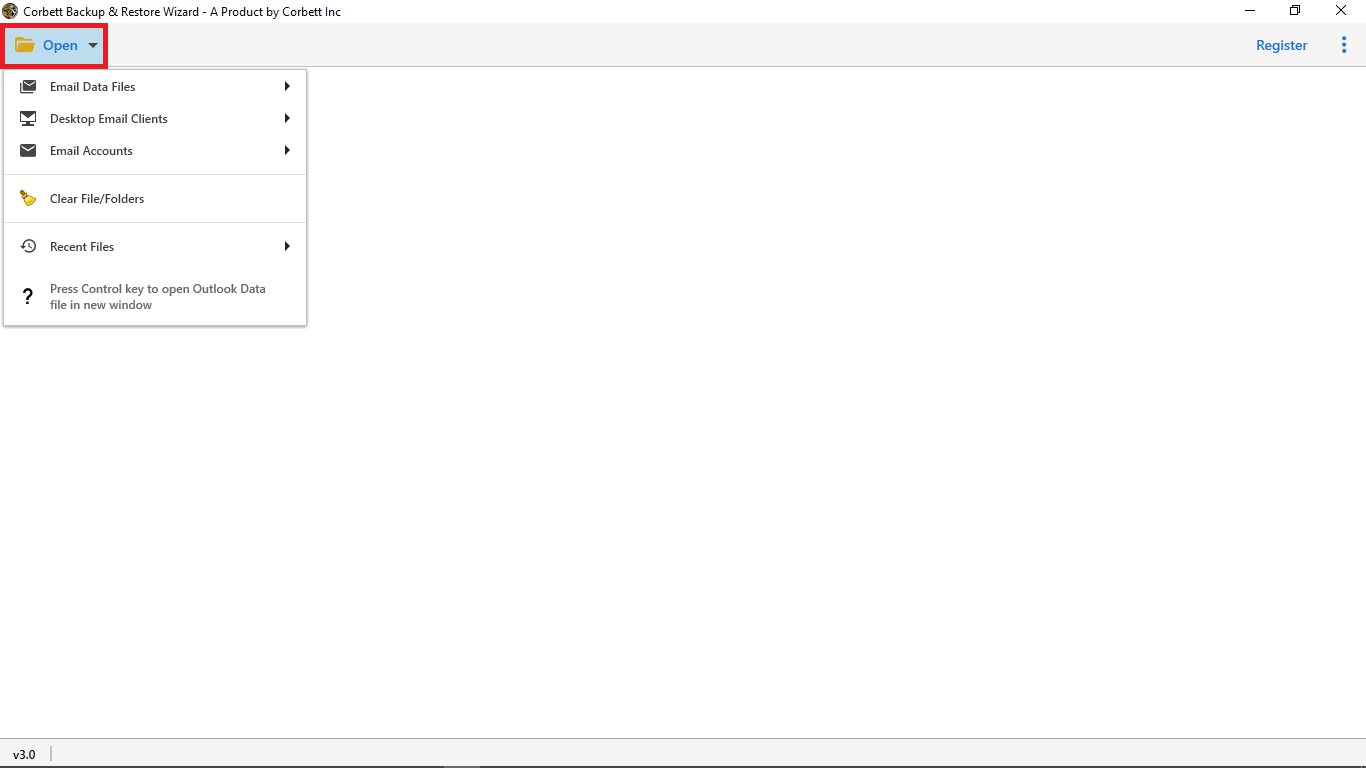
- Download and launch the utility on your Windows system and click on the Open button.

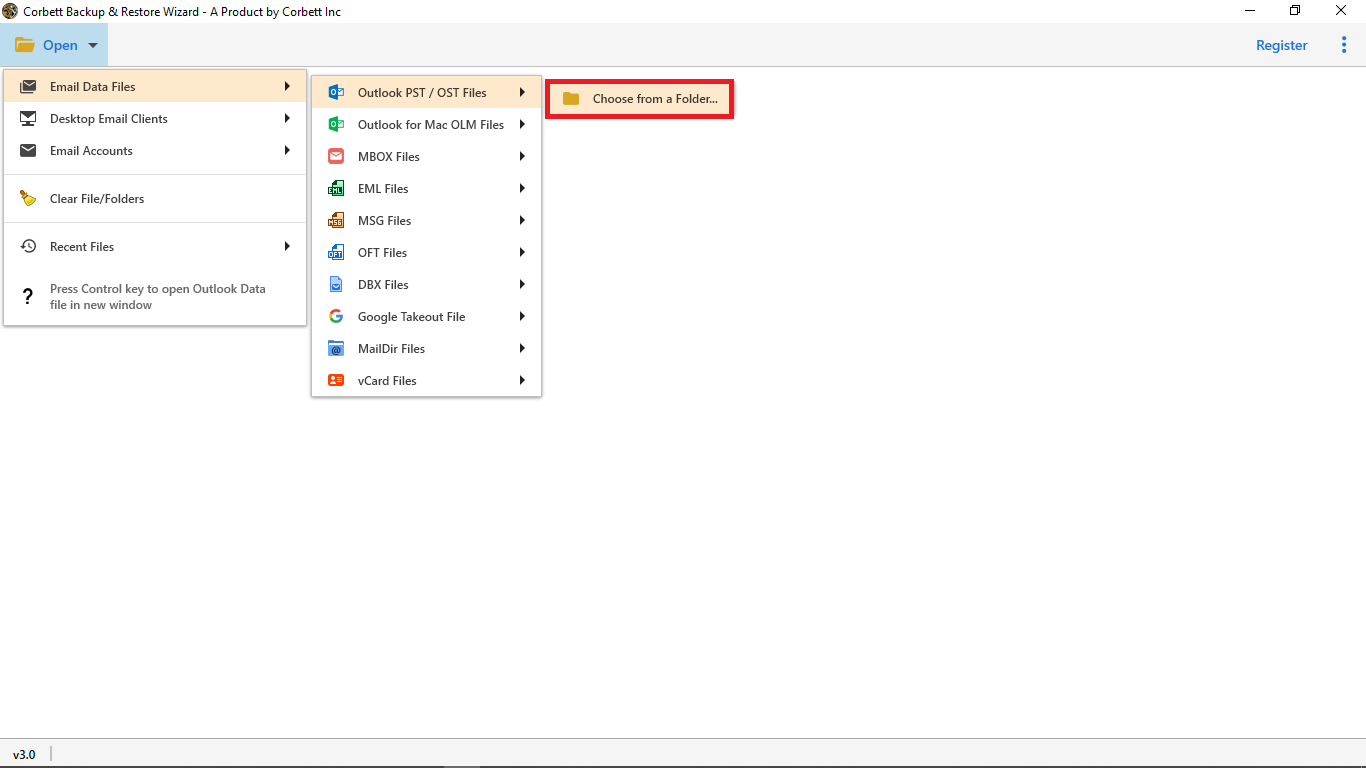
- Now, select Email Data Files >> OST Files >> Choose File or Choose Folder to add and load your OST files to the software.
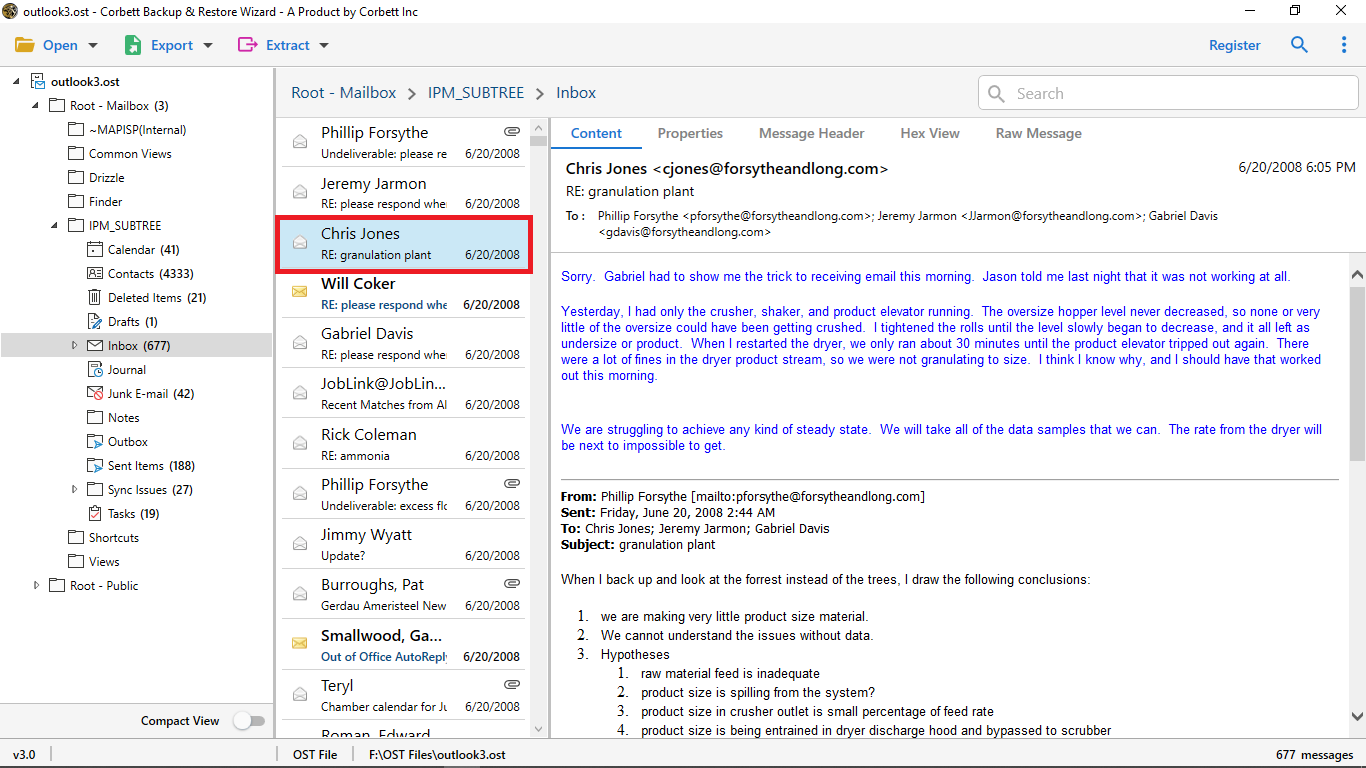
- Preview your uploaded OST file data in the dedicated panel of the software. Use the search settings to filter and sort data according to preference.
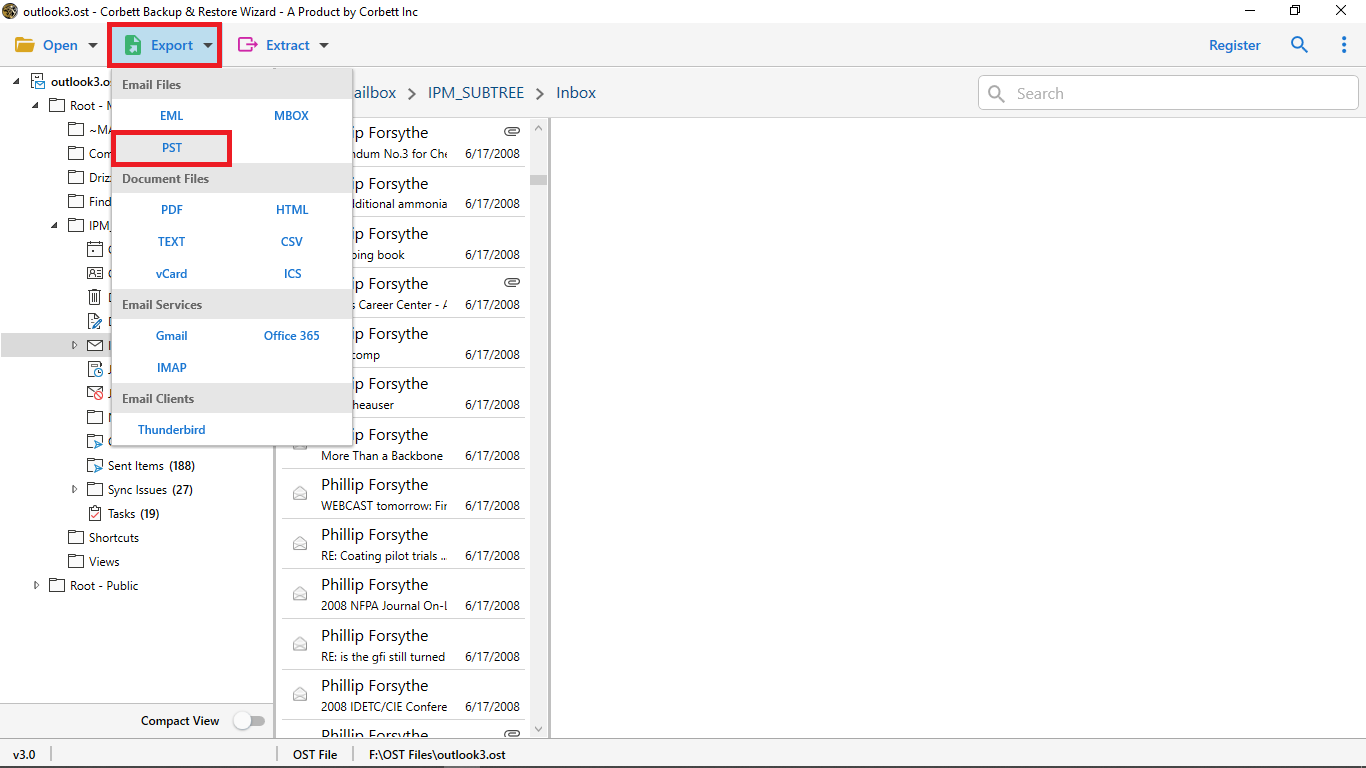
- Click on the “Export” tab and select the “PST” format from the dropdown list.
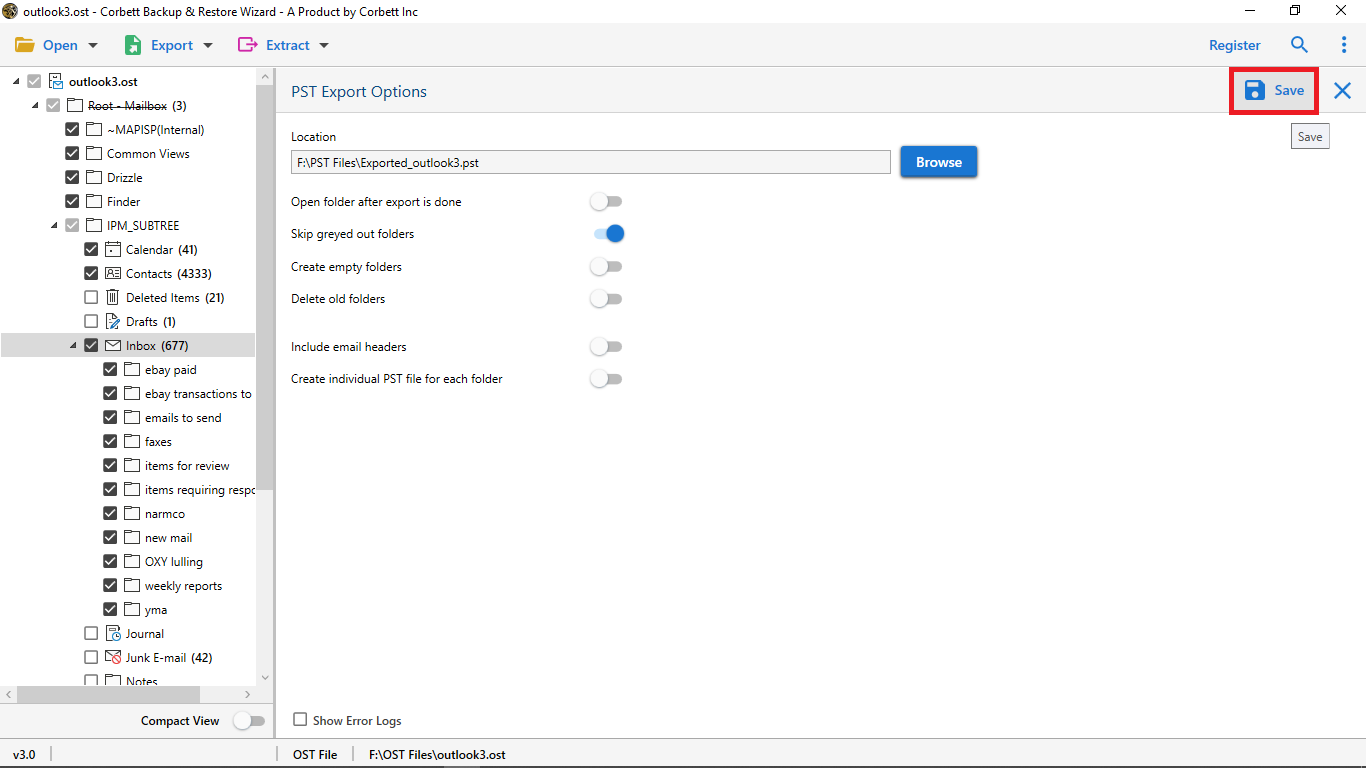
- At last, utilize the provided advanced options, for instance, “create individual PST file for each folder” and click on the “Save” Button.
So this was the hassle-free tutorial to use the expert utility to fix the “OST file has reached the maximum size” issue.
Furthermore, if you want to divide your resultant files based on the category of items, you can do so by checking the box for the “Create individual PST file for each folder” option in the advanced options at the end. Enabling this option will help you create multiple PST files, each containing different category items of the resultant files.
Why Choose The Professional Utility?
- It is proficient in converting OST files into other formats smoothly and efficiently.
- It supports converting user OST files in batch mode which saves a significant amount of time and effort.
- The utility can efficiently extract contacts from OST files for selective conversion.
- You can also create an individual PST file for each folder based on your category of items for smoother organization and segregation.
- It can extract email addresses from OST files in a hassle-free way as well.
- Along with that, it is also capable of successfully extracting attachments from OST files.
- It is also compatible with all versions of the Windows Operating System, whether the latest or older.
So There You Have It
In this article, we discussed how to resolve the “OST has reached the maximum size” issue. We shared multiple manual methods as well as an automated utility backed by numerous experts. In case none of the manual methods work for you or you want to migrate your OST file data, you can do so with the help of the above-mentioned expert utility.
Questions People Ask!
Q: What is the size limit of an OST file?
A: The overall size of an OST file has a limit of 50 GB for Outlook 2010, and for earlier versions, it was 20 GB. The limit is applied using Unicode.
Q: Can I increase the size limit of the OST file?
A: Yes, you can increase the size limit of OST files by editing the Windows registry. However, this process is risky and requires technical knowledge, and may not be compatible with non-technical users.
Q: Is it safe to increase the OST file limit?
A: By following the technical process, it is possible, but it is not an officially recommended technique by Microsoft.
Q: Is there any other way to increase the OST file size?
A: Yes, alternatively, you can increase the size of OST files. Some of the best ones are:
- Delete the unused or unnecessary attachments.
- Save or download the old emails.
- Use professional tools to manage the data, such as the Corbett OST Converter Tool.