How to Connect SiteGround Email to Gmail? – Use this Expert guide!
SiteGround is a web hosting company, but it also provides services like domain registering, email hosting, and cloud hosting. In the email services, it provides you hosting, email marketing and email account management for the standard business communication. The program easily integrates with many email programs like Gmail. But before connecting the account, first we should know the scenarios of why there is a need to move the SiteGround account to Gmail.
Why Add SiteGround Email to Gmail?
Managing emails in one place saves time and reduces stress. Plus, integrating SiteGround email with Gmail you can easily access the data. Here are the main benefits of connecting your SiteGround email to Gmail:
- Centralized Communication: Having your multiple accounts in one place allows you to easily manage and access the data.
- Improved Productivity: Users link their Gmail to G Suite, where you can take the benefits of Google Apps like Doc, Spreadsheet, PPT, etc. This increases productivity.
- Advanced Features: Gmail’s has powerful features like labels, filters, and search which you can use to organize your emails.
- Secure Access: Gmail adds an extra layer of protection of your email by using the two-factor authentication, spam filtering, etc.
- Cross-Platform Access: Gmail has its own mobile app and is also a webclient. So, by using Gmail you can get your SiteGround data from any device.
- Cloud Backup: To securely store your SiteGround data, Gmail is the best option.
For these reasons many of the users want to migrate emails from SiteGround to Gmail. Now, to the main topic of the post. So, we have found two methods from the internet which help you in your process. First one is the manual method which we explain in detail below.
How to Manually Link SiteGround Email to Gmail?
Before going through the steps, you have to make certain points. You must know your SiteGround email address, password and the settings of IMAP or POP3. This is crucial as most of the users couldn’t sync their account with incorrect details. After that carefully follow the steps.
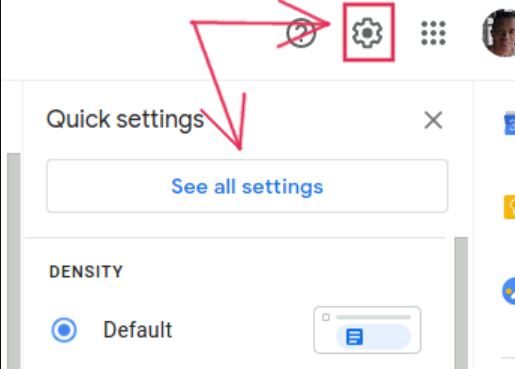
- In your Gmail account. Click on gear icon (⚙️) and select “See all settings”.
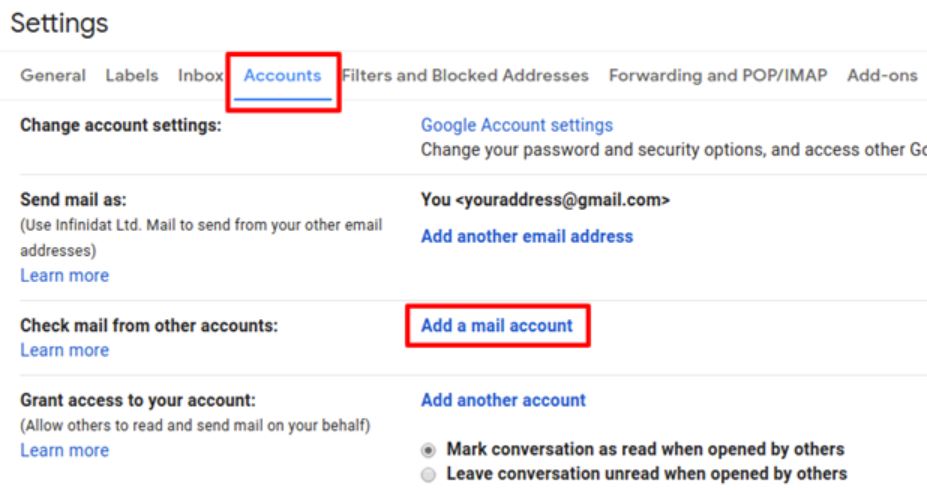
- Then, click on the “Accounts and Import” tab at the top.
- Under the section of “Check mail from other accounts”, press the “Add a mail account”.
- Now, type your SiteGround email address and hit “Next”.
- Choose the “Import emails from my other account (POP3)” option. Press the Next button.
- Enter your username, password, and POP3 server details:
- Server: mail.yourdomain.com
- Port: 995
- Check the box for “Always use a secure connection (SSL)”.
- Click “Add Account”.
- After adding the account, Gmail will ask if you want to send emails using this address. Select “Yes”.
- Enter your SMTP server details:
- SMTP Server: mail.yourdomain.com
- Port: 465 or 587
- Check the box for “Use SSL”.
- Enter your SiteGround email and password again.
- Click “Add Account” at last.
- To check if the account is configured, send a test email.
This is the manual way to add your SiteGround account. This method is free to use, but it contains a lot of steps and also you may have issues with this process.
Common Issues Associated with the Manual Approach
- If you enter incorrect server settings or there is an issue in the server. Then, you may have the issue of connecting your account.
- There are chances that some of the data will be missing after the process.
- You need professional knowledge to connect your account. or understanding the working of the server.
Thus, following the manual method can cause you these problems, but don’t worry, we have another method which you can use to get your data.
Migrate Email from SiteGround to Gmail with Expert Suggested Method
When it comes to a smooth and secure migration process, no other solution compares to the Corbett IMAP Migration Software. Numerous technical experts have deemed this utility as their personal favorite as it delivers astounding results.
This tool is loaded with amazing filters and features that make the entire process a hassle-free experience for users.
5 Quick Steps to Add SiteGround Emails to Gmail
- Install the Corbett SiteGround Email Migration Software. Click the “Open” tab and select “Email Accounts” >> “Add Accounts”.
- Enter your SiteGround Email login credentials, press the “Add” button.
- Once the software uploads the data, preview the emails.
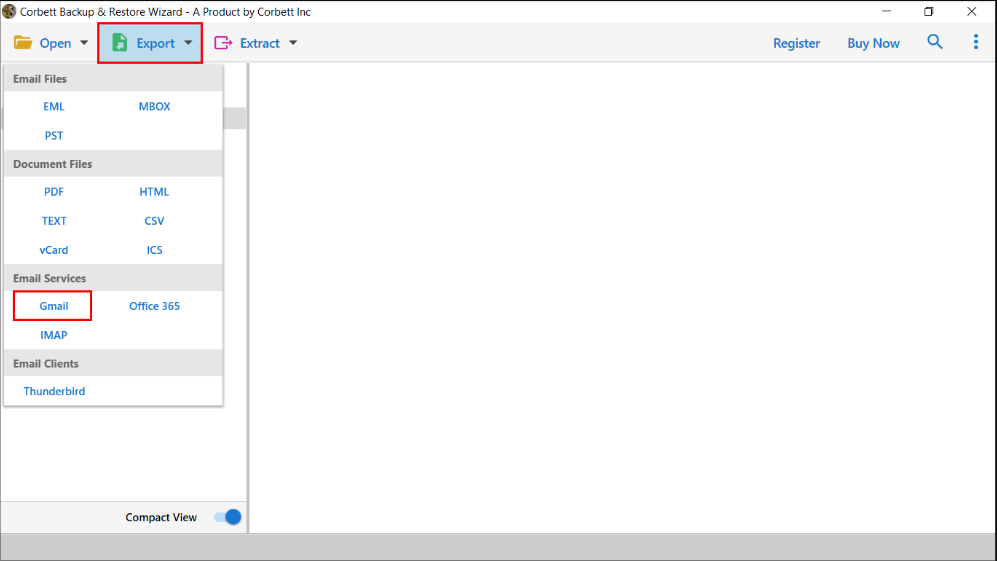
- Then, click the “Export” button and select the “Gmail” option.
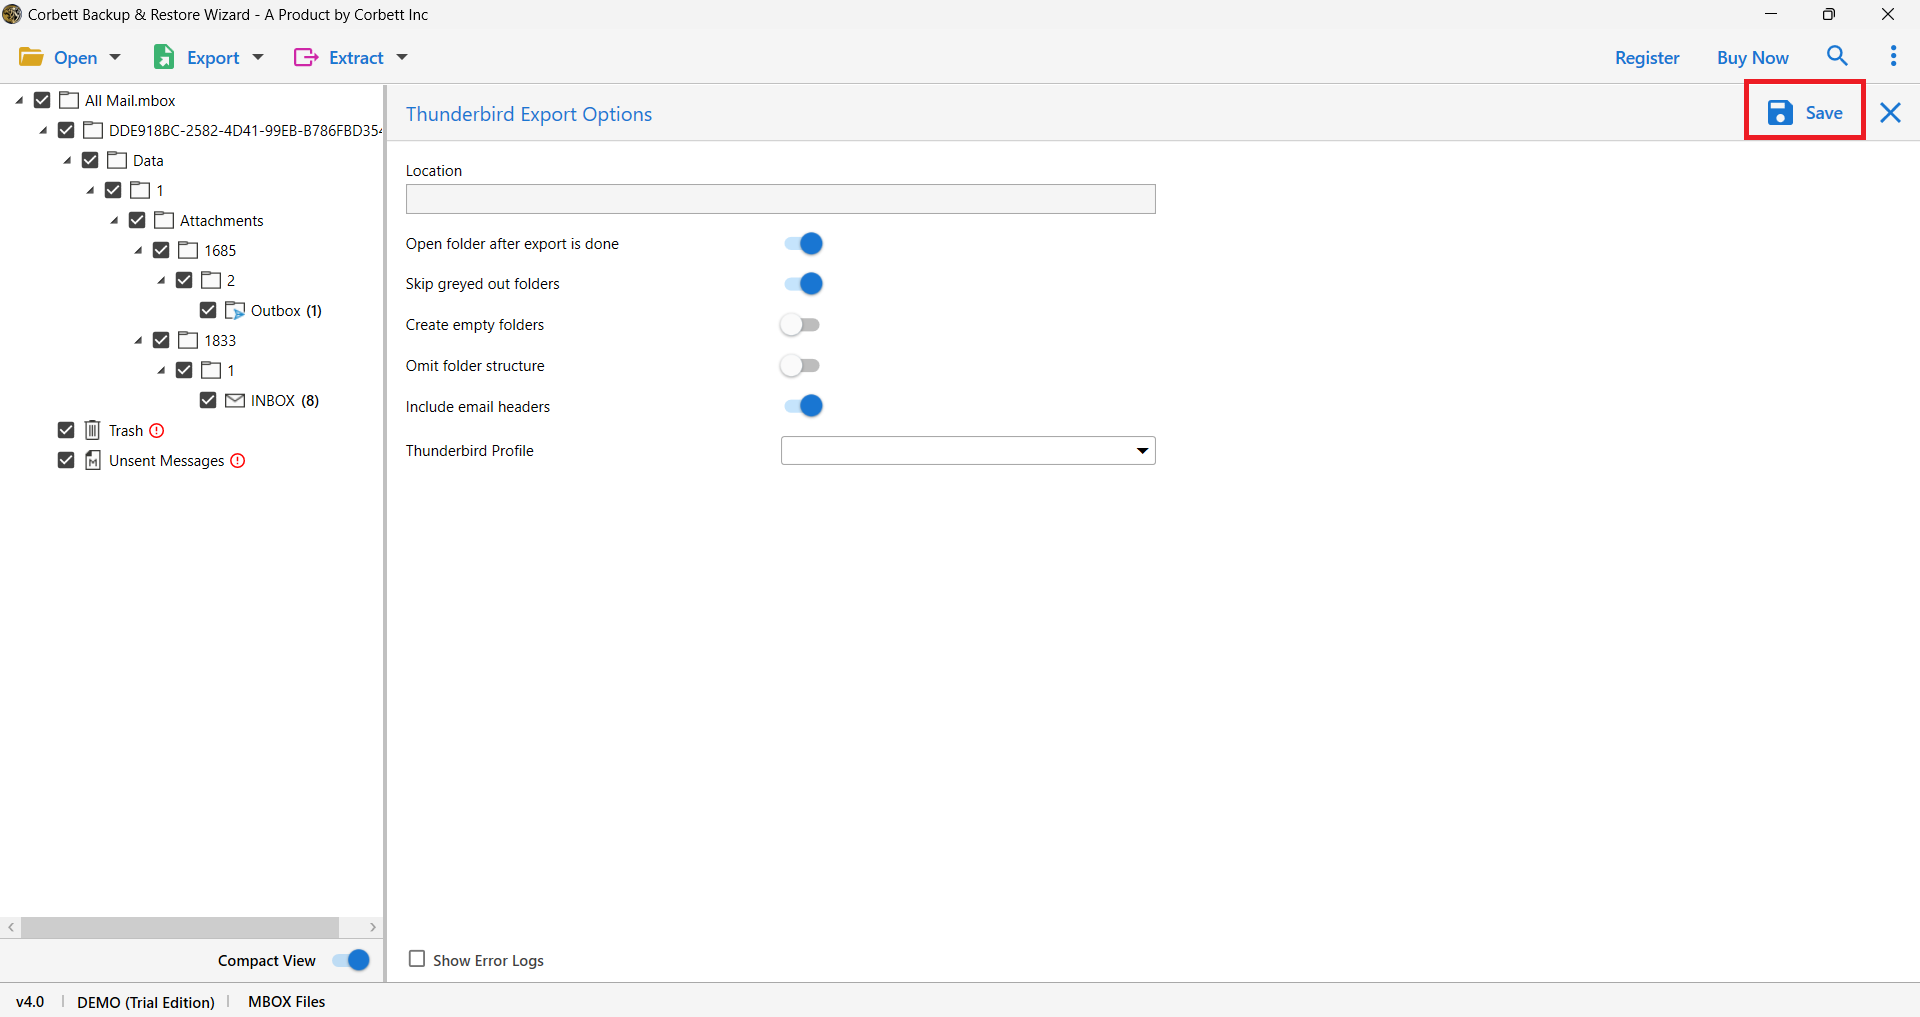
- Enter your Gmail Account credential and finally, click “Save”.
And done! These steps successfully connect your SiteGround emails to Gmail or G Suite Mailbox. For your query we have provided answers below.
Frequently Asked Questions
Q1. How can I start the SiteGround email migration?
Ans. To migrate your SiteGround emails, go to the Site Tools, click on Emails and then Email Migrator.
Q2. How to catch all emails in SiteGround?
Ans. For this, you have to create the catch all rules.
- In the Site Tools, click on the Email button.
- Select the Forwarders option and Manage Rules.
- Run the Kebab menu next to Default record.
- Click Forward and then enter your Catch all email address
Q3. How can you extract email addresses from SiteGround?
Ans. To get your client’s email ID.
- Go to the Client Area section.
- Click on the services button.
- Select the Email Marketing button.
- Choose Contacts and Contact List.
- Click on the Export button and choose the options to download the email addresses.
Q4. What is the outgoing mail server for SiteGround?
Ans. The outgoing mail server of SiteGround is the Simple Mail Transfer Protocol. It forces emails to port 2525 and 25 for plaintext or ports 465 and 587 for encrypted messages.
Time to Wrap Up
To get the benefits of Gmail, users add SiteGround email to Gmail. That’s why this guide provides you two solutions to move your data. The methods are simple but you need to pay attention as some issues will occur, especially in manual method. But, if you use the expert recommended software because of its advanced features helps you to achieve the results that you desire.
Read Similar Articles:


