How to Import OST to Gmail Account? Quick Solutions
Summary: The workaround in today’s post will walk you through the entire procedure to import OST to Gmail. Here we will discuss the possible reasons and methods you can follow to safely import OST file to Gmail account with all data. So, let’s start the post.
OST (Offline Storage Table) is an Outlook data file that provides the functionality to access and modify Outlook emails in offline mode. However, there are several reasons why a user wants to add an OST file to their Gmail account. Some of the prominent reasons/benefits are mentioned below:
- Gmail is a cloud-based platform that allows you to access email and other data from anywhere.
- Google’s strict security measures protect your data from unauthorized access, spam & malware.
- Gmail provides 15GB of cloud storage, making it a cost-effective decision to import OST to Gmail.
Not, only this the OST file is dependent on the Exchange Server and once it goes offline/corrupted, there is no solution to open or import OST to Outlook. So, if you want to securely migrate Outlook OST to Gmail, then read the post thoroughly. Here are the topics that we will cover in this post.
How to Import OST File to Gmail? Expert Suggestions!
Our first recommendation is to complete the process by using the Corbett OST Converter Tool. It is an expert-verified solution that allows you to import OST to Gmail with all the data. Furthermore, the software is capable of processing and uploading orphaned/corrupted/damaged OST files to Gmail account.
The solution offers you multiple advanced features and functionalities that make it the best choice for users. With this single application, you can easily transfer your OST file to desktop clients, email formats, document formats, and email servers.
A free demo version of the software is available to test the software functionality. So, download the utility from below and import OST file to Gmail account.
Instructions to Import OST to Gmail
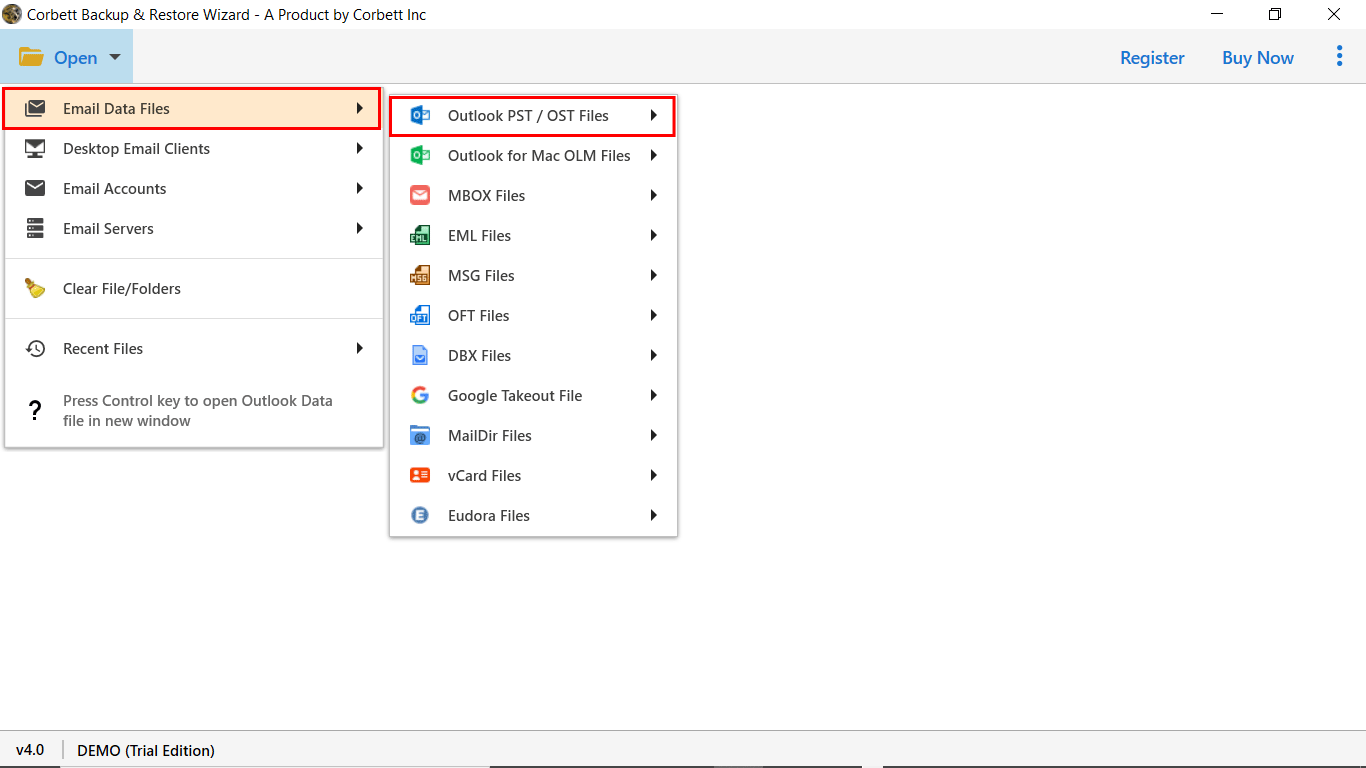
- Download and run the Software.
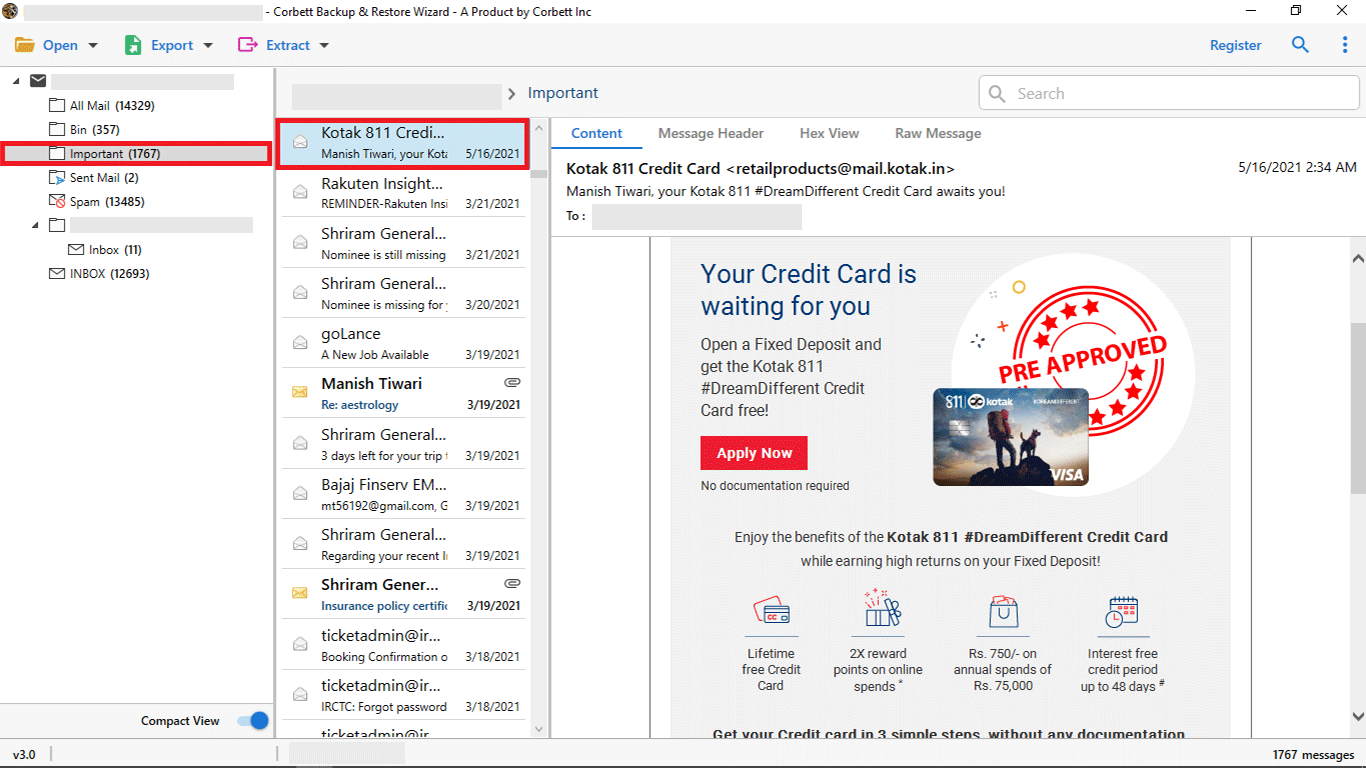
- Click on Open >> Email Data Files >> OST File.

- Now, browse & upload Outlook OST to preview data in 4+ modes.
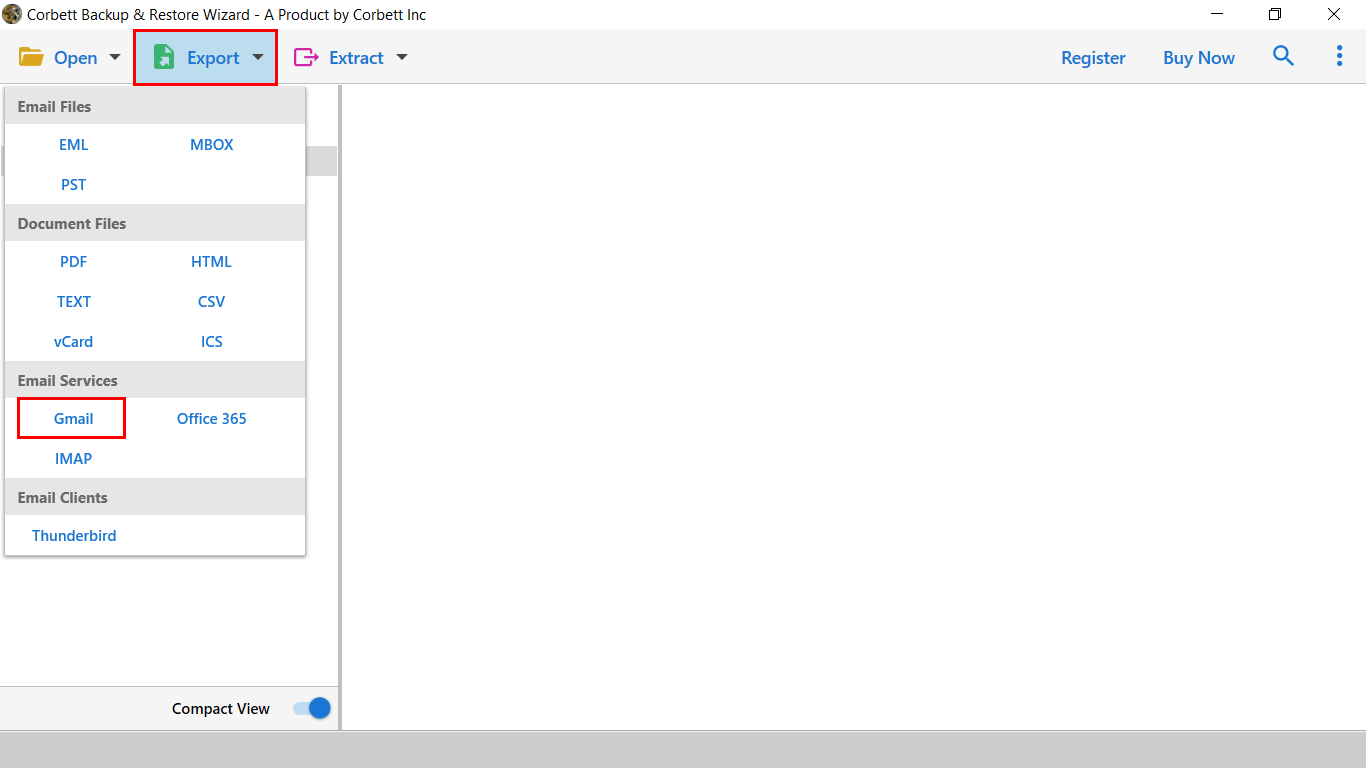
- Click on Export and select the Gmail option from the list.
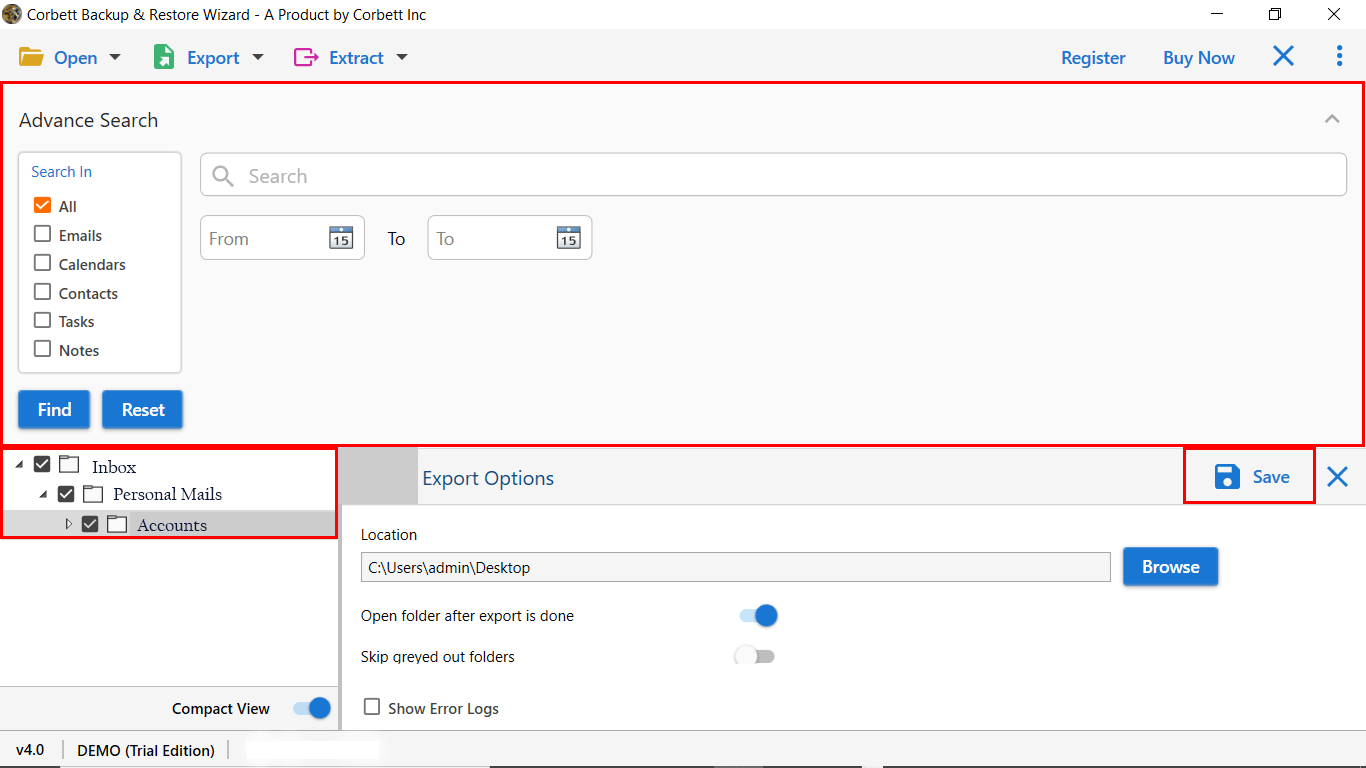
- Apply filters & click save to import OST file to Gmail account.
Video Tutorial to Export Outlook OST to Google Mail
Watch the video to understand how the software works to successfully import OST to Gmail account:
Manual Techniques to Import OST to Gmail
The manual procedure to import OST file to Gmail accounts is quite complex, and it involves 3 phases. There is no direct option available to perform this migration task. So it’s recommended to convert data in PST format first. Let’s check out the work highlights you need to follow in the manual procedure.
#1) Find your OST Location
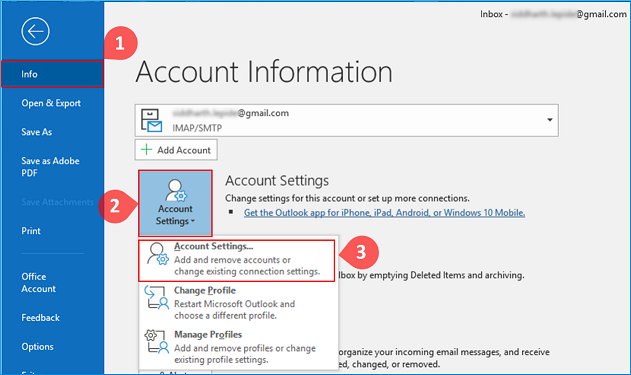
- Open Outlook
- Click on File >> Account Settings >> Account Settings

- In the next window, click on Data Files >> OST File >> Open File Location

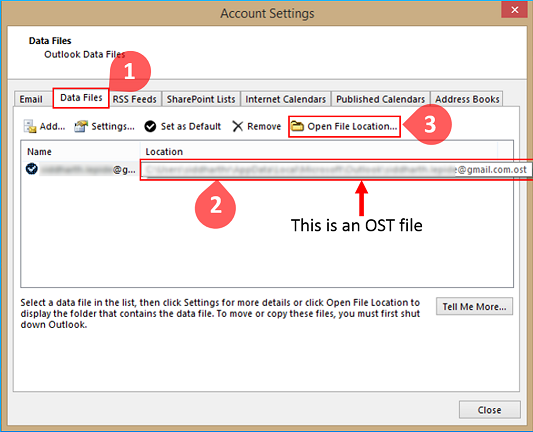
Note: With the help of the above steps, users can quickly get the OST location. If you cannot get the OST location, check your Outlook edition.
- C:\Users\admin\AppData\Local\Microsoft\Outlook\user@xyz.com
#2) Export Outlook Data File to MS Standard Format
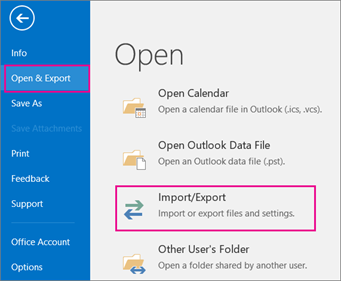
- Re-open Outlook Application.
- Navigate to File Tab >> Open & Export > > Import/Export.

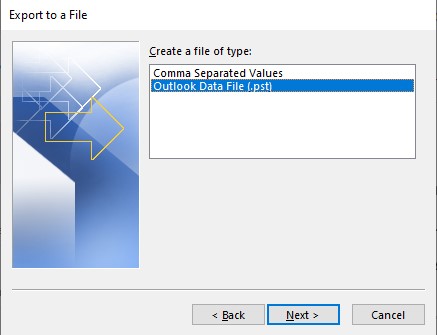
- In Import/Export wizard, click on Export to a file. Click Next.

- Select the Outlook Data file from the export file option.

- Next, select the data files you want to export. Click Next.
- Now browse the designation to save data and click on the Save button.


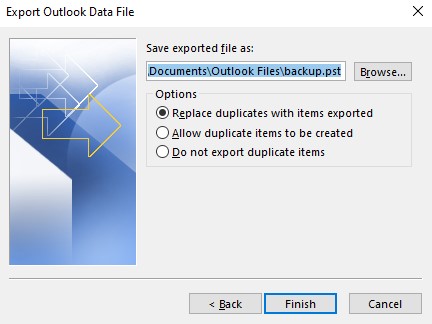
Here you successfully converted the data file to another format. In the following procedure, we will explore how to import the resultant PST file into a Gmail account using GSMMO.
#3) Final Steps to Import OST File to Gmail
- Install the Free GSMMO Tool on your system.
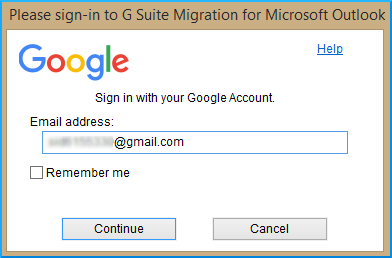
- Run the application, provide login information and continue.

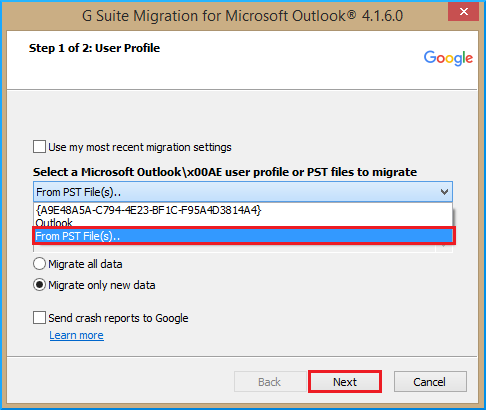
- Allow access to your Gmail account & select the source as PST file.

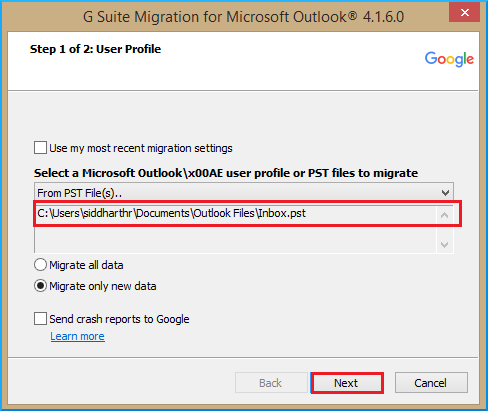
- Enter the PST File path to the GSMMO Tool and click Next.

- Next, select the data fields and click on the Migrate button.

- The procedure to import OST to Outlook will start successfully.


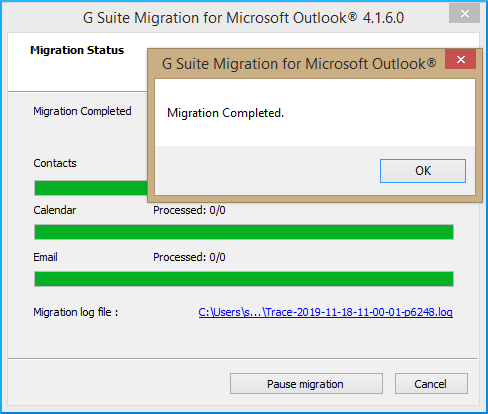
Congratulations! You have successfully import OST to Gmail. The manual method is time-consuming and even takes a couple of hours to complete the process. On the other hand, the automated solution only takes a couple of moments and instantly migrates your data.
Concluding Words
The manual procedure to import OST to Gmail account requires a high level of technicalities, and you have to install specific supportive applications to accomplish it. In contrast, the automated solution is a stand-alone application and doesn’t require any external support. The best part of this toolkit is its advanced functionality and easy-to-use graphical interface, which makes the entire procedure to import OST file to Gmail account more reliable. Also, there is a live chat option available to assist you with every movement.
Read More: