Download Google Drive Folders to Your Desktop (Fast & Easy)
Google Drive is well-known as the absolute cloud storage platform that allows users to sync, backup, and share files on a plethora of devices. It is a widely used platform through which users store files online and make them accessible from anywhere they want. However, some users wants their Drive data in their local storage space.
The reasons behind this can be personal or to make their data offline. As one of our user also raise an issue which we explain below.
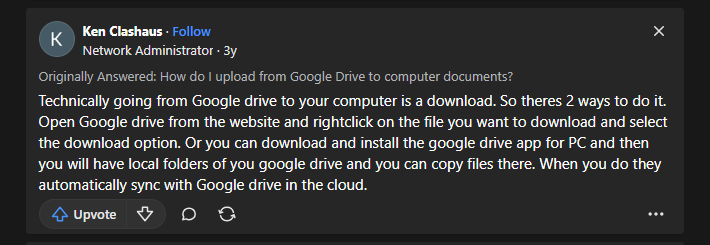
User Query

Considering the above user query, another user replies that to transfer folders from Google Drive to your computer, you are essentially downloading them and there are two basic methods to do so, they are-
- Access Google Drive via the website.
- Installing the Google Drive application on your desktop.
We’ll talk about the different methods to move folders from Google Drive to your desktop in the upcoming section, but first, let’s take a look at the benefits of moving the files.
Benefits of Moving Files From Google Drive To Desktop
Moving your files and folders from Google Drive has several benefits:
- The primary reason for saving the information is to make your data offline.
- Having your data on your desktop makes the process faster and easier.
- Downloading your Google Drive data makes it easier for you to manage crucial information.
- There are chances of losing your data in Google Drive, so exporting to a desktop allows you to backup your data.
Now, you know the advantages of having your Google Drive on your local computer. Let’s go through various solutions to export your data.
Methods for Transferring Files From Google Drive To Desktop
There are various ways you can opt to move your files and folders from Google Drive to your desktop. We will explain each method in detail, so follow them carefully. The methods are:
- Google Drive’s Web Interface
- Google Drive Desktop Application
- Google Takeout
These methods are recommended by our experts. So, they will work and give you nice results. So, we start to our first option.
Using Google Drive’s Web Interface
If you have not installed the Google Drive application on your computer, then it is not a big deal. As you can access the Drive on a web browser and save your data.
- Run your web browser and go to the Google Drive.
- Select the folder you want to download. To select multiple folders by pressing the Ctrl key.
- Right-click on the folder and click the Download button.
- Google Drive saves your data in ZIP format. Go to the location where your file is stored.
- Right-click the file and press the Compress file.
Using Google Drive for Desktop Application
If you have Google Drive application, follow the steps below to export your data.
- Open the Google Drive and log in to your account.
- A message will appear stating, Sync your Google Drive with your desktop. Click Yes and select the folders you want.
- Your folder will be downloaded to your desktop. By syncing your Google Drive with the computer, any changes will be automatically updated.
Using Google Takeout to Download Google Drive to Computer
Users can use Google Takeout to move folders from Google Drive to their desktop. Follow the steps given below:
- Go to Google Takeout and deselect all the products except Google Drive.
- Choose a file type and size for export, and Google Takeout will create a downloadable Archive folder.
- Now, click on “Create Export”. It may take some time depending on the file size.
- Once the export is ready, you will receive an email with the download link.
- Now, extract the files from the archive folder and move them to a preferred location.
More often than not, users find that their Google data migration gets stuck at 99 using this manual procedure. Thus, in case your Google Takeout is not working, technical professionals suggest it is best to use an automated Google Takeout alternative instead of the manual takeout service.
Expert Suggestion on the Issue
As Google’s standard storage space is shared among Google Drive, Gmail, and Google Photos, the space becomes cluttered. So, it is best that users take regular backups of their data and download Gmail emails to computers in order to maintain the free space. The offline copies of your email data ensure swift recovery in unfortunate situations like accidental deletion.
We suggest you use Corbett Gmail Backup Software as it is the best software for the purpose. Using this utility, one can transfer all data in a file format of their choice easily. It enhances your experience of backing up Google email data as it provides several advanced features.
Time to Wrap Up
The above article gives you a detailed explanation of how to move the Google Drive folder to a desktop. We talked about the various methods to solve the problem and talked about some benefits. Since you get a limited amount of space on Google, we recommend you take regular backups to prevent any loss of data. Users can use our professional Gmail backup software to back up their data as the utility provides advanced features that do the work with 100% accuracy, so you don’t need to worry about time consumption and any data loss.
Read Similar Articles:
