How to Migrate Gmail to Office 365 Account ?

- Top Reasons to Migrate Gmail to Microsoft 365?
- Transfer Emails from Personal Gmail to Office 365
- Move Your Professional Gmail to Microsoft 365 Manually
- Phase 1. Verify Domain Ownership
- Phase 2. Create User Mailbox and Assign Microsoft 365 Licenses
- Phase 3. Set Up a Communication Channel between Gmail and O365
- Phase 4. List Gmail User Mailboxes for Migration Batch
- Phase 5. Prepare the Migration Batch for Gmail to Office 365
- Phase 6. Update Your DNS Records to Direct Gmail to Office 365
- Professional Approach to Migrate Gmail to Office 365 Account
- Steps to Migrate Gmail to Microsoft 365
- Author’s Suggestion
Gmail is a free, web-based email service developed by Google. It allows users to send and receive messages all over the world. Gmail is widely used because it offers strong security, effective spam filtering, large storage space, and also integration with Google services like Drive, Calendar, and Meet.
Office 365 is a cloud-powered subscription service that includes apps like Word, Excel, PowerPoint, and Outlook. It also includes cloud tools like OneDrive and Teams and offers advanced security, AI features like Copilot, real-time collaboration. It allows users to access files from any device.
Top Reasons to Migrate Gmail to Microsoft 365?
- Transferring Gmail to Microsoft 365 allows users to access productivity suite apps like Outlook, Word, Excel, OneDrive, and SharePoint.
- It allows users to manage emails, calendars, and contacts all in one platform.
- Microsoft 365 gives more mailbox storage as compared to Gmail.
- Protect users’ data with advanced security features and multi-factor authentication.
- It provides full control over admin control over user access, permissions, and data management.
Transfer Emails from Personal Gmail to Office 365
If you want to transfer data from personal Gmail emails to an Office 365 account, you can use Outlook.
- Download or open Outlook, then click on File.
- Go to Account Settings and hit Add New Account.
- Enter Gmail ID or password to configure Gmail in Outlook.
- Now, click File > Open & Export > Import/Export.
- Choose Export to a file, click Next, and select Outlook Data File (.pst).
- Select the Gmail email folder.
- Save the file at your preferred location.
- Finally, add Microsoft 365 account to Outlook and import the PST file.
Now, wait for Outlook to sync the emails, and Gmail emails will now appear in Microsoft 365.
Move Your Professional Gmail to Microsoft 365 Manually
1. Verify Domain Ownership
First, verify that the domain you used for Google Workspace accounts belongs to you with Microsoft 365 or Office 365.
- Go to the Microsoft 365 Admin Center.
- Click Go to Setup.
- Select your Domain.
- Add users.
- Set up DNS to complete the process.
2. Create User Mailbox and Assign Microsoft 365 Licenses
- Go to the Admin Center and navigate to Users > Active Users > More Options.
- Click Add User to create a single account, or choose Import Multiple Users to upload a CSV file.
- After adding users, click Verify to confirm the details.
- Finally, assign the appropriate license or choose create a user without the product license.
3. Set Up a Communication Channel between Gmail and O365
- First, go to Exchange Admin Center, then Recipients > Migration > Migration Endpoints.
- Then, hit the “+” button and choose IMAP.
- Now, enter IMAP server and settings.
- Finally, give the migration endpoint name in the general information page.
4. List Gmail User Mailboxes for Migration Batch
- First, log in to your Google Admin Console.
- Go to Users and choose the list of users from the Admin center.
- Collect the email addresses of the selected users.
- Finally, create an Excel sheet, enter the email addresses and passwords, and save it as a CSV file for migration.
5. Prepare the Migration Batch for Gmail to Office 365
- Navigate to Admin centers > Exchange in the Microsoft 365 admin center.
- Go to Recipients > Migration in the Exchange admin center.
- Select the “+” icon > Migrate to Exchange Online.
- Choose IMAP migration > Click Next and upload your CSV file with Gmail users.
- Once validated, your Gmail mailboxes will appear.
- Click Next after selecting the migration endpoint you created in the previous step on the Set the migration endpoint page.
- Select Next to proceed with the IMAP migration configuration. Please accept the default values.
- On the Move Configuration page and give the migration batch name.
- Go to the Start Batch page and click Start to begin migrating emails to Office 365.
6. Update Your DNS Records to Direct Gmail to Office 365
- Go to the Admin Center and choose Settings.
- Click on Domain, then select your domain name.
- Once the process finishes, you’ll see a confirmation message showing that the Gmail to Office 365 migration is complete.
After reading the above-mentioned Migrate Gmail emails to Office 365 manual procedure. You can say that it is not an easy task to perform. However, understanding the technicalities and then being able to perform it without confusion is only possible for a technical or an IT Administrative person to handle.
If you are a non-technical person with a non-technical background. Then, I highly suggest you avoid the manual procedure for your Gmail to Office 365 Migration. Or you can perform this migration of Gmail to Office 365 by using the fully automatic software solution.
Professional Approach to Migrate Gmail to Office 365 Account
Corbett Gmail Migration Software is a reliable solution for securely migrating Gmail data to Office 365. It allows users to transfer emails, contacts, and calendar data in bulk or selectively, saving time and effort. The tool provides advanced filters such as date range, sender, and subject. It also preserves all email attributes and attachments during migration. Free editions are available to migrate 10 emails per folder from Gmail to Office 365.
The software is designed with a user-friendly interface, whether you are a professional or a non-professional user. You can migrate Gmail emails to Office 365 accounts without any technical advice. 24/7 tech support is available. If you need assistance and customization in software, you can contact the customer support team.
Steps to Migrate Gmail to Microsoft 365
Now, follow the below step-by-step procedure to migrate Gmail 3to Office 365 accounts.
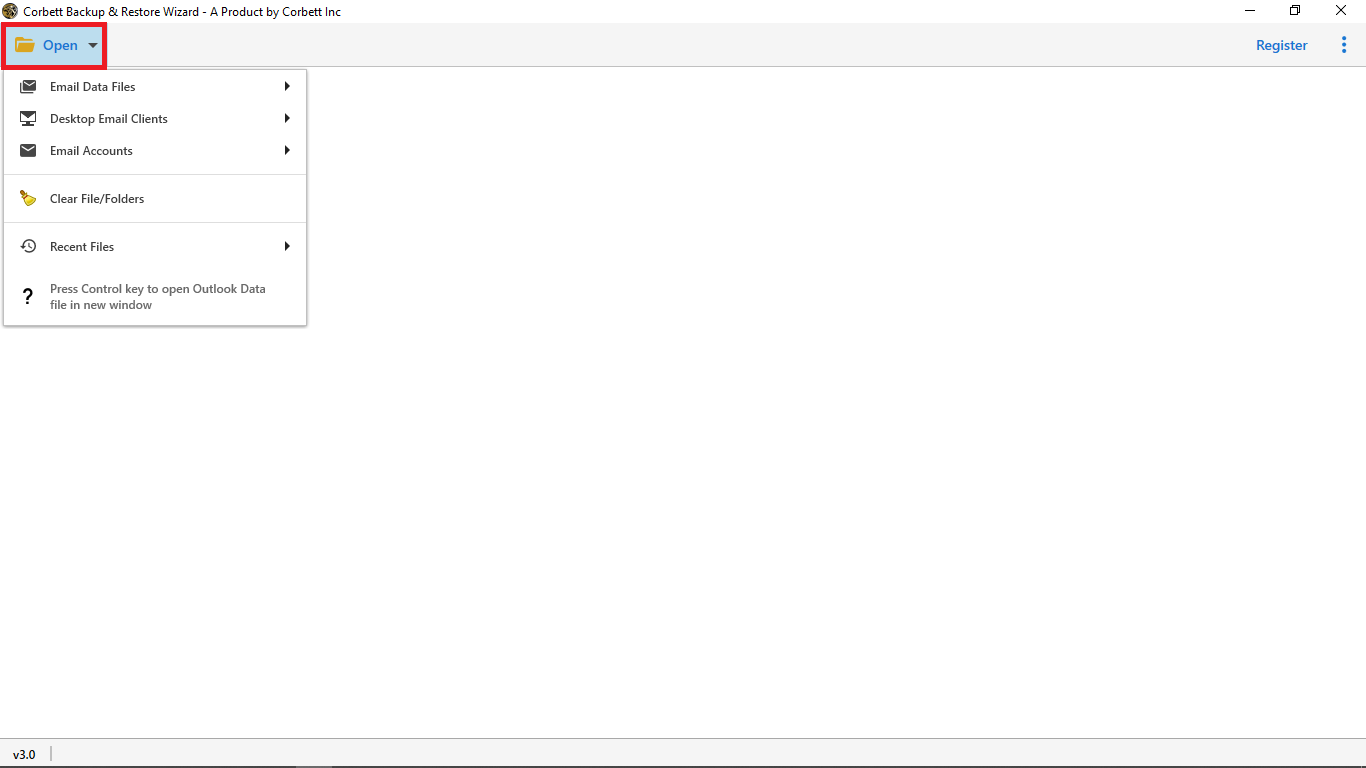
1. First, download the software on your computer and hit Open.
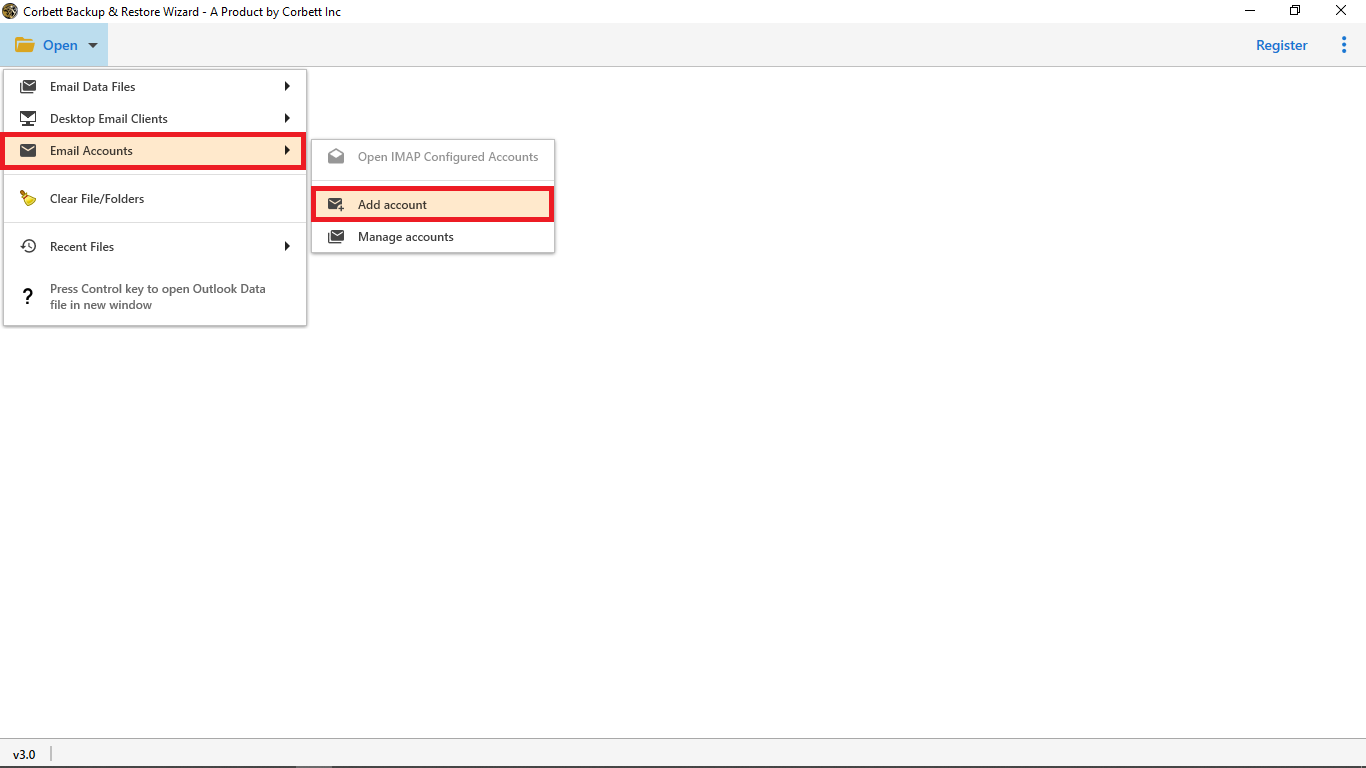
2. Then, select the Email Accounts and then the Add Account option.
3. As soon as you hit the add account option, the tool will show you a pop-up window to enter your Gmail account credentials.

4. After logging in to your Gmail account, the tool will start uploading all the files and folders into the preview panel.
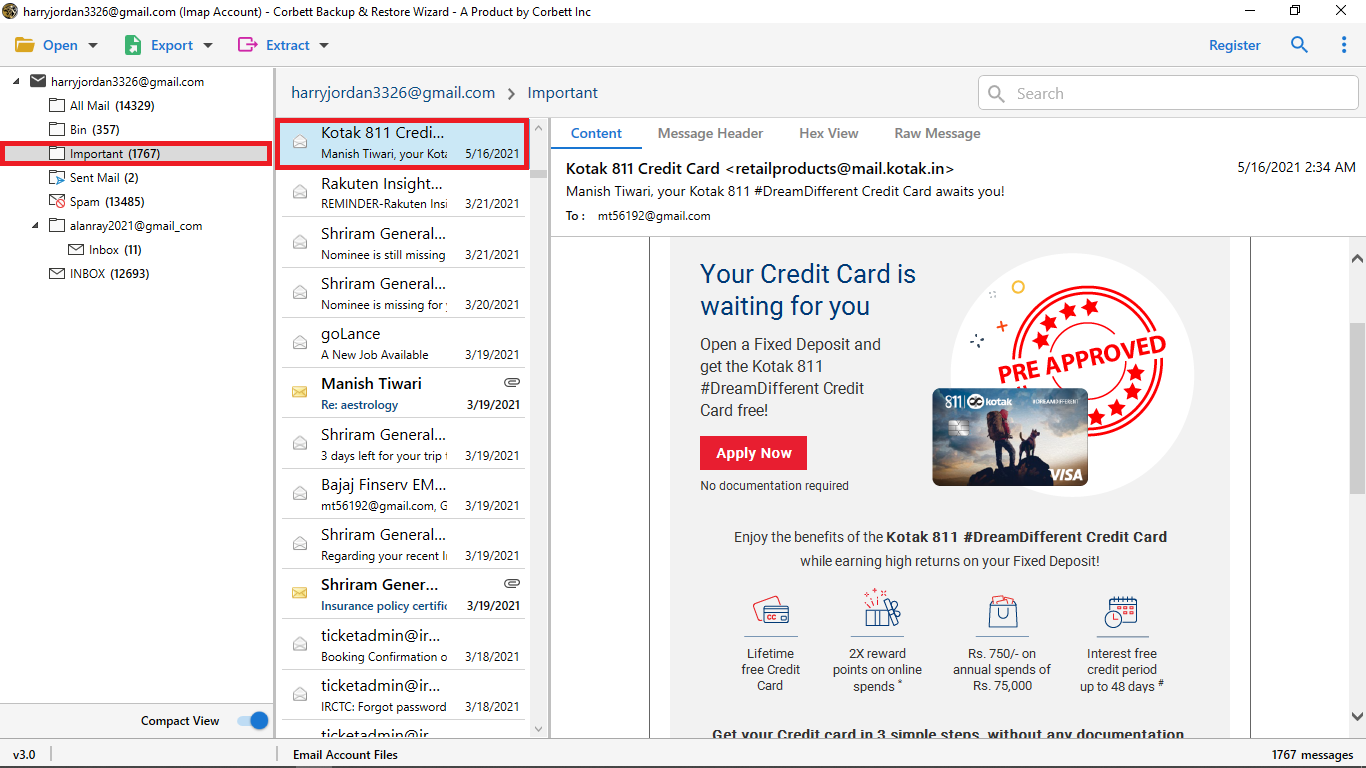
5. You have complete freedom to view the Gmail emails in multiple preview panels with attachments.

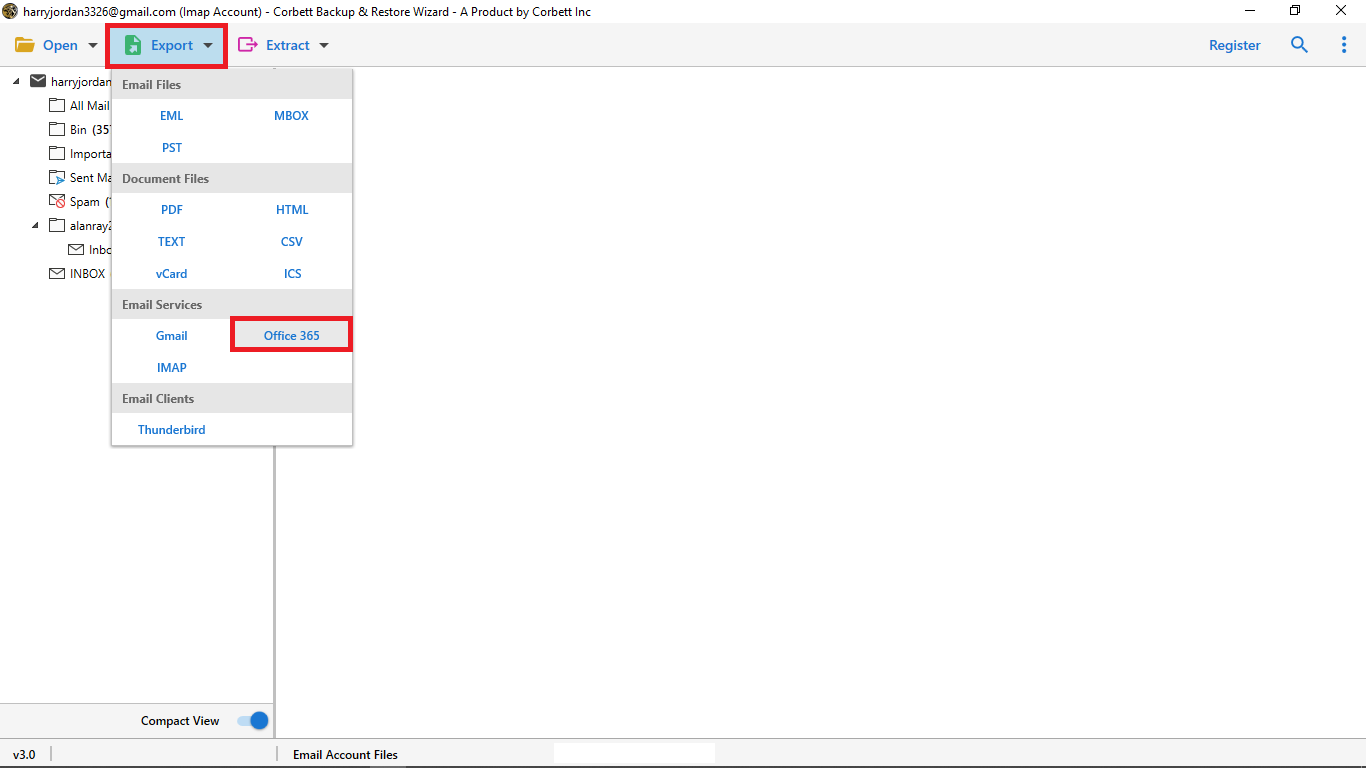
6. Then click the Export button and select the Office 365 option.
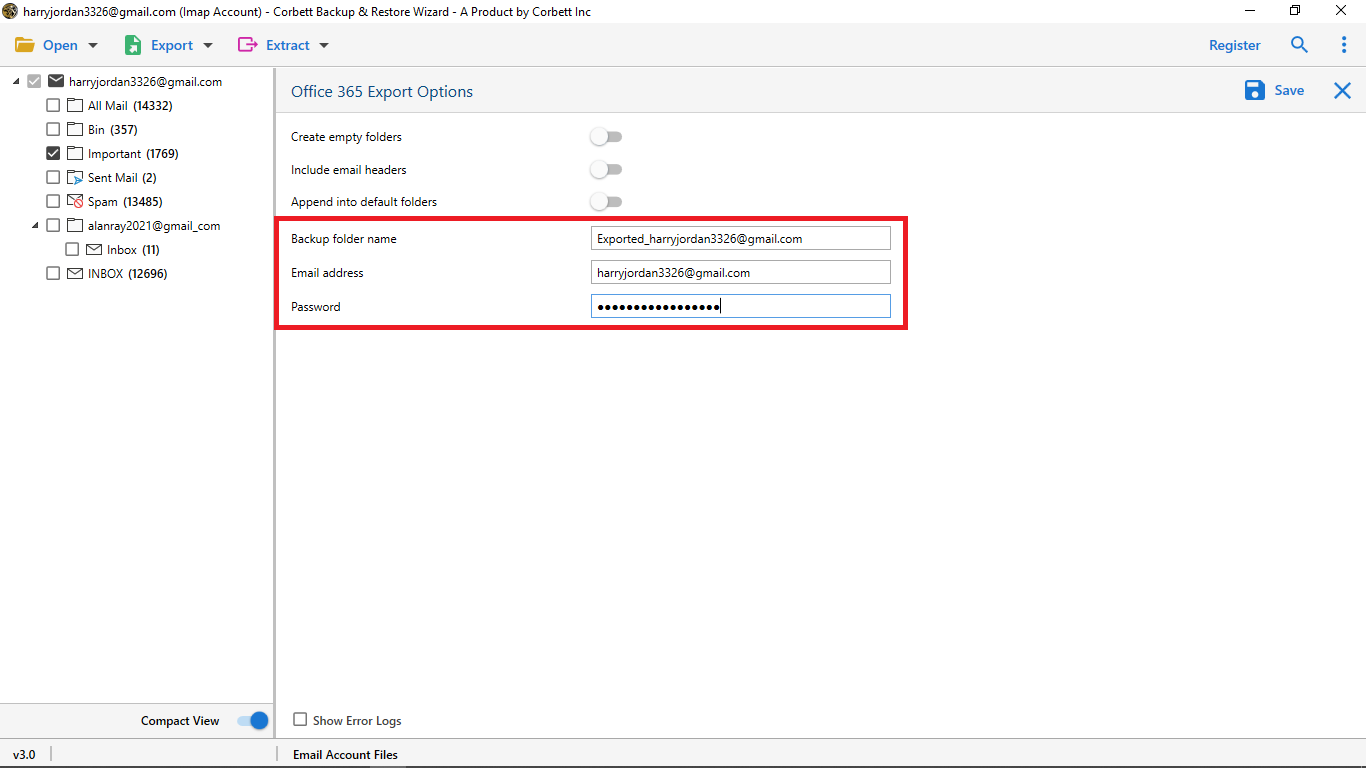
7. Now, in the export window, enter your Office 365 email credentials and enable all the advanced options before migrating Gmail to your Office 365 account.
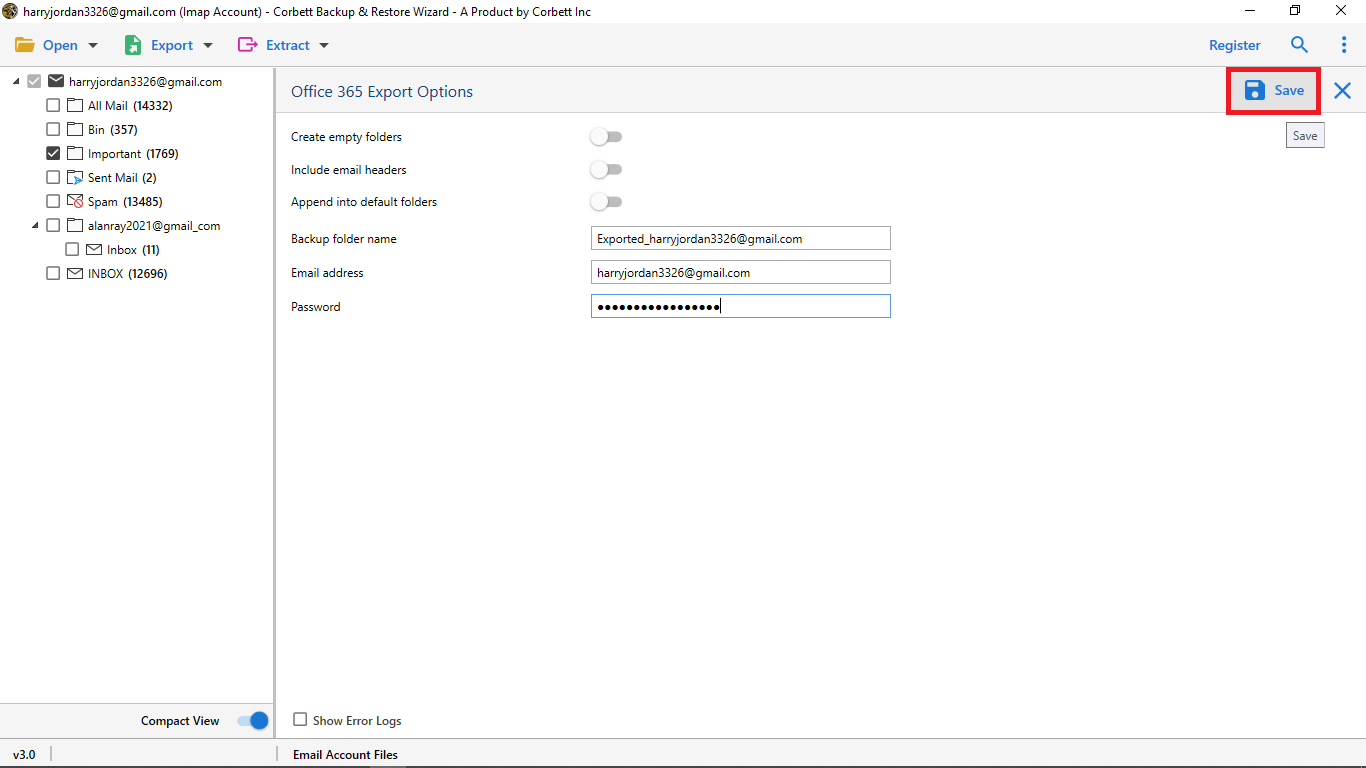
8. Lastly, click Save to begin the process of Gmail to Office 365 Migration.
Author’s Suggestion
After reading this complete article, I hope that you can easily migrate Gmail emails to Office 365 accounts by using both manual and fully automatic solutions. The long and lengthy procedure to manually transfer Gmail emails to Office 365 account requires a user’s both time and effort. Without technical knowledge, the manual process may increase the risk of errors. However, we recommend you go with the software solution for your Gmail to Office 365 migration process.
Because the second approach is safe and secure. Also, it is easy to perform without requiring any additional knowledge.
Read Similar Articles:
- Migrate Yandex to Office 365 with a Secure Solution